DIY Projects

Easy DIY Holiday Book Covers

This past weekend as I was cleaning up the house in preparation of getting our Christmas decorations out, I was looking at our TV stand and the countless colorful books that filled the open shelving… a mix of TJ’s books and my own that we’ve collected over the years. While I’ve always loved the TV stand filled with books, it didn’t have a festive feel that I was hoping for and then I thought about a simple way to fix that without spending more than $20! I decided to wrap each book (like we used to do in elementary school) with a few different types of holiday gift wrap from Target. It took me a few tries to remember how to do it without the paper ripping but eventually I got the hang of it and I am in love with how it turned out! You can watch my IG stories “craft” highlight for a close-up tutorial here

I stuck with creamy whites, dark green, and traditional packaging paper (the cute brown kind) for the most part and I just love how it ties this whole corner together! I’ll probably keep most of them this way year-round because of how clean and organized it makes it look. 

Anyways, I can’t believe Thanksgiving is next week! I’ll be sharing a lot of helpful gift guides soon so be sure to check back if you’re looking for some holiday shopping ideas!

DIY Projects

Landscaping Update: Building a Backyard Path

This post was made in collaboration with Chase Freedom Unlimited. All opinions are my own. 

I’m back today with another backyard update! For the last several months, we’ve been slowly but surely making some progress on our backyard landscaping ideas and I’ve been learning a ton about gardening and landscape design in general. In partnership with Chase Freedom Unlimited, a cash back credit card that allows you to earn cash back on every single purchase, I’ve documented the learning process and feel like I’ve truly gained so much knowledge. Seeing climbing roses blooming half way up our arbor and a jasmine wall growing faster than we can keep up is the most rewarding thing! Getting to watch something grow from a tiny plant and knowing that you played such an important role in that is such a fun feeling.

When we first bought our house, it had a small path from the patio to the firepit made of wood chips. We weren’t a big fan of the wood chip “path” and one of our first projects was to clear them out. It had been a while since clearing the wood chips, but now we wanted to focus on the path leading from the arbor at our fence gate. As you may have seen in one of my previous posts, we were totally in love with the path at one of our rentals in France. 

We made a trip to a home improvement to see if we could find something similar and a design we loved. We went to the outdoor section with pavers and pebble rocks. We found square 1×1 pavers and 1 x 6in bricks in a shade of color we really liked and set them up in a unique alternating pattern. We knew this would look good as the steps of our path, and now needed to find the pebbles that would go between. The major stores had a few to choose from, but we also stopped by a local landscaping store as well, trying to find a color and size pebble that would look good with the pavers. We ultimately settled on a brand that offered bags with a good selection of sizes, and the colors ranged from a dark to a muted gray. The final piece we needed was a border that would contain our path. We settled on a no-dig landscape border that would be easy to lay down and wouldn’t be as noticeable as other borders. We ended up getting two 60-foot borders because we have about 50 total feet to cover. Another resource you may want to consider using is a weed barrier for under the path as an added blocker. 

Once we got back with all our supplies, we began to sketch out the route we wanted the stone path to take from the fence to the patio. For the most part it was a straight path with an initial curve at the beginning. There was a little bit of grass in the pathway, so our first step was to clear the path of debris and level out where the pavers would go. Once everything was clear, we figured out how wide the path should be based on wide each paver step ended up being. The width of each step equaled about 18 inches, so we decided on 5 inches on each side of the pavers, for a total of 28 inches for the path. The no dig border was very easy to lay down and accommodated the curve we were anticipating with the path. Each pack came with 18 stakes that we nailed into the ground. 

With the path outlined by the border we began to lay down the pavers. We used two of the square pavers and four of the bricks for each step. Each step was about a foot apart and we needed a total of 20 steps to complete the path. Once the pavers were set, we began to fill in the rest of the path with the pebbles. Pro Tip: use polymeric sand between the pavers to create a solid bond so there is no rocking when using the steps. Now that our path is finished, we are going to fill in the sides with sod in order to have grass growth in the backyard. 

DIY Projects

DIY Hanging Gutter Planters

This post was made in collaboration with Chase Freedom Unlimited. All opinions are my own.

Earlier this summer, we decided to add a swing to our front porch, but I knew the porch needed something else. Our porch is really tall and there was a big space behind the swing that I knew needed to be filled with something. After visiting a friend’s house, I noticed she had hanging planters at the end of her porch and I loved them! I especially loved what they were made out of… gutters! The following weekend, TJ and I decided to pick up some supplies to try and make our own gutter planters… and they worked! Today I wanted to share a quick tutorial of how we made these. I can’t wait to fill them with different plants throughout the year! The best part was that the whole project took less than an hour and cost less than $50 (without plants included).

If you’re new here, I’ve been sharing a few landscaping goals these past few months. I had a goal this year to learn more about gardening and landscaping in general and teamed up with Chase Freedom Unlimited, my personal favorite cash back credit card to ensure I’m earning 1.5% cash back on every purchase while reaching these goals. I’ve learned SO much in such a short amount of time but still have quite a few backyard landscaping goals in progress, like growing grass, laying down a stone path, and much more. Luckily, my initial projects like these gutter planters are earning me cash back that I can use towards those projects to keep this project moving! I’ll continue to share all the yard design projects and updates on here. 

SUPPLIES:

12 feet of vinyl gutter

3 sets of gutter caps

1 pack of ¼ x 2 inch S hook

2 screw in D planter hooks

About 20 feet of nylon rope

Six 1 inch washers (with hole wide enough for desired rope)

Six ¼ – 1 ½ inch pipe clamps


TOOLS:

Power Drill 

Mitre saw (or jigsaw)

Polyurethane spray

Flat head screwdriver

Tape measure 

STEPS:


  1. Determine desired length of the gutter planters. We used 12 feet of gutters to make three 4 feet sections. Cut the gutters using a mitre saw or jigsaw to the desired length.


  2. Drill 5 holes in each gutter spaced evenly. Two holes will be used for the rope to pass through and the other three will be for drainage.


  3. Measure the length of the space vertically to determine how long your rope needs to be. We had about 7 feet of space on each side and cut our rope accordingly. TIP: if you can, have Home Depot or Lowes cut the rope for you using their tool that melts the ends. This will keep your rope from unraveling.


  4. Once the rope length is determined, measure out the distance between the planters and mark that on the rope. We had about 28 inches between each planter.


  5. Once marked, slide one planter onto the rope using the 2 outer holes. Loop through the washer and then the pipe clamp. Tighten pipe clamp onto rope until snug. Repeat for the other side of the planter and remaining 2 planters.


  6. Mark holes where D planter hooks will connect to the ceiling, dependent on how long the gutters were cut. Screw hooks into place using accompanied hardware. 2 options: Tie rope directly onto D hook or tie directly onto S hook. If using the S hook, this will allow for removal of the planters without untying the rope. 
  7. Solidify tied rope using polyurethane spray that will harden.

    Lastly, fill planters with desired potting soil and plants. 
Our Home

Bedroom Decor Updates + New Fan

It’s been a while since I’ve shared any of our updated bedroom decor so I figured now that I’ve switched some of it up for the fall season, it’d be a good time to dive into all the details! For starters, we recently replaced our old ceiling fan with the ‘Norden’ fan by Hunter Fan Company. It’s probably the most beautiful fan that ever existed, in my opinion, and I’m loving the modern yet natural feel the light wood blades and white finish give to this space! It just flows so well with all of my other decor and fits in seamlessly as opposed to our previous fan. 

Aside from it being the perfect finishing touch to the room, the quality is incomparable. It comes with a handheld remote for easy speed and lighting adjustment (has 6 speeds) and it is somehow so quiet and peaceful! TJ was able to install it himself pretty quickly and we’re so happy with it! It keeps us cool all night and I’ve even noticed that I sleep better since we’ve been using it.

For the bedding, I recently spotted this windowpane print duvet cover and knew it would be so perfect for fall and winter while still keeping the room neutral if I wanted to switch out some throw blankets and pillows. This is the duvet cover I ordered but here is a more affordable option as well. 


For the art above the walls, I switched out my favorite affordable white 16×20 frames with a variety of fall favorites:

Entertaining & Recipes

A Pansy Potting Party with Wave

Over the last year or so, I’ve picked up a deep love for planting flowers. My mom and my grandma have always been so skilled and knowledgeable when it comes to gardening and I always wondered when or if that would happen for me. We’ve put in a lot of long days of work in our yard to create our own oasis which has been the most rewarding part of owning our first home. I was SO excited when Cool Wave Pansies asked if I would be interested in hosting a fall Pansy Party in Raleigh because 1) How fun and unique of a party does that sound?! And 2) I’ve never taken any container gardening classes and this would be so helpful to use in my everyday life! And 3) Did I mention how fun?!

Last Thursday a bunch of friends and I gathered around at Loading Dock Raleigh for an evening of good times, good food, and Good Dirt, a sustainable and chemical-free dirt company based right here in Raleigh! I was so interested to learn more about Good Dirt as we’ve been interested in creating a vegetable garden and I’ve been reading up a lot on organic gardening. After some catching up with friends and local bloggers and sipping delicious cocktails garnished with a pansy (yes, they’re edible, too!), Claire from Cool Wave Pansies gave a demonstration of how to create a mixed planter, taught us a little bit about each plant at the party, and then everyone designed their own flower container to take home using Good Dirt potting mix and Cool Wave Pansies, and other plants! Claire taught us about the “Spiller, Filler, and Thriller” strategy: selecting a spiller plant to drape outside of the pot, filler plants to fill in gaps, and a thriller to add some height such as Rosemary or other taller plants.  

We had a variety of vibrant Cool Wave Pansy colors to choose from, along with additional plants of all shapes and sizes and it was so fun getting to be so creative and seeing how different everyone’s pots turned out. I honestly had never created a pot of mixed plants before and I can’t believe how simple it is to create an impressive mixed container! In the past, I’ve filled countless pots around our patio and deck, but I’ve usually stuck to one type of flower per pot. Creating a container of different depths, textures, and colors is not only so simple, but it’s so much fun and adds so much dimension and character to an outdoor space. 


Over the summer, I planted a variety of flowers in our yard and it’s been so fun going out there every morning to take care of them and see how much they’ve grown but, now that we’ve entered fall, it’s time to switch it up! Pansies are a go-to fall flower to add some color once the cooler temperatures arrive and they’ll continue to bloom until it starts to freeze. Cool Wave Pansies come in so many beautiful colors and can be found at Home Depot, Lowe’s, and other local nurseries such as Garden Supply Co. in Cary and Campbell Nursery in Raleigh. I, personally, love the look of white pansies around our neutral home and I cannot get enough of these! I even filled up our gutter planters behind the porch swing with Cool Wave White Spreading Pansies. 

It was such a joyful evening getting to celebrate, learn, and create with so many friends I don’t get to see very often! I left feeling so inspired and went home to create even more containers using Cool Wave Pansies to place along our back deck stairs. I think this flower potting party will have to become a regular thing from now on! I encourage you to round up your friends and grab some containers, Cool Wave, and host your own #WavePottingParty!

Thank you to Cool Wave Pansies for sponsoring this post!

Entertaining & Recipes

Fall Traditions with MacKenzie-Childs

About a month ago, I had the opportunity to visit the MacKenzie-Childs headquarters in upstate NY and I came home with a deep appreciation for the brand, the people behind it, and the passion that goes into designing each piece. We toured the grounds and were able to see first-hand the process of each step along the way… from the designing, molding, glazing, painting, and more. We were even able to sit with the artists and paint our own pieces which was so much fun! We had lunch and the best talks with the CEO and Creative Director and I had never seen a workplace where every single person was SO passionate about where they work. It makes having my own MacKenzie-Childs collection in our home even more special. It was one of my favorite weeks of the entire year and I learned so much!

We recently made a delicious recipe that my grandma always makes called Sunday Chicken Casserole. It was once given to her by one of her closest friends and it makes the most delicious dinner once the cooler temps come around! I’ll share the recipe at the bottom of this post if you’re interested! To me, fall is a special time of year because of all of the moments it reminds me of – eating my grandma’s casseroles, layering up and going on brisk morning hikes through the crunchy leaves with my family to the river, celebrating Thanksgiving and seeing more family, finding new fall DIY projects to create, tailgating before football games, and so much more.  Most of my fall memories revolve around some sort of family gathering though and as I get older, I want to make sure to treasure both old and new fall traditions. 

There is so much tradition and history that goes into MacKenzie-Childs and it’s something that I want to be able to pass down to family along with other meaningful traditions and memories. These pieces are crafted with the highest quality and attention to detail and I had so much fun creating this neutral fall tablescape with a few of my personal favorite MC pieces!

For starters, MacKenzie-Childs is known for their iconic black and white “Courtly Check” pattern and, while I think it adds the PERFECT touch of print for any season, I fell in love with the all-white and textured Sweetbriar Collection. I started this table-setting with Sweetbriar chargers and plates and added in pops of Courtly Checked pumpkins and other dinnerware accessories like a baguette dish, pumpkins, salad tossers, wine-stopper and more. By the way, they aren’t pictured here but the Sweetbriar mugs are the BEST mugs I’ve ever owned… the shape and size is so perfect and we use them every single morning. 

One new piece that I was most excited to order was the casserole dish. It is probably the nicest thing in our entire kitchen and I absolutely love how you can cook in it but also serve since it’s so stunning. This would also make such a special gift for my mom or mother-in-law because they’re both always hosting dinners. 

If you’re on a budget but wanting to tie in some fall touches to a table-setting, my two favorite things to focus on decor-wise are: pumpkins as center-pieces and NAPKIN RINGS! I found the cutest beaded napkin rings (acorns and pumpkins) and I love how much of an impact they make on the table while still being so small. 

I hope you found some inspiration through this post and, if you’re a fan of chicken and rice pilaf, you’ve got to try my grandma’s casserole!

From my Grandma’s cookbook: Sunday Chicken Casserole

Note from my grandma: Ann Tibbatts gave us this recipe. It makes a delicious and easy casserole. Great for a potluck supper. I often take this comfort food to shut-ins or someone recovering from surgery. 

Ingredients:

4 boneless chicken breasts cut in half

½ stick of butter

1 tablespoon flour

1 cup of sour cream

¾ cup chicken broth

1 cup sliced mushrooms

2 small boxes of rice pilaf

½ cup grated mozzerella cheese


Directions:

Cook rice. Wash chicken, soak in salt water a few minutes, pat dry. Melt butter and sauté chicken for 10 minutes. Remove chicken from skillet. Add mushrooms and sauté them until tender. Stir in flour and chicken broth, then sour cream. Stir and simmer for a few minutes. Spread rice in pan. Arrange chicken on top. Pour sauce over rice and chicken. Sprinkle cheese on top. Bake at 350 for about 30 minutes. 

I’m sharing all of my favorite MacKenzie-Childs finds below:

This post is sponsored by MacKenzie-Childs. All opinions are my own.

Entertaining & Recipes

Top 3 Quick & Simple Fall Appetizers

I’ve been in fall-decorating mode this last week and the latest corner I’ve spruced up a bit is the bar-cart. This bar cart/serving cart/whatever you’d like to call it has served so many different purposes over the last few years. What was once a coffee station, bar-cart, snack/guest cart, and wine corner, is now set up for fall entertaining. You can shop my exact white bar-cart here and if you haven’t yet checked out Walmart’s latest fall arrivals, I’m sharing some of my favorites throughout this post! Walmart is working it’s way up to be one of my go-to sites for decor… it’s sister site Hayneedle has always been in my top 3!

Anyways, I thought it would be fun to share a few of my go-to fall appetizers today including one of my favorite family recipes that is quick, simple, and fairly healthy!

MARINATED VEGETABLES

This recipe is my mom’s and is SO simple but so tasty. Every single Thanksgiving, she always makes this a few hours before we eat and it makes the best appetizer. The sooner you make the dressing and let the vegetables marinade, the better! Now any time we have any sort of fall gathering to attend, I make these.

Dressing:

1 cup red wine vinegar
1 cup olive oil
1 tablespoon salt
1 teaspoon cracked pepper
1 or 2 cloves of fresh garlic, finely minced
1 teaspoon dried oregano
2 teaspoons sugar

Vegetables:

(a big bowl of them)
cherry tomatoes
broccoli and/or cauliflower florets
red onion, peeled and sliced or diced
artichoke hearts halved or quartered
olives (optional)
celery stalks cut into 1 inch lengths
tiny baby carrots
red, green, or yellow peppers cut into squares or slices
feta cheese (optional)

Combine first 7 ingredients; shake well in a jar. Wash and cut up vegetables into bite-sized pieces. Toss in a plastic bag with dressing and marinate overnight, flipping bag occasionally. Serve with crumbled feta. 


BUTTERNUT SQUASH & GOAT CHEESE BRUSCHETTA

Ingredients:

Butternut Squash (I get the pre-cut to save time)
1 teaspoon of olive oil
1 teaspoon of honey
french baguette (sliced)
salt/pepper
goat cheese
pine nuts

If your butternut squash isn’t already cut into cubes, do that while pre-heating the oven to 420. Drizzle olive oil and honey over the cubes of squash and top with salt/pepper before placing in the oven for 20 minutes. While squash is in the oven, toast slices of french bread and spread goat cheese over the slices. When the squash is cooked and tender, top the bread with it along with pine nuts!

CHEESE BOARD

This one is pretty self-explanatory but one can do no wrong with a cheese board. My personal favorite cheese boards include: brie, goat cheese, crackers, blackberries, prosciutto, bread, and fig jam but the possibilities are endless. 

*items above are clickable

Thank you to Walmart for sponsoring this post! All opinions are my own. 

Style

My First Time Using Trendsend

Before traveling to Banff recently, I discovered that one of my favorite retailers, Evereve, actually had a styling service called Trendsend. If you’re new to hearing about Evereve, it is a retailer with 85+ locations across the country and they carry brands like Free People, Sanctuary, Z Supply, Agolde, and so many other high quality favorites of mine. Anyways, after doing some research on Trendsend, I was able to fill out some information about my taste, lifestyle, and where we were going to be traveling which then went to a stylist. A few days later, a box of 7 pieces arrived at my door that I was able to try-on and see if I like. Included was a very personalized letter including tips of ways to pair each piece to make the most of them and y’all know I LOVE mixing and matching outfits so I was excited to try them all on and see which ones I could bring with me to Banff. 

There is a $20 styling fee included but it is also credited towards any purchase when you check out. You can return anything you don’t want to keep and then check-out online with the items you do want to keep (free shipping both ways!)! Out of all 7 pieces, there was only one piece that didn’t fit the best on me – everything else I absolutely LOVED and will wear all season long. When I filled out the online profile, I told them that I wore casual clothing mostly and that I would be traveling to somewhere pretty chilly. I also told them more about my taste, budget, body type, and lifestyle. The box was the perfect curated collection of items that I will reach for day after day this fall. I loved the personalization of it all and the fact that there were no algorithms involved, just real life humans trying to help ya girl feel confident and dress well! If you’re interested in trying it out, this link will give 20% off your first order. If you decide to keep 4 or more items, you’ll get an additional 10% off.

When you use Trendsend, your stylist will put together 6-8 items based on everything they know about you creating 2-3 mix and match looks that they think you will love. You simply keep what you love and send back what you don’t. You can also select how often you would love to receive a box, whether that be just a one time order or regularly. If you shop at Evereve, your stylist can also take a look at your wishlist in there which is really helpful. They’re happy to take a look at your Pinterest page too… they know how it goes!

So, let’s review the items that were sent in my first Trendsend box!

Overall, I loved using Trendsend and I will definitely be using it in the future after seeing how great my first experience was. Don’t forget to use this link for 20% off your first order!

Thank you to Trendsend for sponsoring this post. All opinions are my own. 

Canada

Exploring Banff in September

This past weekend we traveled to Banff in Alberta, Canada for the second time within a year, which we never do, but this place was so special it was calling us back from the minute we left! We visited in early October last year and it had snowed a lot leaving us with the most beautiful views of snow-covered trees surrounding the not yet frozen lakes… it was ideal! We felt that we had visited during it’s sweet spot at that time but knew that we were missing out on some things due to the snow. Some hikes were closed, canoes were put away for the year, and there were a few closed roads keeping us from seeing some of the most beautiful spots. It was still one of our favorite trips of all time but we knew we also wanted to experience it in the “summer” before the snow, even if it meant that it would be more crowded.

I thought I’d start out this post with an itinerary/daily diary of our long weekend adventure and finish it with answering a few questions I received while we were there. If you are more interested in seeing how Banff looks in mid-October, you can read the post of our previous trip here!

WHAT I PACKED:

Lake Peyto/Bow Summit

TRAVEL DIARY

THURSDAY

I met TJ in Banff around 5:30pm. He had already arrived to Calgary a few hours earlier than me and picked up our rental car. He also had a burrito in the car waiting for me which was the best start to our long drive to Banff (it takes about 1.5 hours). As soon as we arrived, we checked into our Airbnb downtown and met our hosts, a sweet couple from Switzerland (Albert and Esther) who used to own a restaurant in Banff for over 30 years. They were basically professional chefs and professional Airbnb hosts. This was the house we stayed in. It was a bit of a splurge but this trip was an early birthday present and was booked pretty last minute so we figured we would give it a try since our options were pretty limited. Note: Last year we stayed over an hour more down the road at Emerald Lake Lodge. If you’re thinking of visiting Banff and wanting to stay in any of the hotels, I would recommend trying to book about 10 months out or more. They book up fast this time of year! Anyways, this time we really wanted to switch it up and stay downtown for a different experience.

As soon as we checked in, Albert (the host) asked me what our plans were for the following day. I told him that I wanted to wake up early and go see Moraine Lake, which we didn’t get a chance to see on our previous trip due to snow and road closures. He basically told me that the parking lot would be full by 5:00am and that the road would be closed way earlier than I thought. He recommended that we stop by Moraine Lake in the evening after 5:30pm to ensure the road is open. He also sounded a little offended that I would consider missing his breakfast. I trusted Albert so we changed up our next day plans and walked to find some casual dinner. We found Eddie’s Burger Bar and it was delicious. We really loved being able to walk to dinner every night. Albert’s Airbnb was just a couple of blocks away from the main street where all of the restaurants were so that really made things convenient.

FRIDAY

We woke up Friday morning and walked downstairs to the most delicious spread of croissants, fruit salads, frittata, caprese salad, and practically every other breakfast food I could think of. I now knew why Albert didn’t want me to miss his breakfast. It was honestly one of the highlights of our trip. They had four tables downstairs sitting in front of a complete wall of windows where we would look out and see wildlife walking down the streets of Banff and it was just magical. 


After breakfast, TJ and I decided to drive down to Emerald Lake for old times sake and see the lake where we stayed last time. It was beautiful. All of the lakes we saw on this trip were 10x more blue than when we saw them previously. They are the most blue in late July through September but Banff’s most crowded time is July and August so it’s key to time it right! Personally, I would probably never visit in July or August because I don’t want to deal with traffic and parking problems. We walked around the lake and then decided to head over to Peyto Lake again. Peyto Lake is a little ways away from everything else but it is one of the most beautiful views I’ve ever seen. Unfortunately, I’ve been hearing that they closed after this past weekend until 2021 for renovations along the path. So, before you make the drive out there, I would recommend doing some research online first! I guess we got lucky with the timing!


This lake was even more beautiful than we remembered. It was sunny this time around as opposed to snowing so we were really able to get a clear view of the entire lake and mountains surrounding it. If you visit Banff, this is a must-see. Even the drive out there is beautiful.

We drove back to Banff to get some lunch and walked by a small restaurant called Coyotes Southwestern Grill. By this time, it was after 3pm and we were starving so we weren’t very picky with where to eat. This ended up being delicious and a great casual quick option before we would later drive out to Lake Moraine!


Lake Moraine was probably one of the places I was most excited to see because it was new to us. Last year, we couldn’t even get on the road because of it being closed due to avalanches. We lucked out again with how perfect the weather was when we visited Lake Moraine. It was very clear and you could see everything perfectly. It honestly felt like we had the lake to ourselves. The view took my breath away and we both wanted to just sit there for hours and stare at it. We actually ended up walking down the rocks to the lake shore and walked around the lake exploring. That night probably goes down as one of my top 3 favorite nights of my life. Time flew by and before we knew it, we were going to miss our dinner reservation. Luckily, we had a little bit of service and called to let them know we weren’t going to make it and decided that we would just pick up some pho from a local Vietnamese restaurant called Pho House which was very, very delicious, by the way. I will 100% be doing that again. 


SATURDAY

On Saturday (after breakfast, of course), we drove out to Lake Louise early (about 9am) so that we could get a parking spot and hang around there for the rest of the day. We met up with my friend, Makayla, who happened to have planned a weekend in the same place at the same time with her fiance, Alex. It was so fun getting to see her and we ended up spending the entire day with them walking around Lake Louise and hiking up to Lake Agnes Tea House. We didn’t do the exact Lake Agnes Tea House hike because we started from the other end of Lake Louise as opposed to the main trail for Lake Agnes. Our way was 20x more difficult but it was so much fun and I was so proud of us for doing it! We also got to see some incredible views that we wouldn’t have seen otherwise if we hadn’t taken some of those connector trails.

Once we got up to Lake Agnes Tea House, we ordered some tea and biscuits (highly recommend the biscuits/jam!) and rested up before hiking back down.

By the time we got back down to Lake Louise, the crowds had cleared up a bit and we considered going out on the canoes but we knew we probably wouldn’t have enough time before our dinner reservation at The Bison.

After relaxing and living our best robe lives for about an hour, we got ready and walked to The Bison downtown. This restaurant was all around an incredible experience with the entire menu being locally sourced. I ordered the most delicious wild trout on top of quinoa and I will 100% be back here. For most of the nicer restaurants in Banff, I would strongly suggest making a reservation ahead!

SUNDAY

Sunday morning was time to check out of the airbnb so we ate breakfast and decided to have a pretty low key day with no set plans. We knew we wanted to stay around the town of Banff so we packed up our car and found Bow River Trail. The views along this trail were beautiful and I couldn’t believe we hadn’t seen this spot before.

After walking along the trail for a while, we decided to grab some lattes at one of the local coffeehouses. There are a few great coffee shops in Banff that I love: Little Wild and Good Earth Coffeehouse. I’m sure there are many more but those are the only two that I’ve personally been to.

It was soon time to head to the airport and we decided to stop in a small town along the way called Canmore. I’m glad we did because this town was adorable and I might consider staying there next time. I’ve read that Canmore is also a great place to stay on a Banff trip if you’re wanting to save a little bit of money as opposed to staying right in Banff. It felt like it was just a quick 10 minutes away.


Q + A

Where did you fly from/connect to and what airline did you use?

To get there (both times), we booked through Air Canada and flew to Toronto and then Calgary. After we arrived in Calgary, we picked up our rental car and drove about an hour and a half to Banff.


Where would you recommend staying?

There are so many options of places to stay but, no matter where you stay, you’re going to be spending more time than you think driving. Downtown Banff is about an hour away from all of the most beautiful lakes so most people will either decide to stay near the lakes (in Lake Louise Village or even farther at Emerald Lake) or in downtown Banff. About 15 minutes before Banff, there is also a small town called Canmore, which is another great option to stay, especially if you’re wanting a more budget-friendly trip.

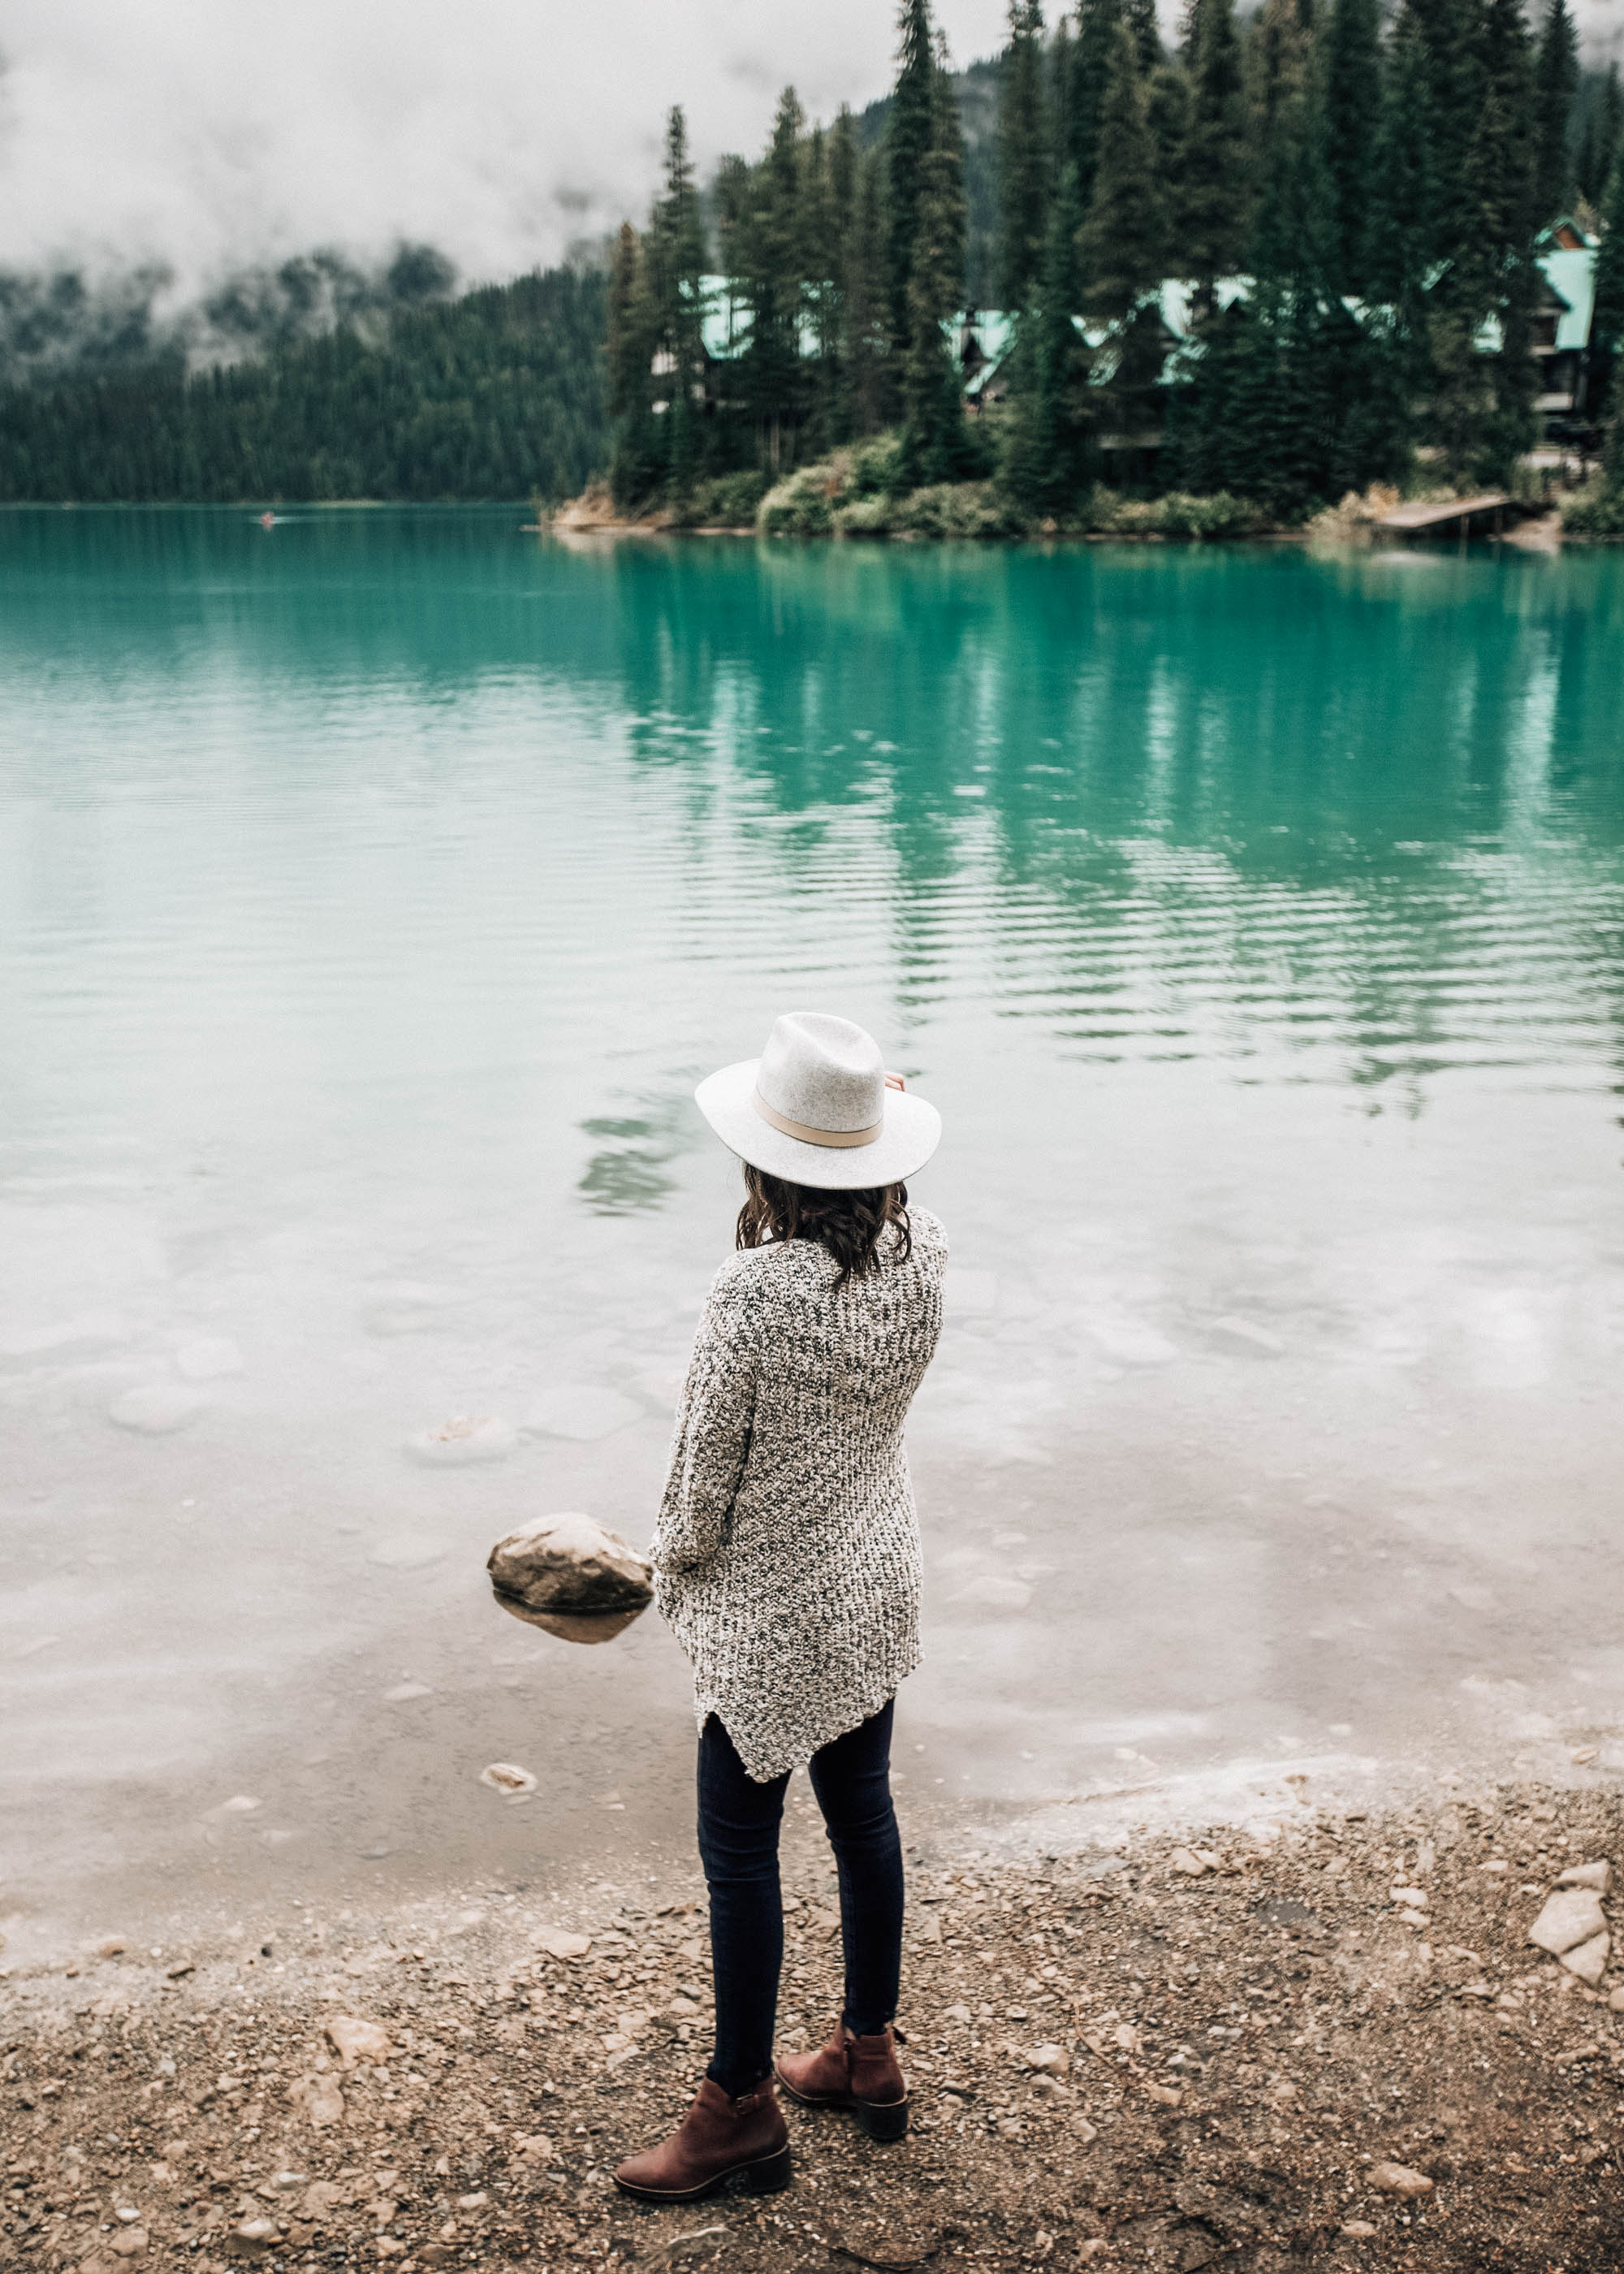
Last year we stayed at Emerald Lake Lodge, which is actually in Yoho National Park, about an hour and 15 minutes west of Banff. We did A LOT of driving last year! This time around we chose to stay in downtown Banff at an Airbnb. Both places were amazing in their own ways. Emerald Lake Lodge was a gorgeous setting and the Airbnb was incredibly convenient.


What time of year/season do you recommend visiting?

This really depends on what you want to do while you are there. Last year we went during the second week of October and it had already snowed about a foot and half the week before we got there. This made everything look like an absolute winter wonderland! We loved exploring the area with the fresh coat of snow which made our trip 10x cozy. On the down side, there were a few hikes that we were expecting to go on, but they were closed due to avalanche risk. This was a major bummer. This was right at the beginning of the off season for the area and there weren’t as many people visiting. The later you go into the season, the less people that will be there.

This most recent time we went a few weeks earlier to catch the trails that we missed and see the landscape without the snow. This also meant that there were a lot more people to try and navigate around. The lines for getting into Lake Louise and Moraine Lake were ridiculously long, downtown Banff had a lot of tourists, and the restaurants were crowded. This is even worse from July-August. We were told that some of the lines into the lakes block the entire highway. So, personally, we will probably always avoid traveling there in July/August but I do know that is the most popular time for good reason! If you visit before July, the lakes may not be fully thawed yet, FYI!

TJ loved the snowy landscape and spending time relaxing by a wood fireplace and watching the snow fall. If this is what you want to do, we would recommend heading there late September into October, but be prepared to go through some winter weather. If you want to explore the outdoors and go on all the hikes you can, the summer to early fall months are probably the best. 


When can you rent canoes and how much does that cost?

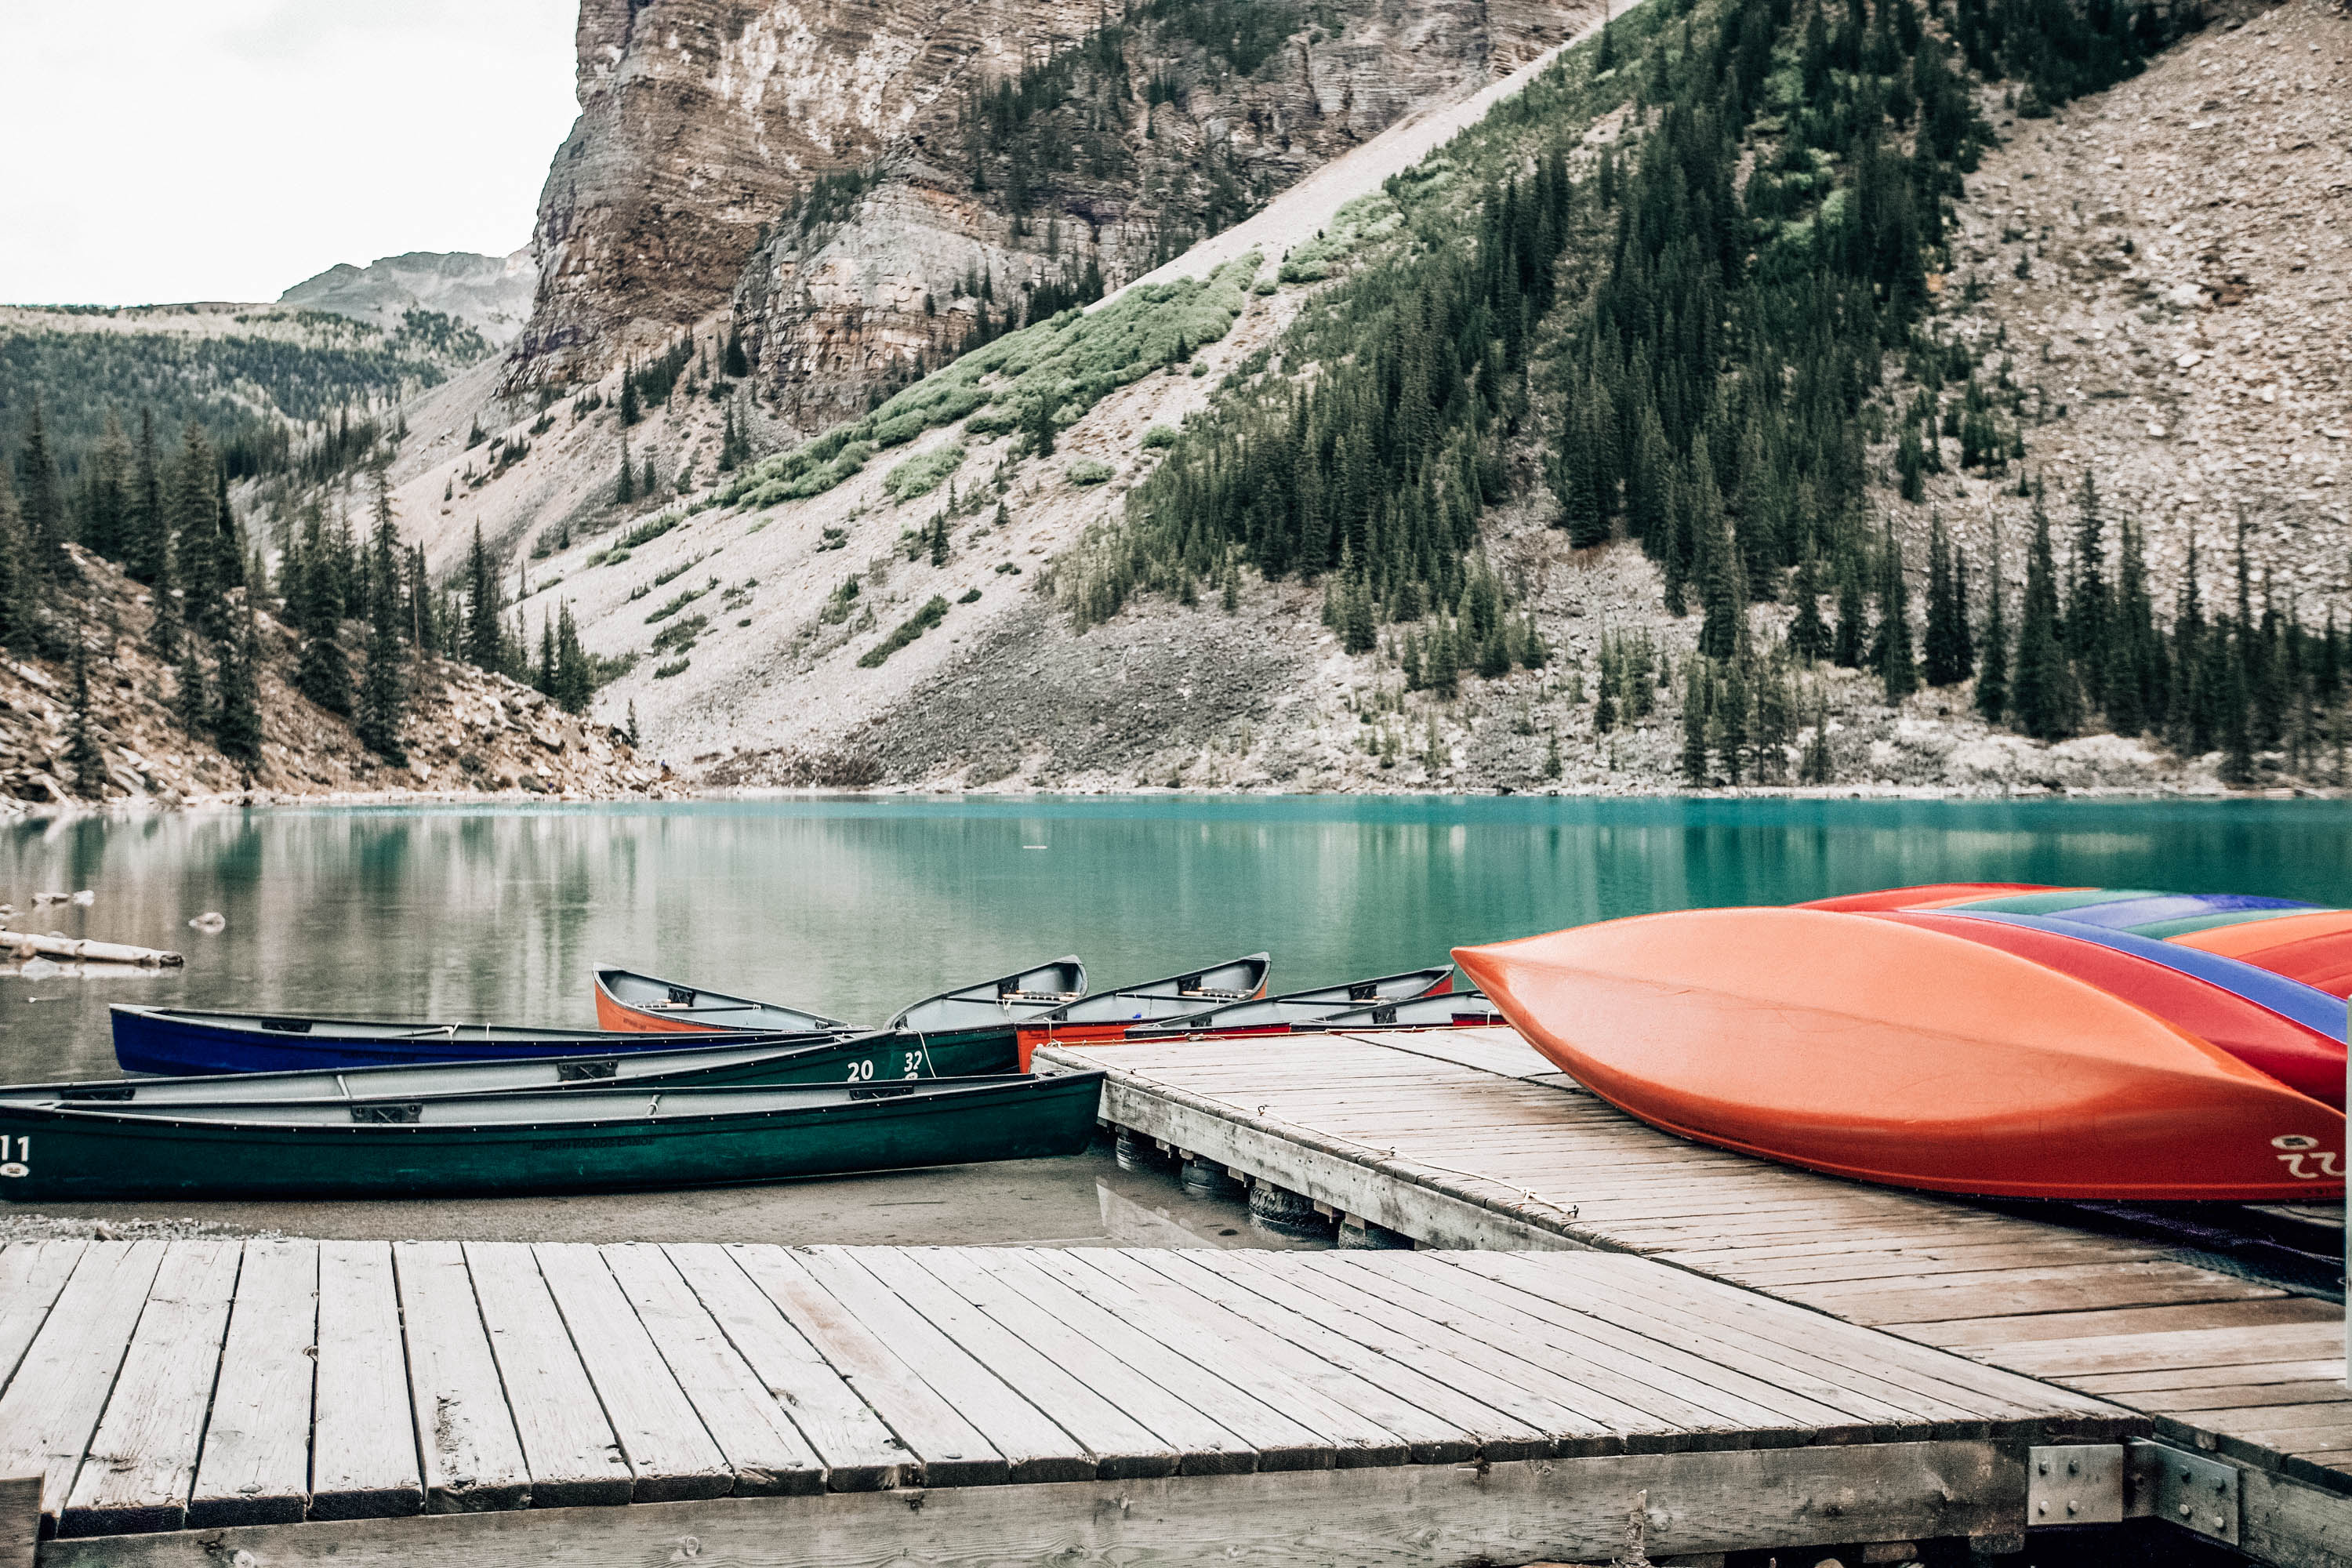
There are a couple different places to rent canoes, all of which close at different times in the year. When we stayed at Emerald Lake Lodge, they literally closed the canoes the day we got there. The price for riding the canoe was $70-$80/hour. One good thing about this option is you do not have to stay at the Lodge to rent the canoes. But there is a very limited supply, so you may need to wait. 

You can also rent canoes at Lake Louise and Moraine Lake, but those are more expensive. The Lake Louise price was $115/per half hour. A lot higher than Emerald Lake. They do have a lot more canoes, so you may not need to wait as long. Lake Louise also allows canoe rentals deeper into the fall, until the lake freezes (then you can trade the canoes for a pair of skates!).

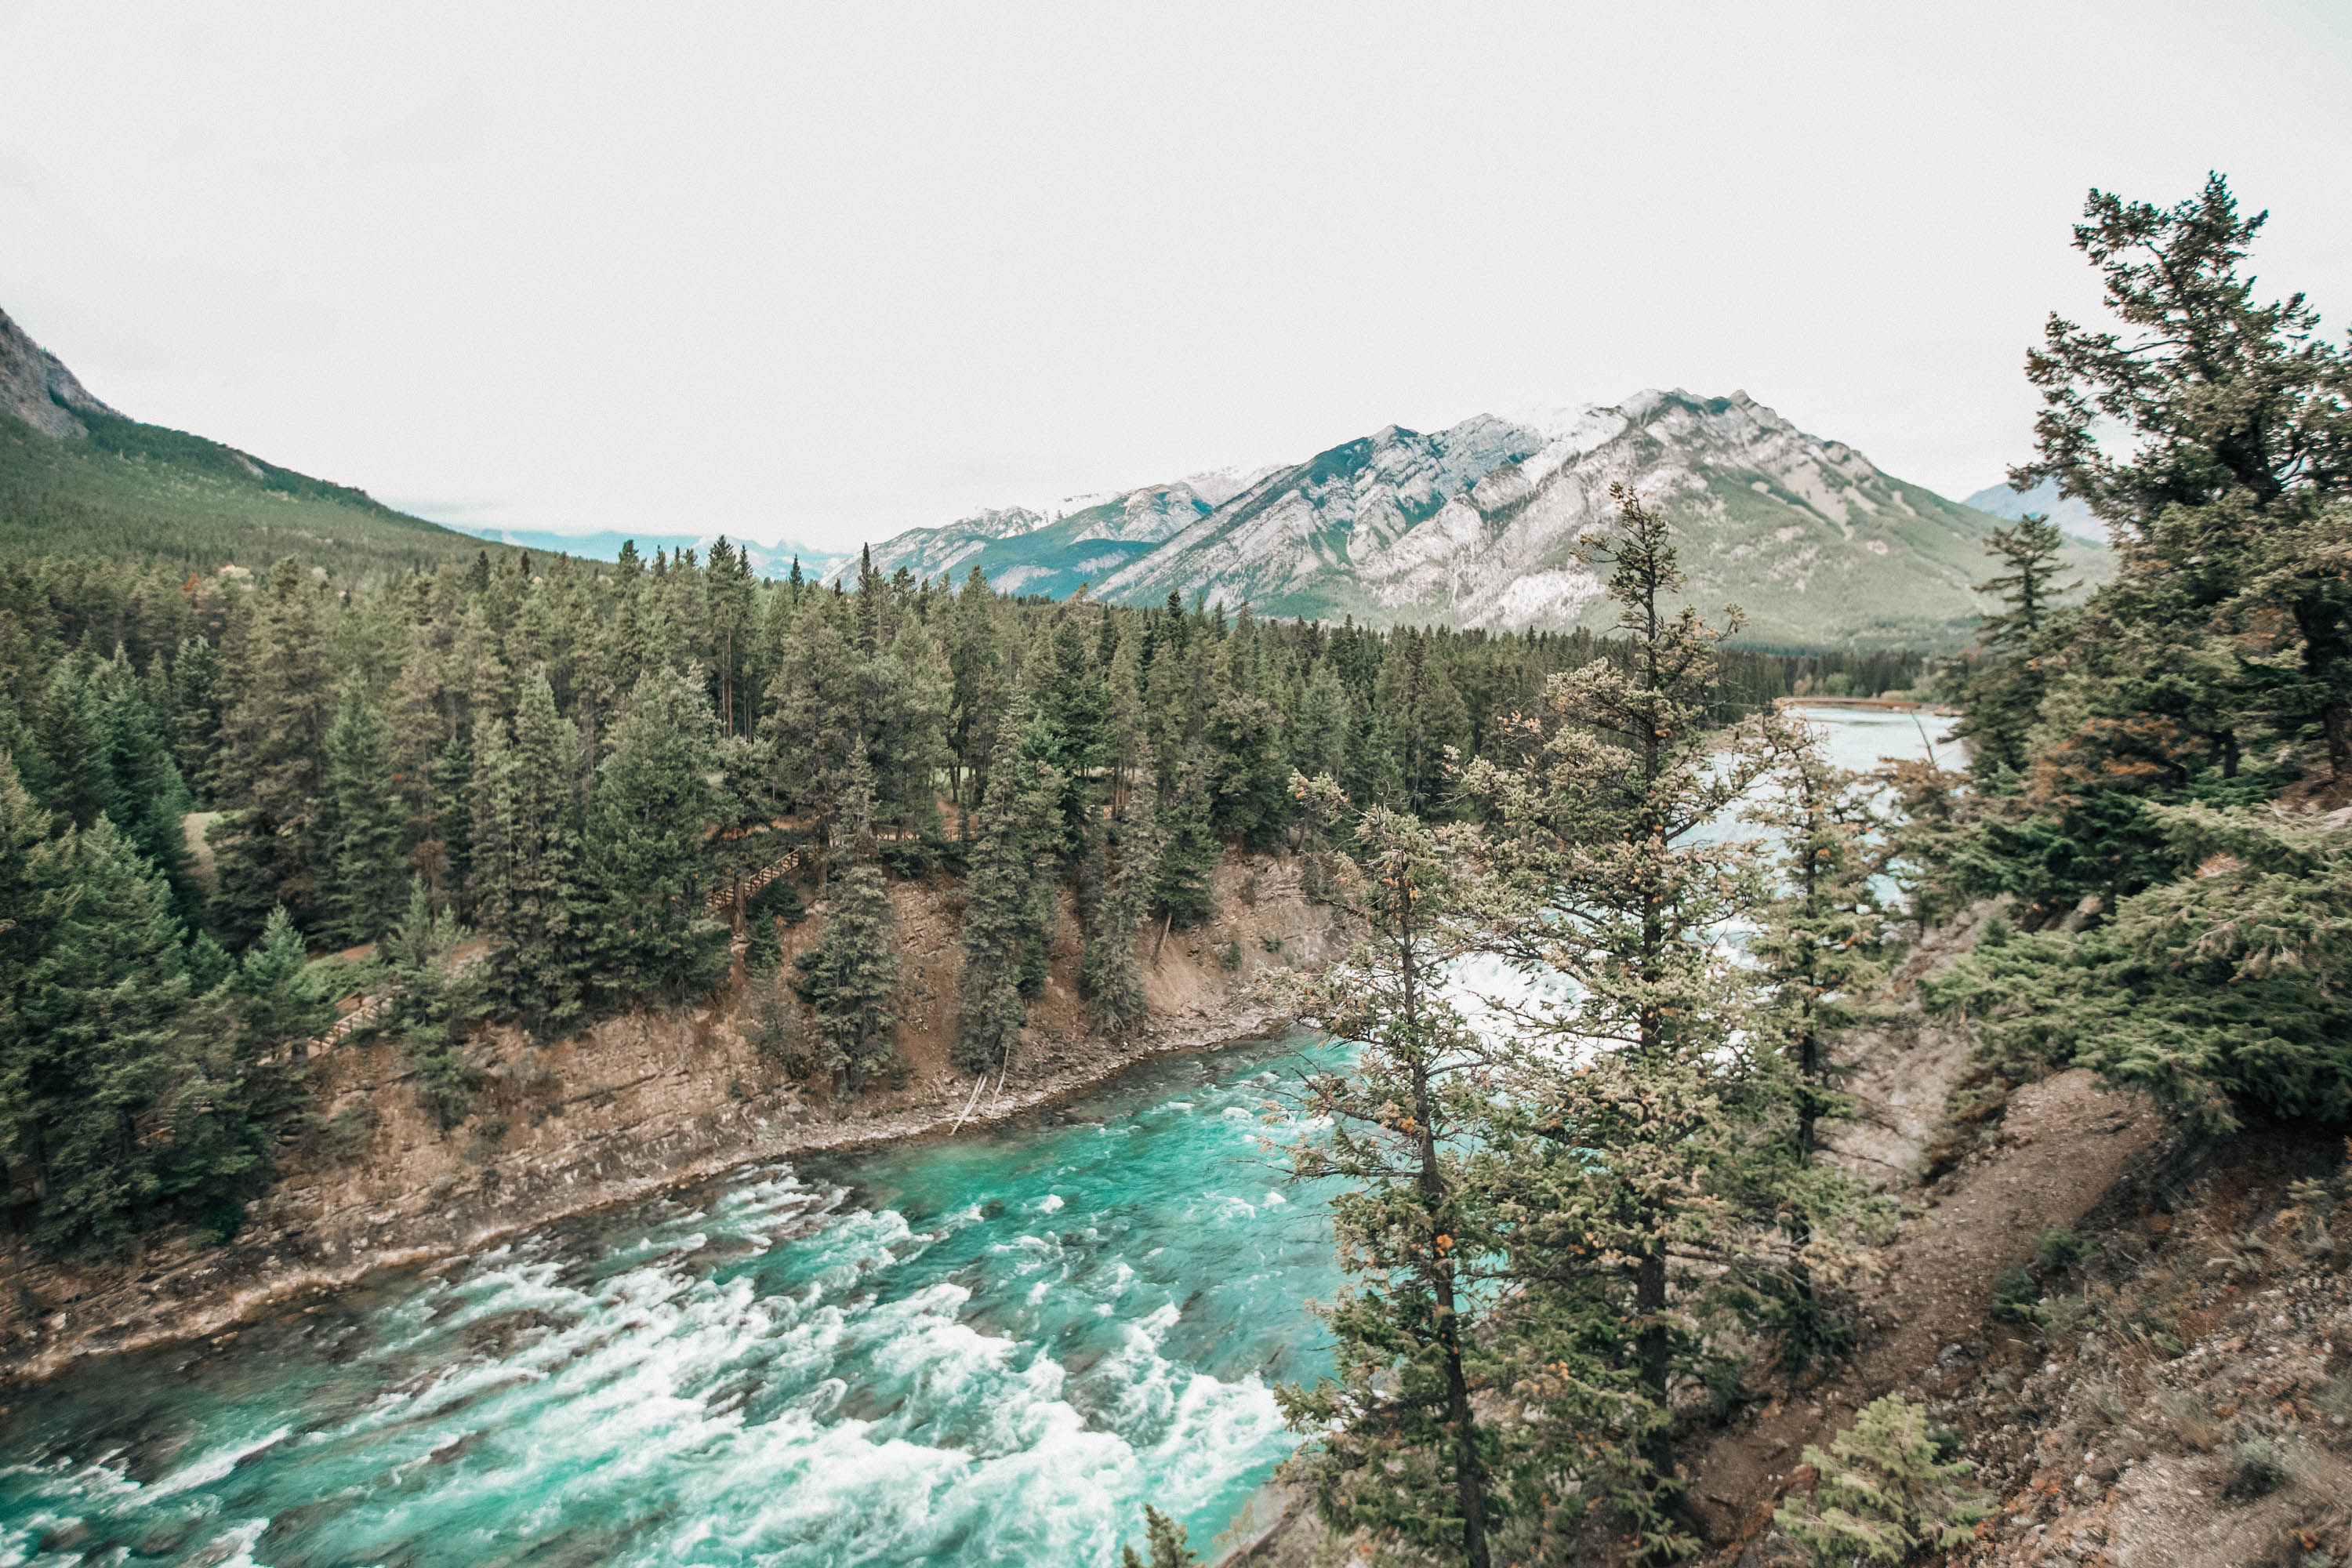
One thing we learned from our Airbnb host, Albert, was that you can also canoe down the Bow River. We never explored this option, so I am not sure what the prices are like, but we did see a few canoers as we were driving along the highway. 


How long of a trip do you recommend?

We would recommend a 3 or 4 night stay. This will give you enough time to travel around the area and see the lakes, go on hikes, or explore the city/town area. If you are coming from the East coast, probably closer to 4 nights. This past visit we were incredibly tired by the middle of the trip after doing so much hiking. But the first time we traveled there we could have sat in front of the fireplace and watched the snow for a week. 


Do you suggest renting a car?

YES!! This is really the only way to get around unless you want to deal with tour buses and shuttles the entire time. It is actually pretty inexpensive to rent cars around there… I was surprised.  The closest airport is Calgary which is an hour and a half away. Also, even if you stay at one of the lakes (Louise, Moraine, Emerald) you will still need a way to get around.

Favorite places to eat?

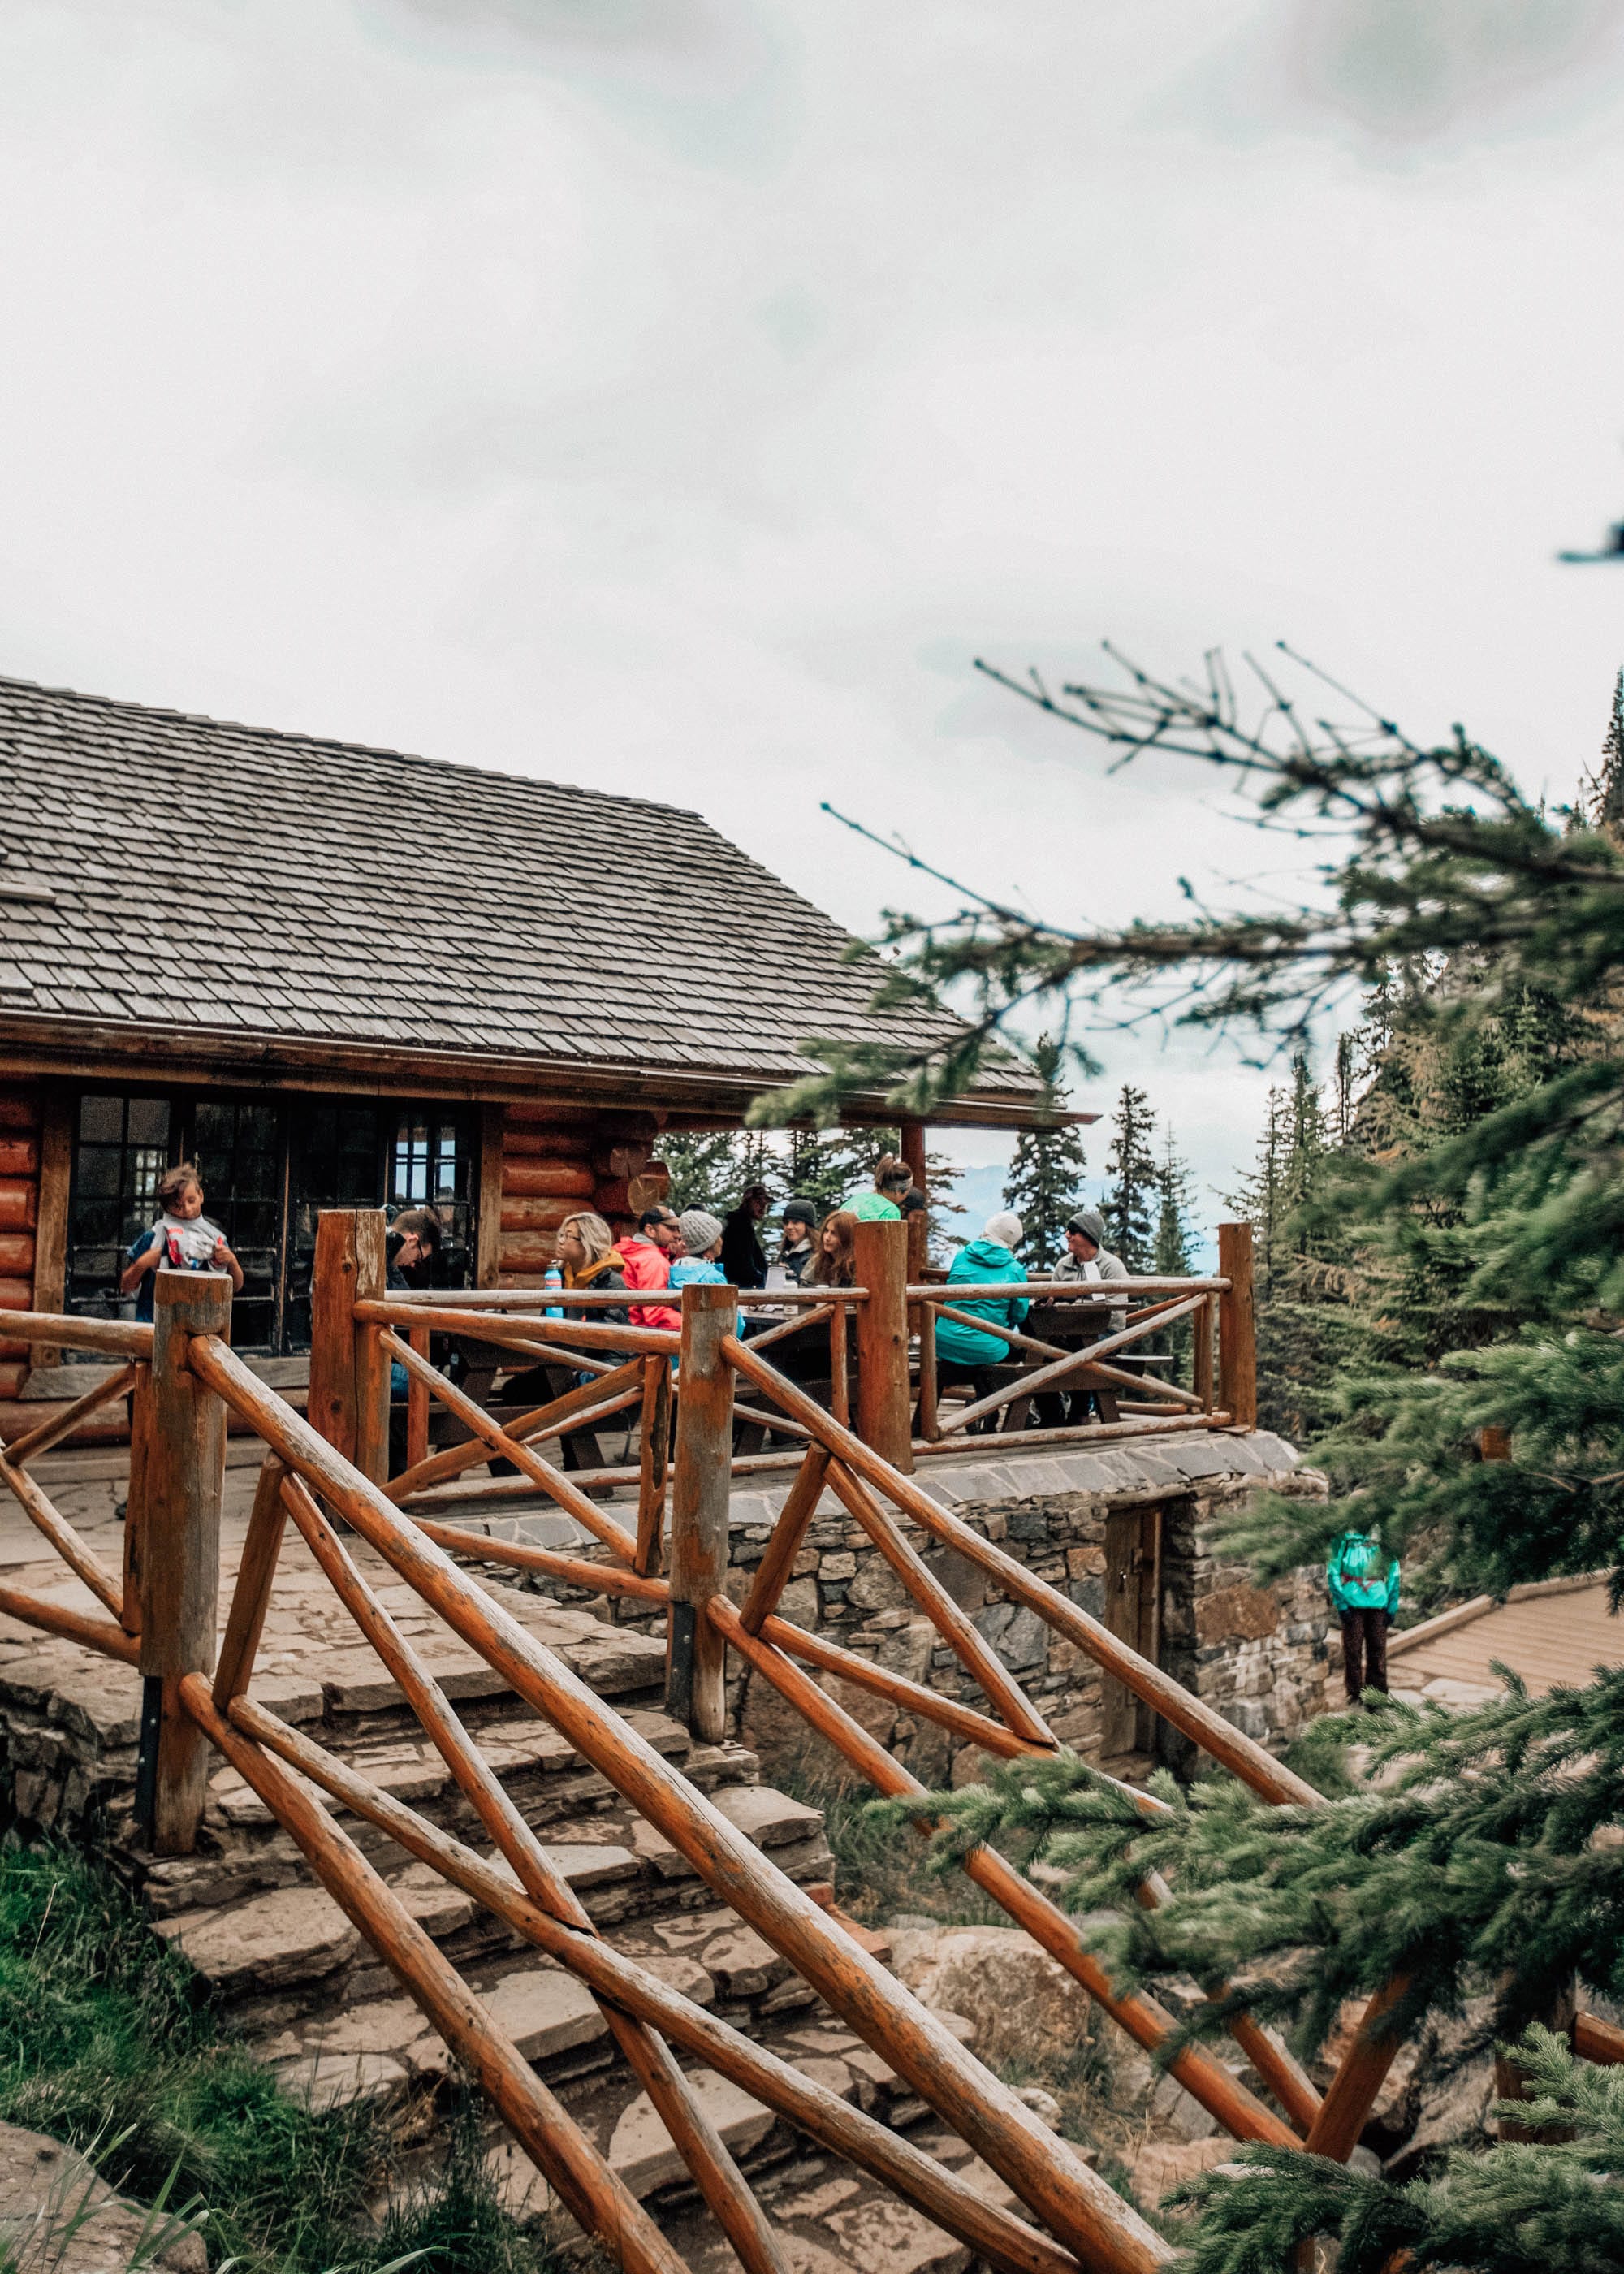
Banff is considered a foodie town, so there are a ton of great places to eat! The first time we visited, we rarely ate outside of the Lodge. The food was amazing there and we have heard great things about the other lodges around Lake Louise and Moraine. 

Our other favorites were The Bison and Eddie’s Burger Bar (it was pretty casual and small, be prepared to wait if you don’t have a reservation) downtown. The Bison is a fabulous option for a nicer dinner. It was my first time having Trout and I loved it! Some other places that were highly recommended were Park Distillery, The Grizzly (if you like fondue), and the Pho House if you are in the mood for take out. For quick bites to eat and coffee, I love Wild Flour and Good Earth Coffeehouse. 


Are there any ways to make it more affordable?

Yes! TJ was able to find a great deal for our first trip to Emerald Lake Lodge on Expedia. He bundled the hotel stay and the flights and we ended up saving about $300. Check out those bundles. Also, if you are okay with not going during peak season (July-September) the hotel stays will be much cheaper. You can also stay a little farther outside Banff in Canmore. It is about 15 minutes away from Banff, but still has a lot of fun things to do. You can also find affordable Airbnb’s in Banff and Canmore.

You can also bypass some of the paid shuttles by going to the scenic lakes in off hours. Get to Lake Louise and Moraine Lake later in the afternoon (or extremely early in the morning). You will still have plenty of time to explore the lakes without all the people. There are also activities that can be done in off hours for free as well. The Banff Gondola typically costs about $60/person, but after 7pm it is free.  


What are your top 3 must do’s?

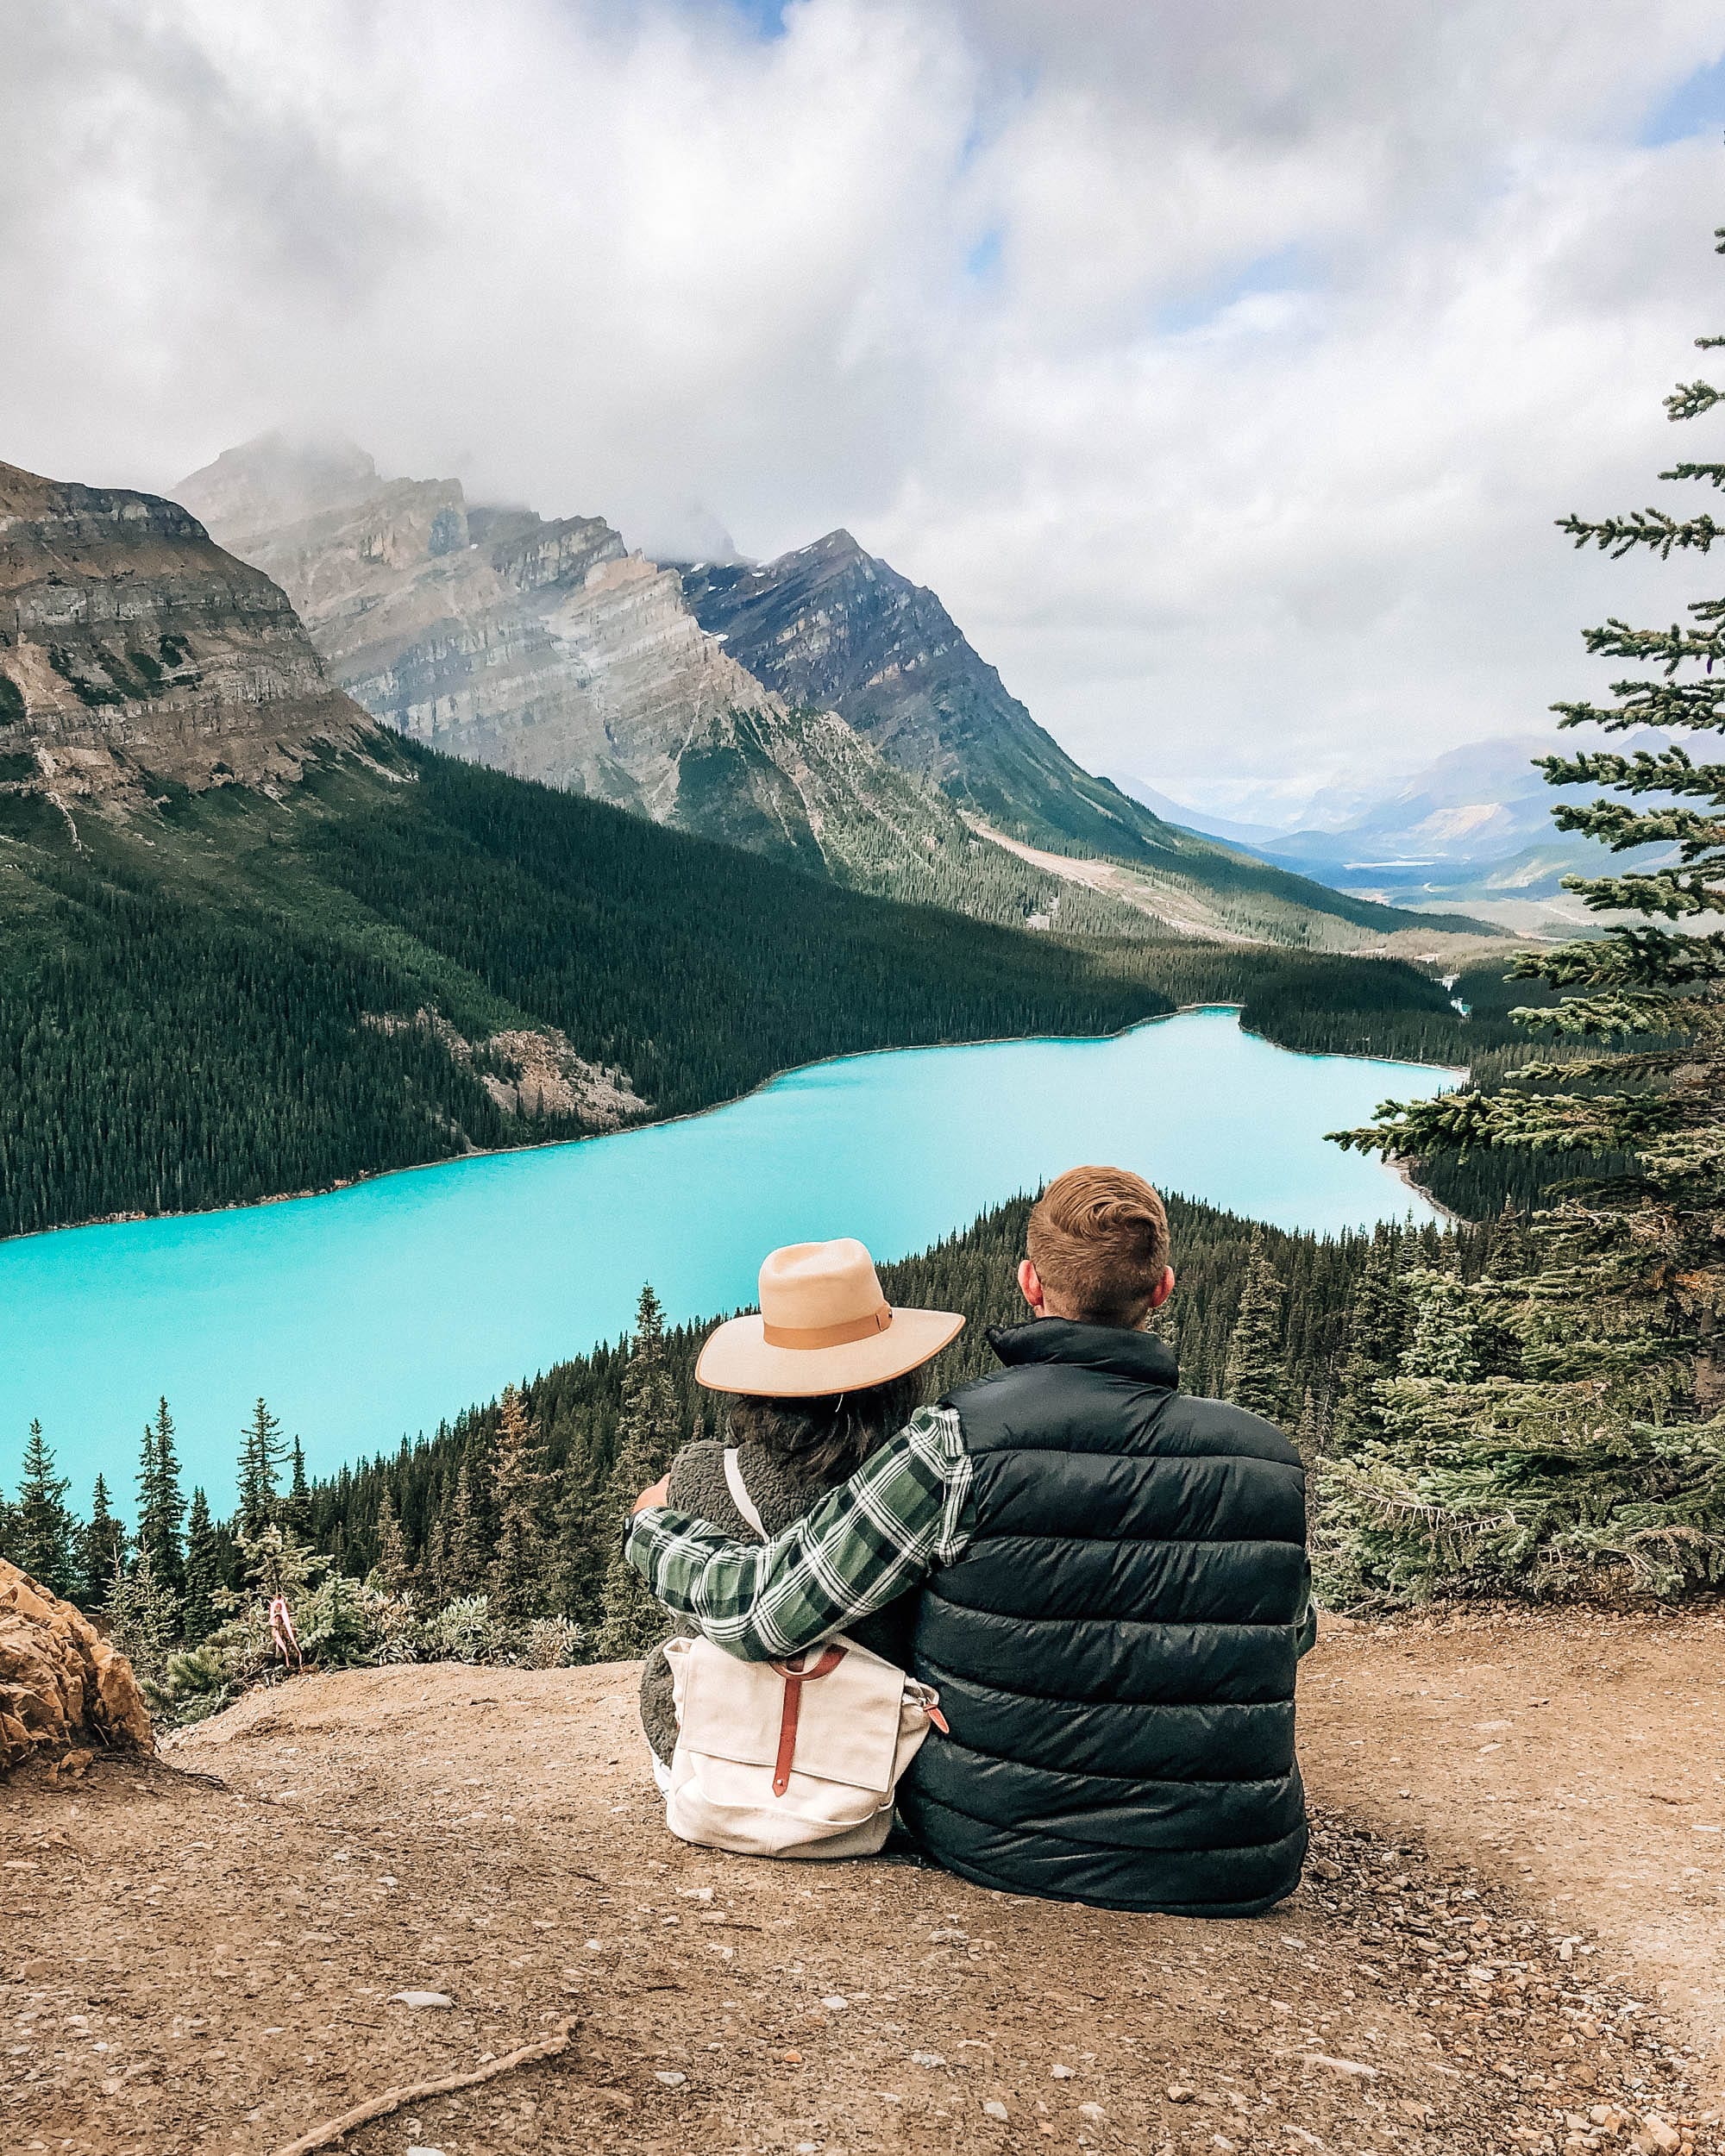
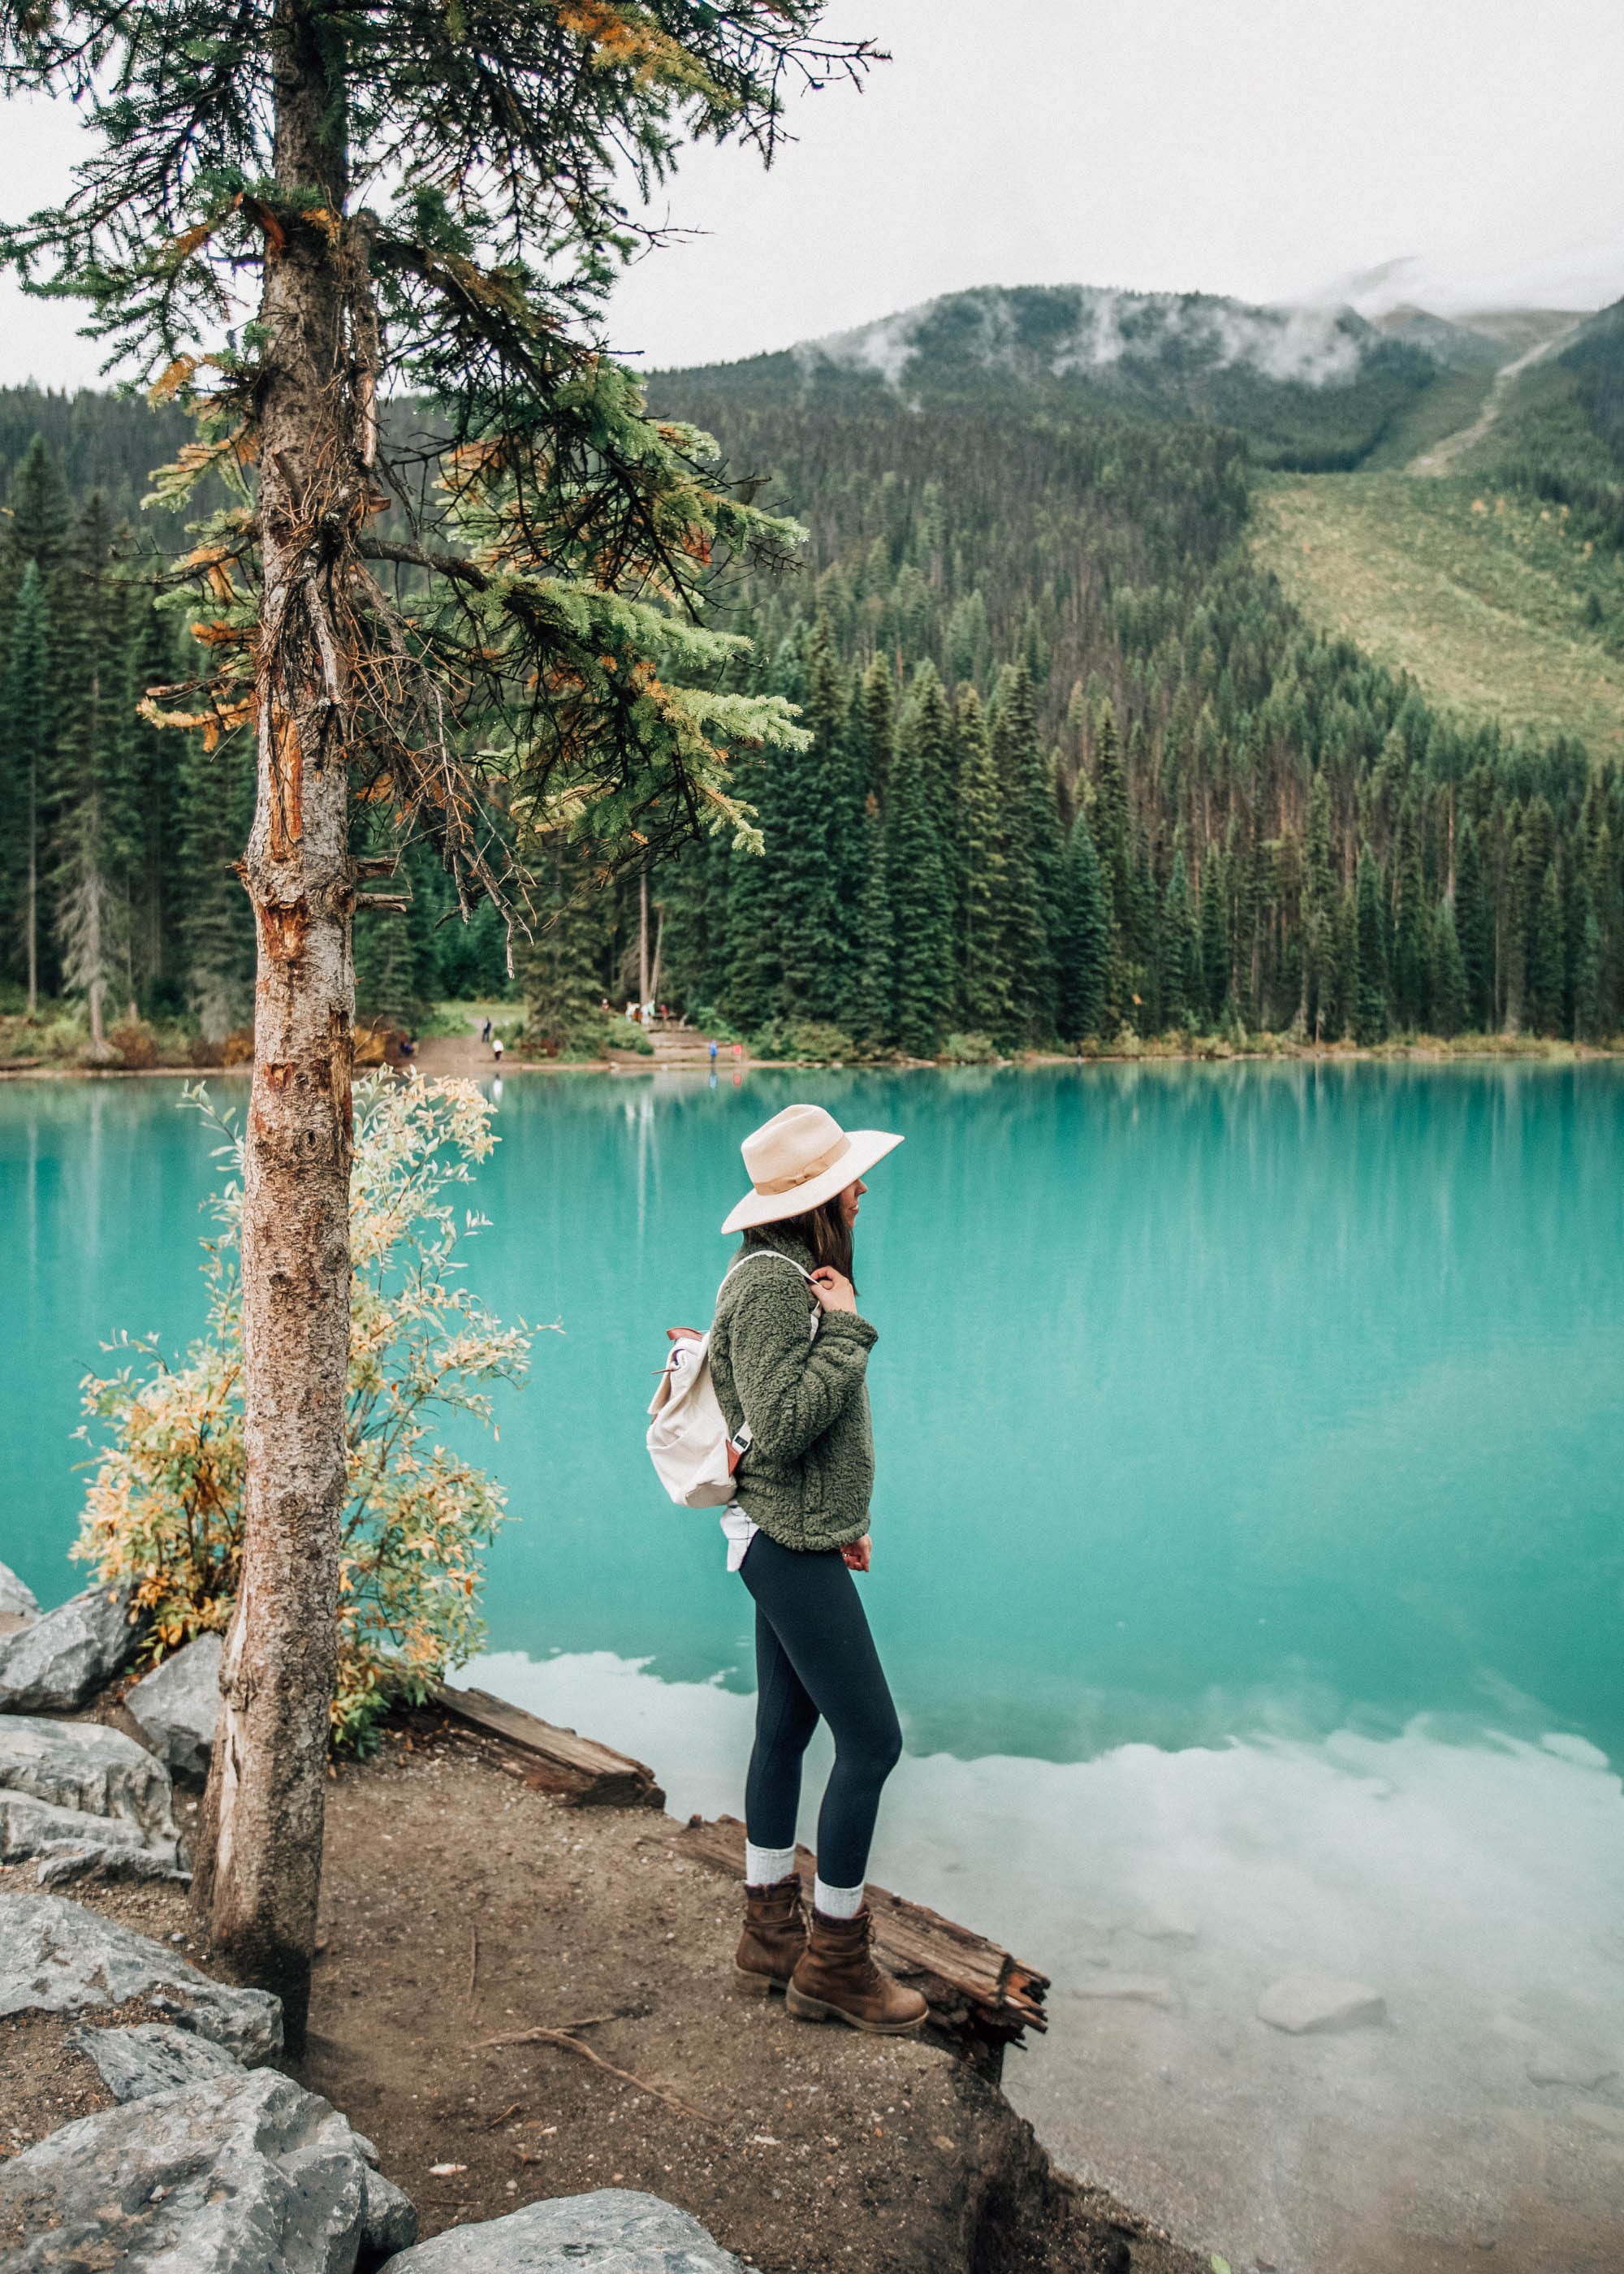
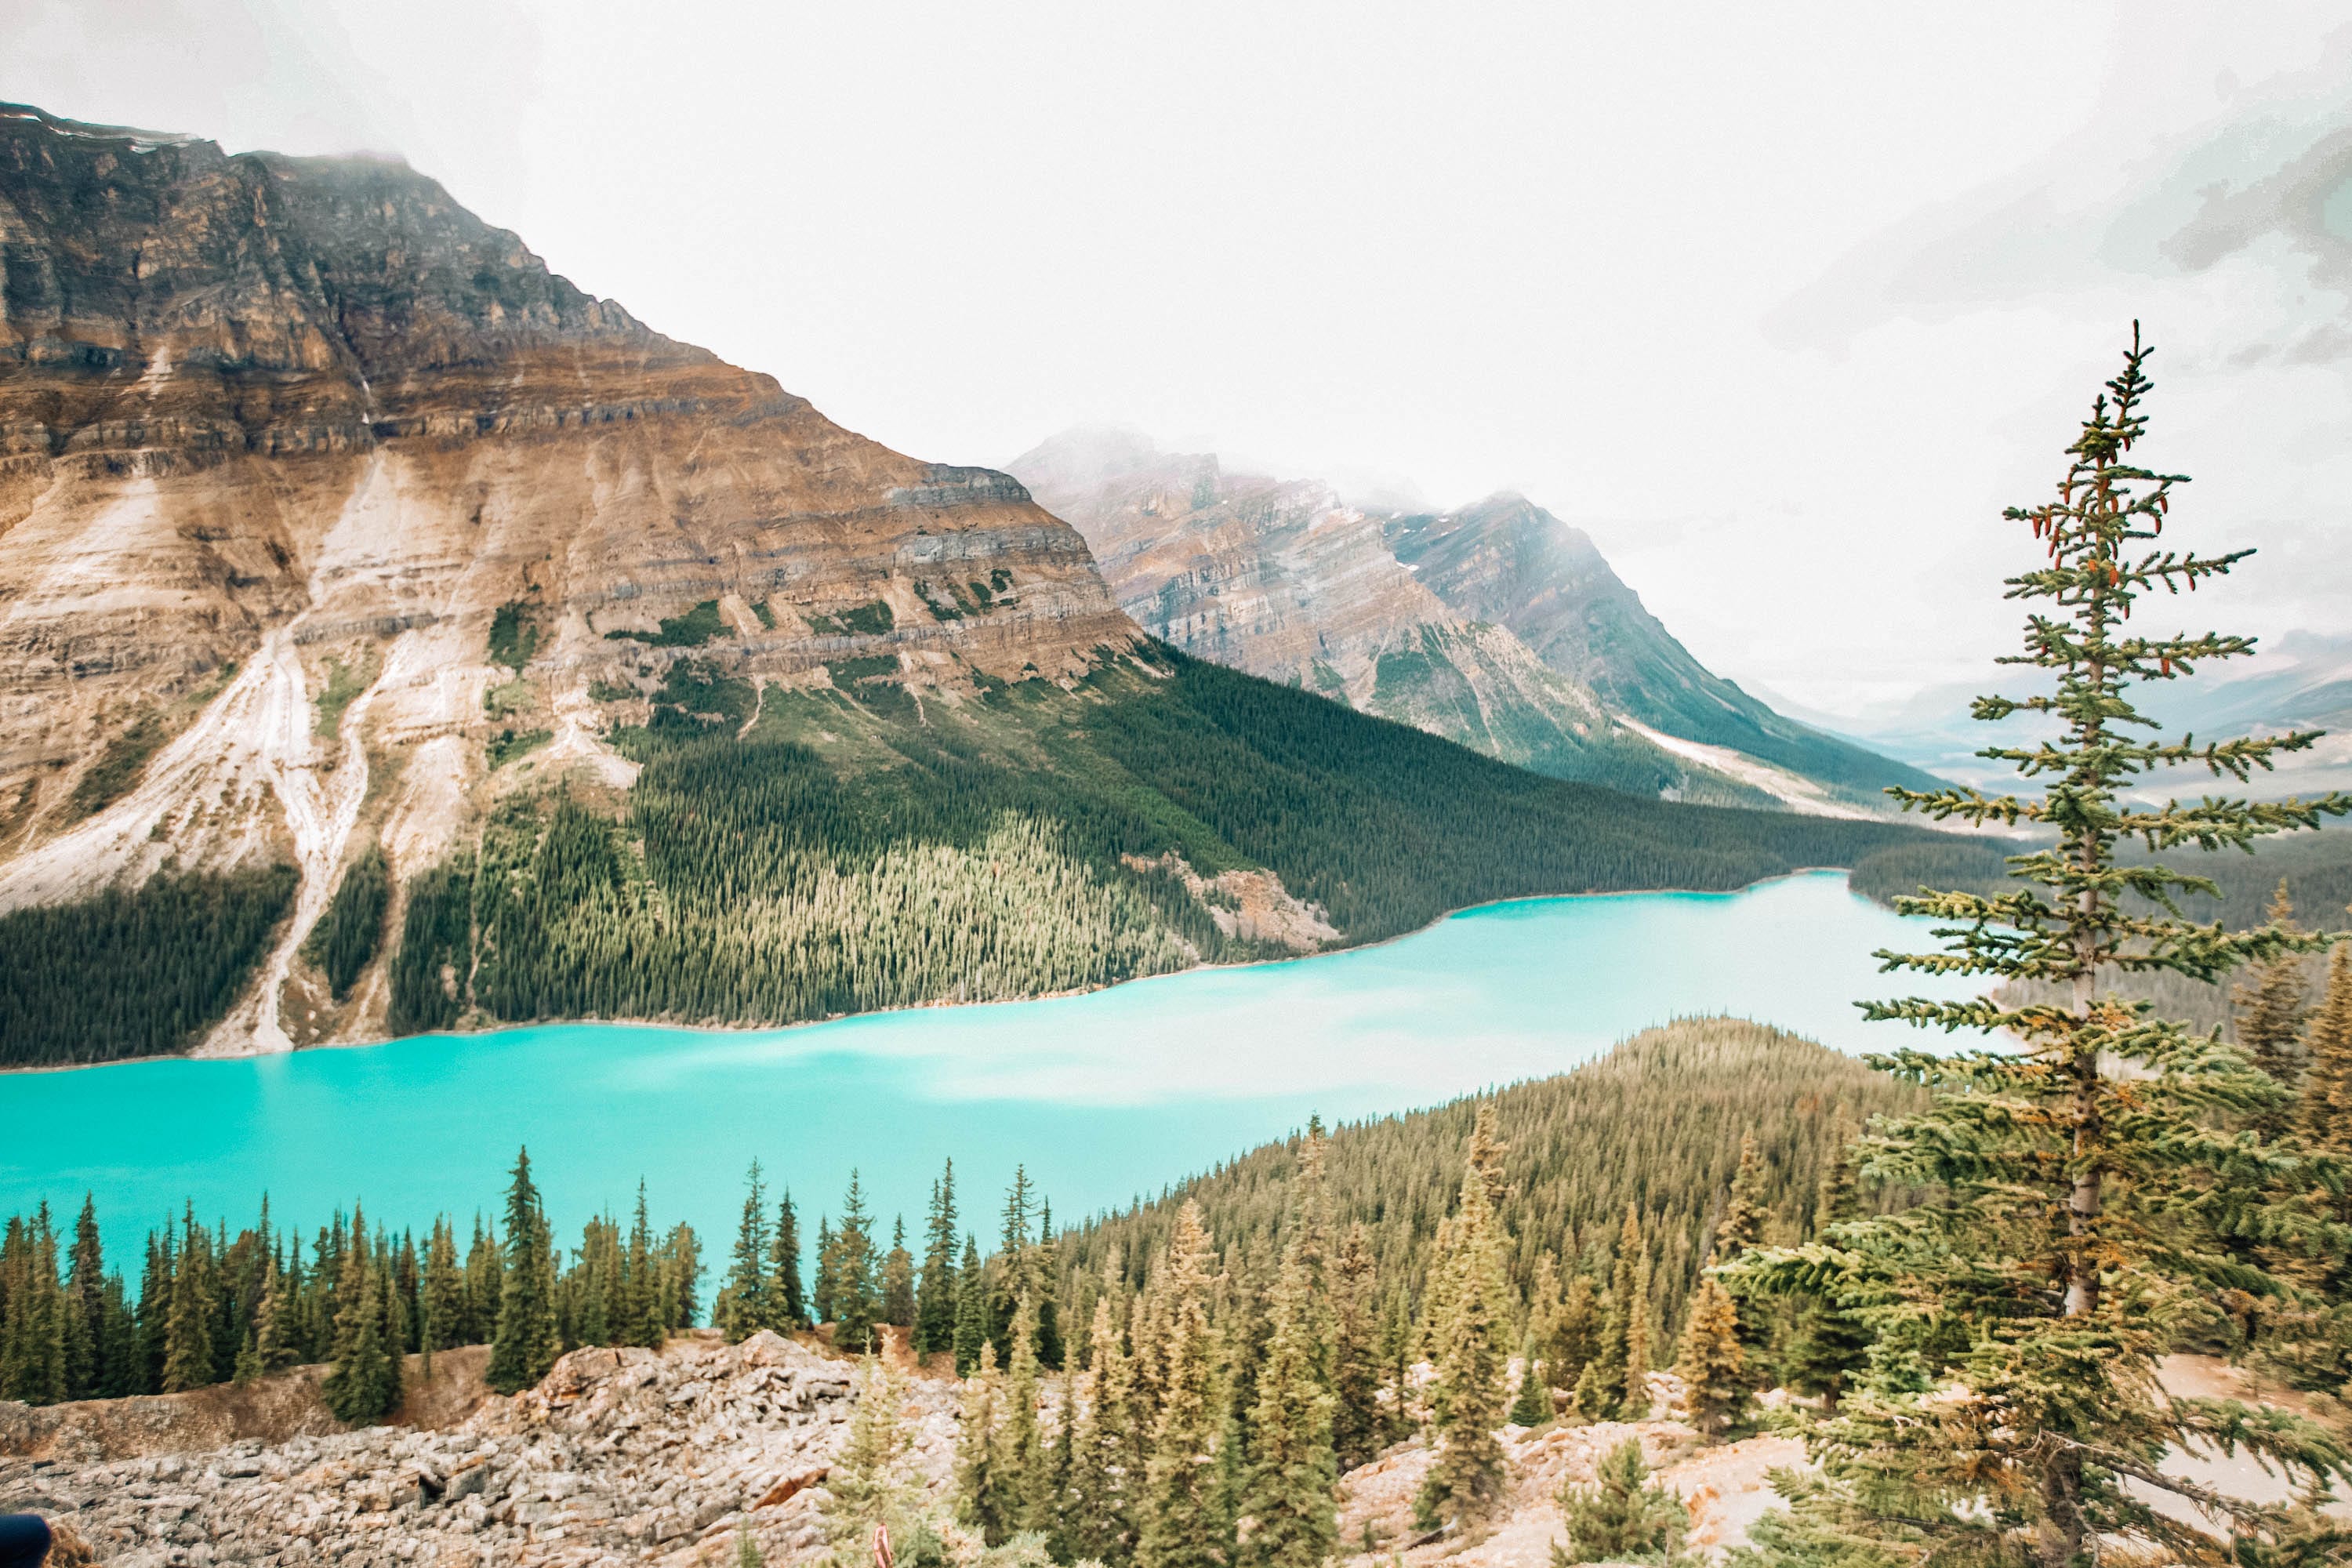
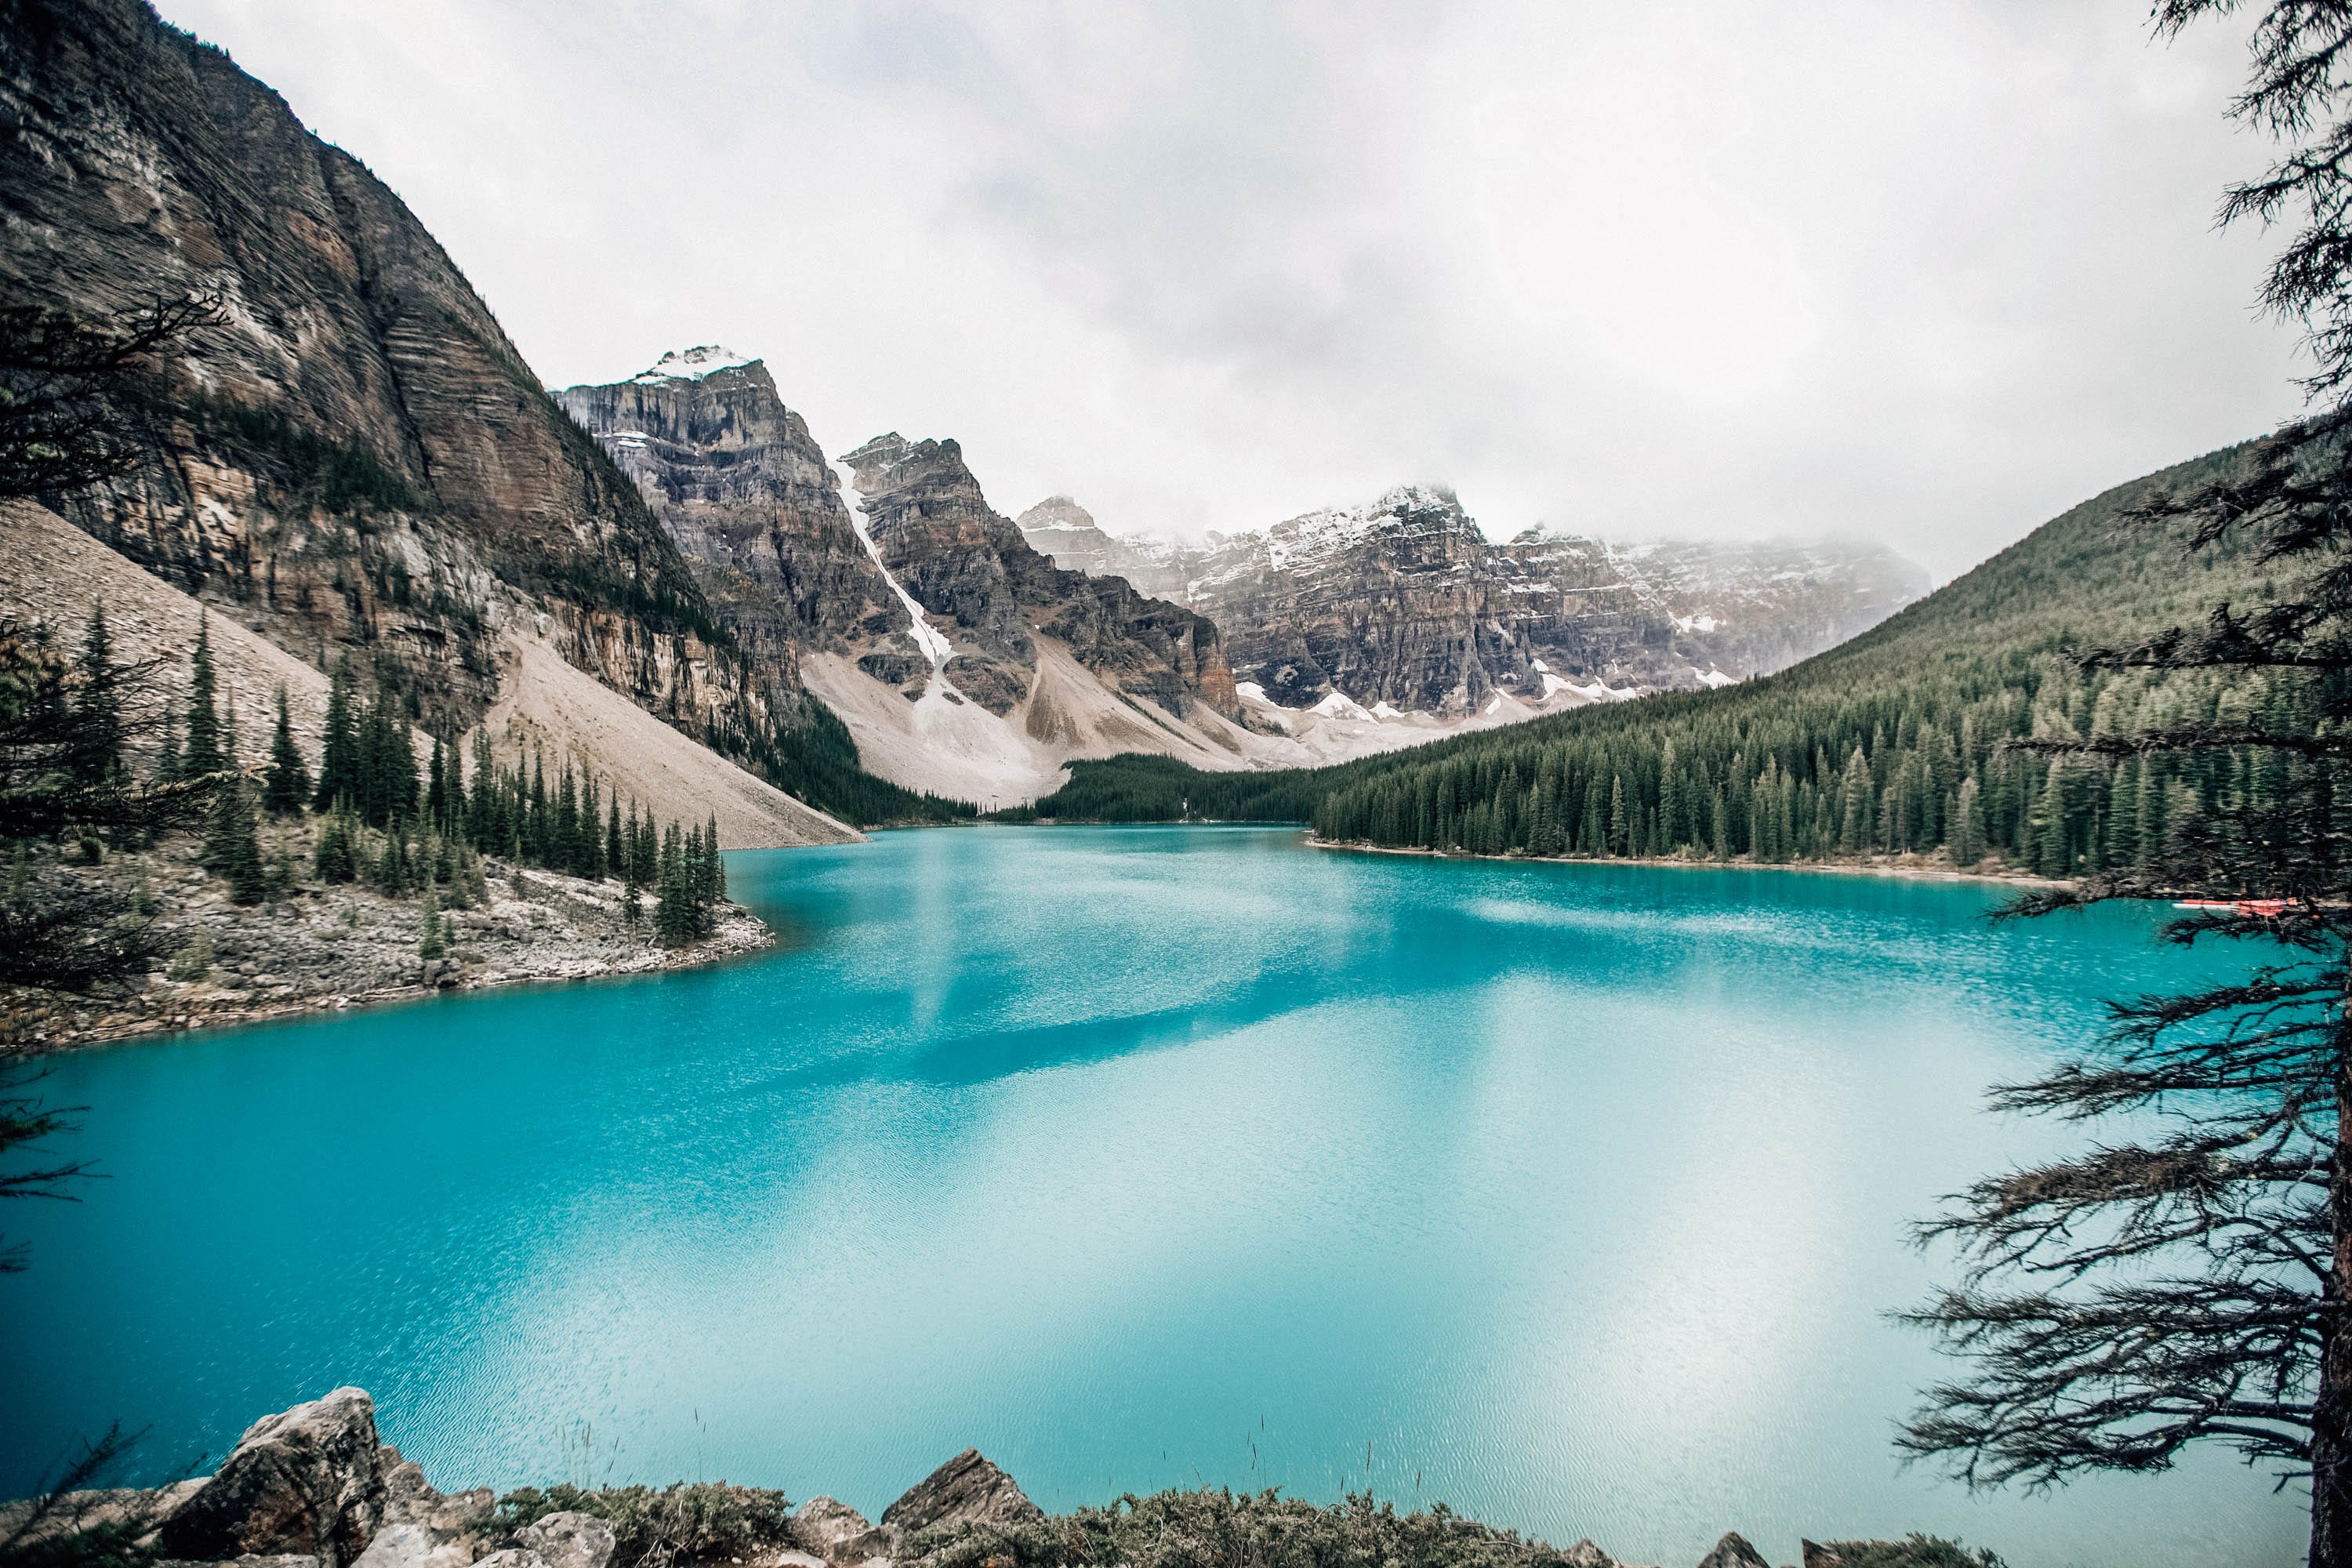
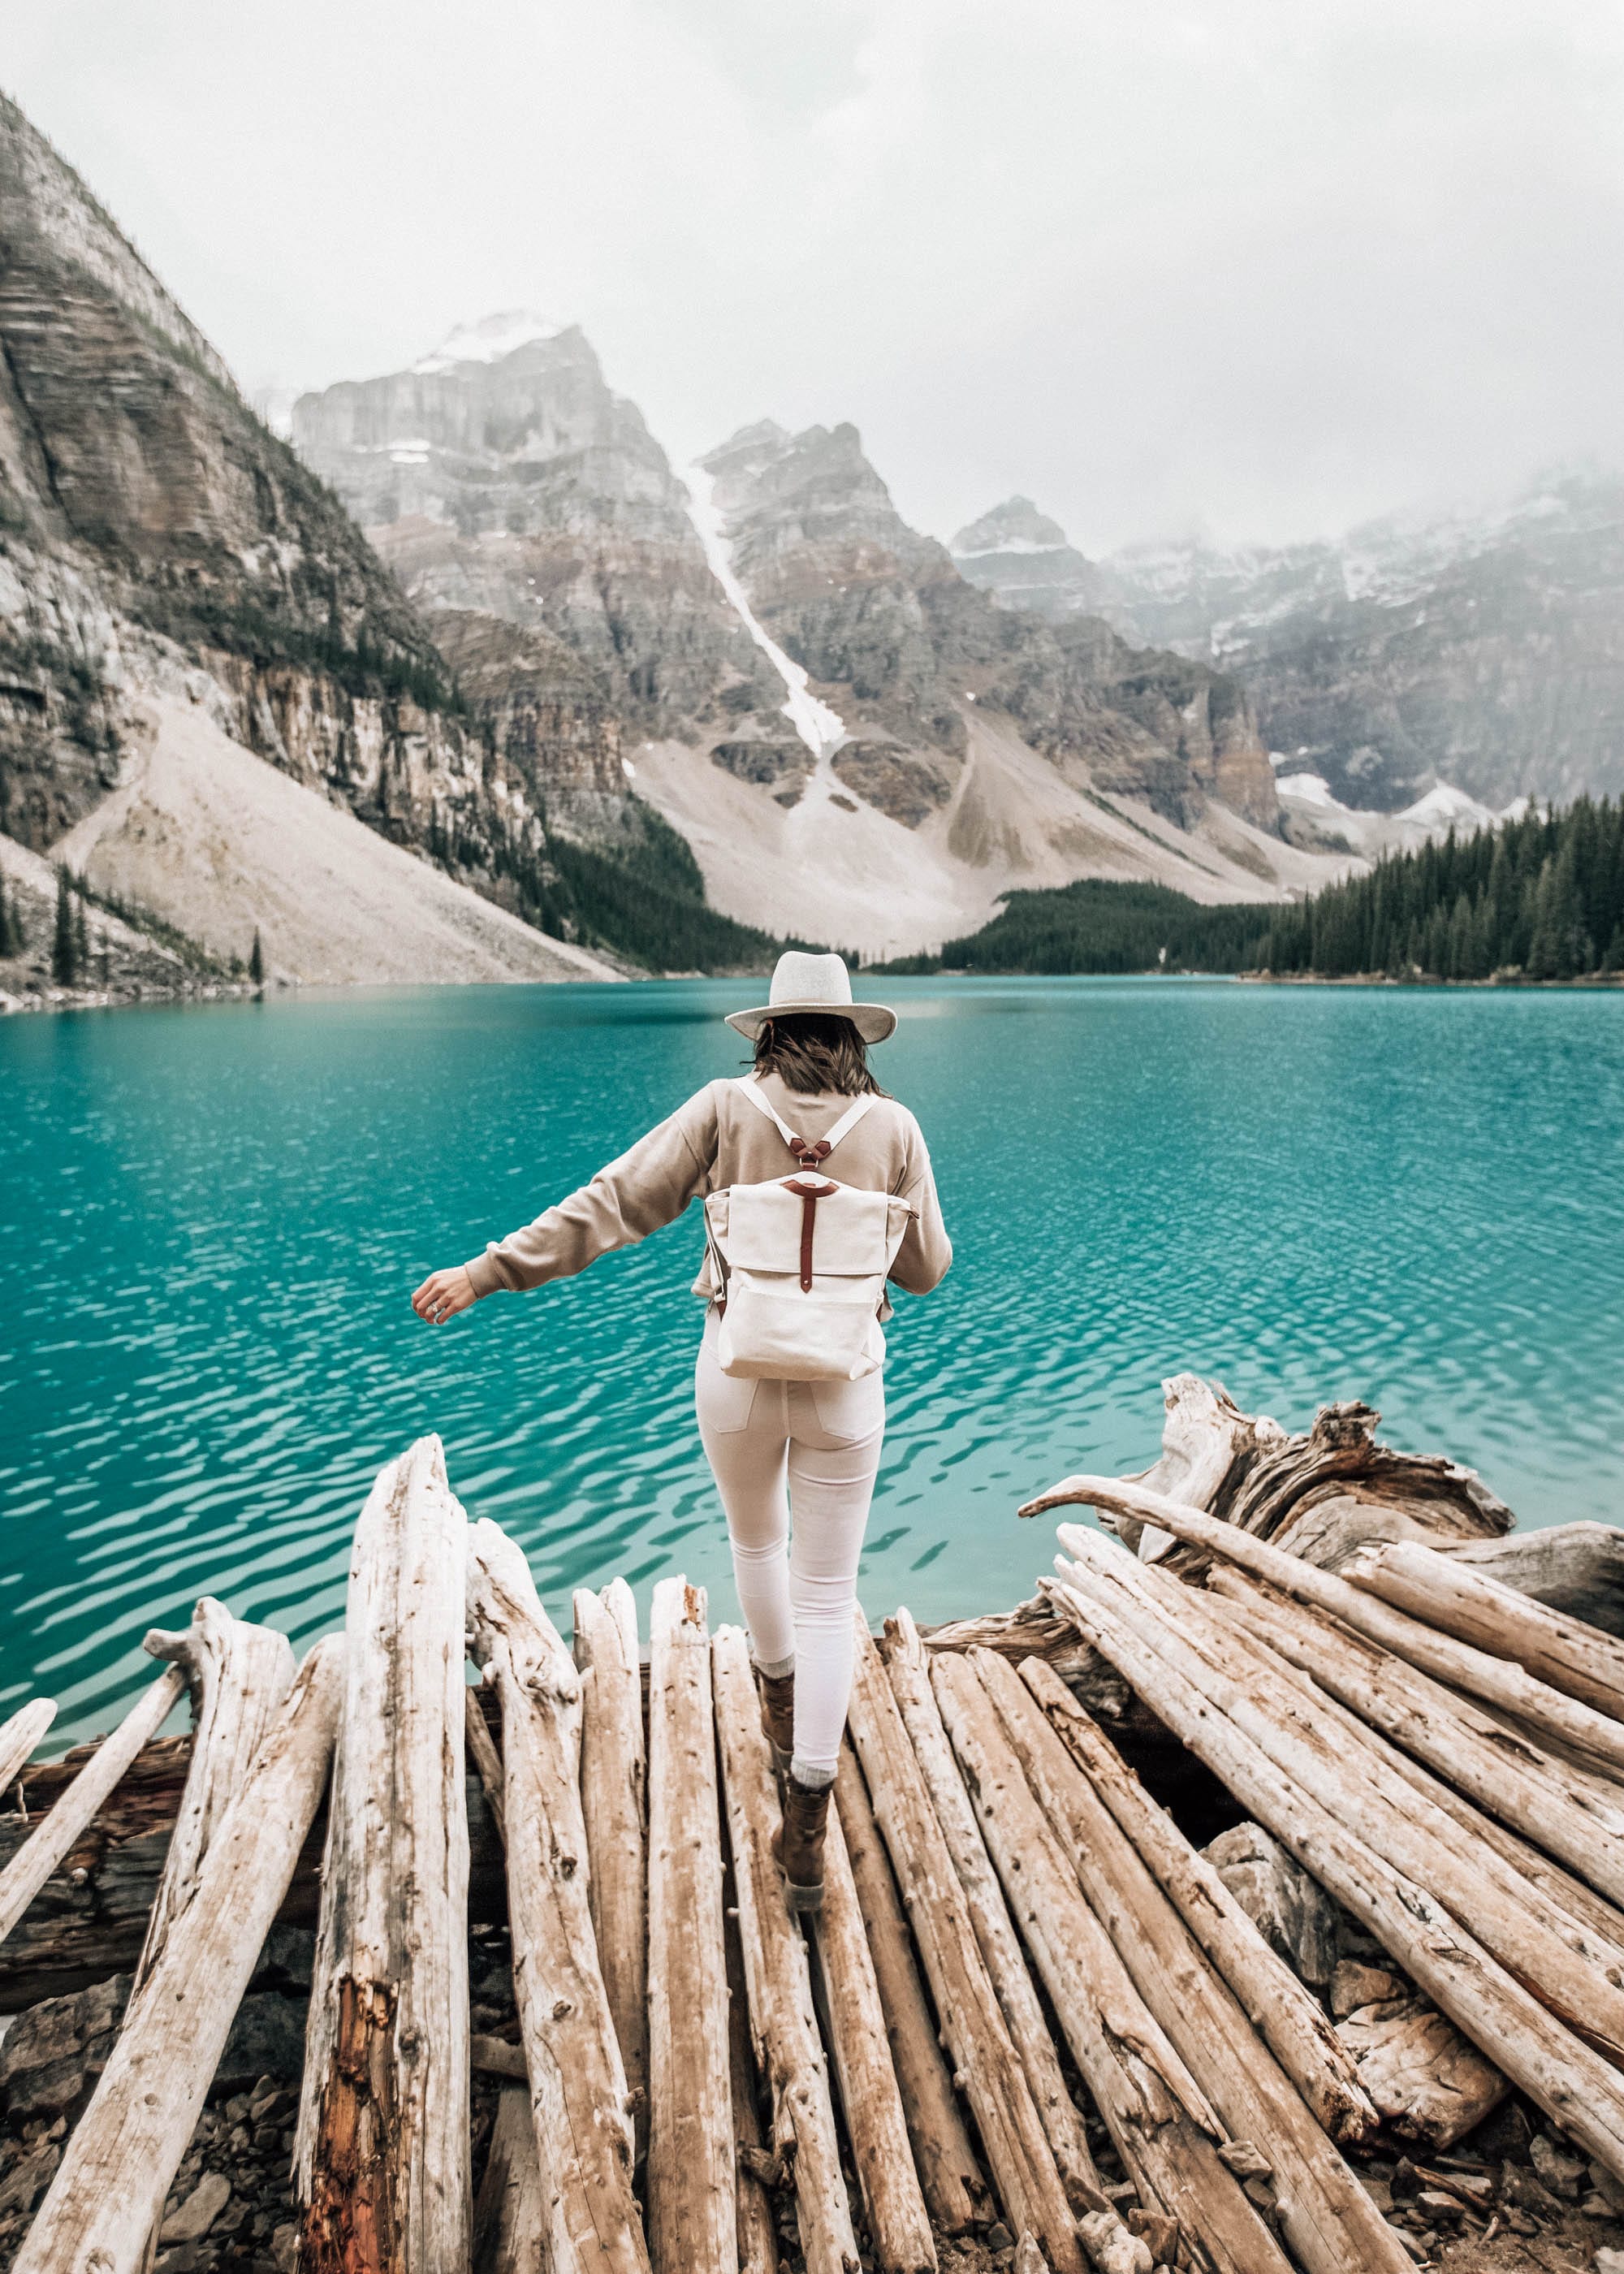
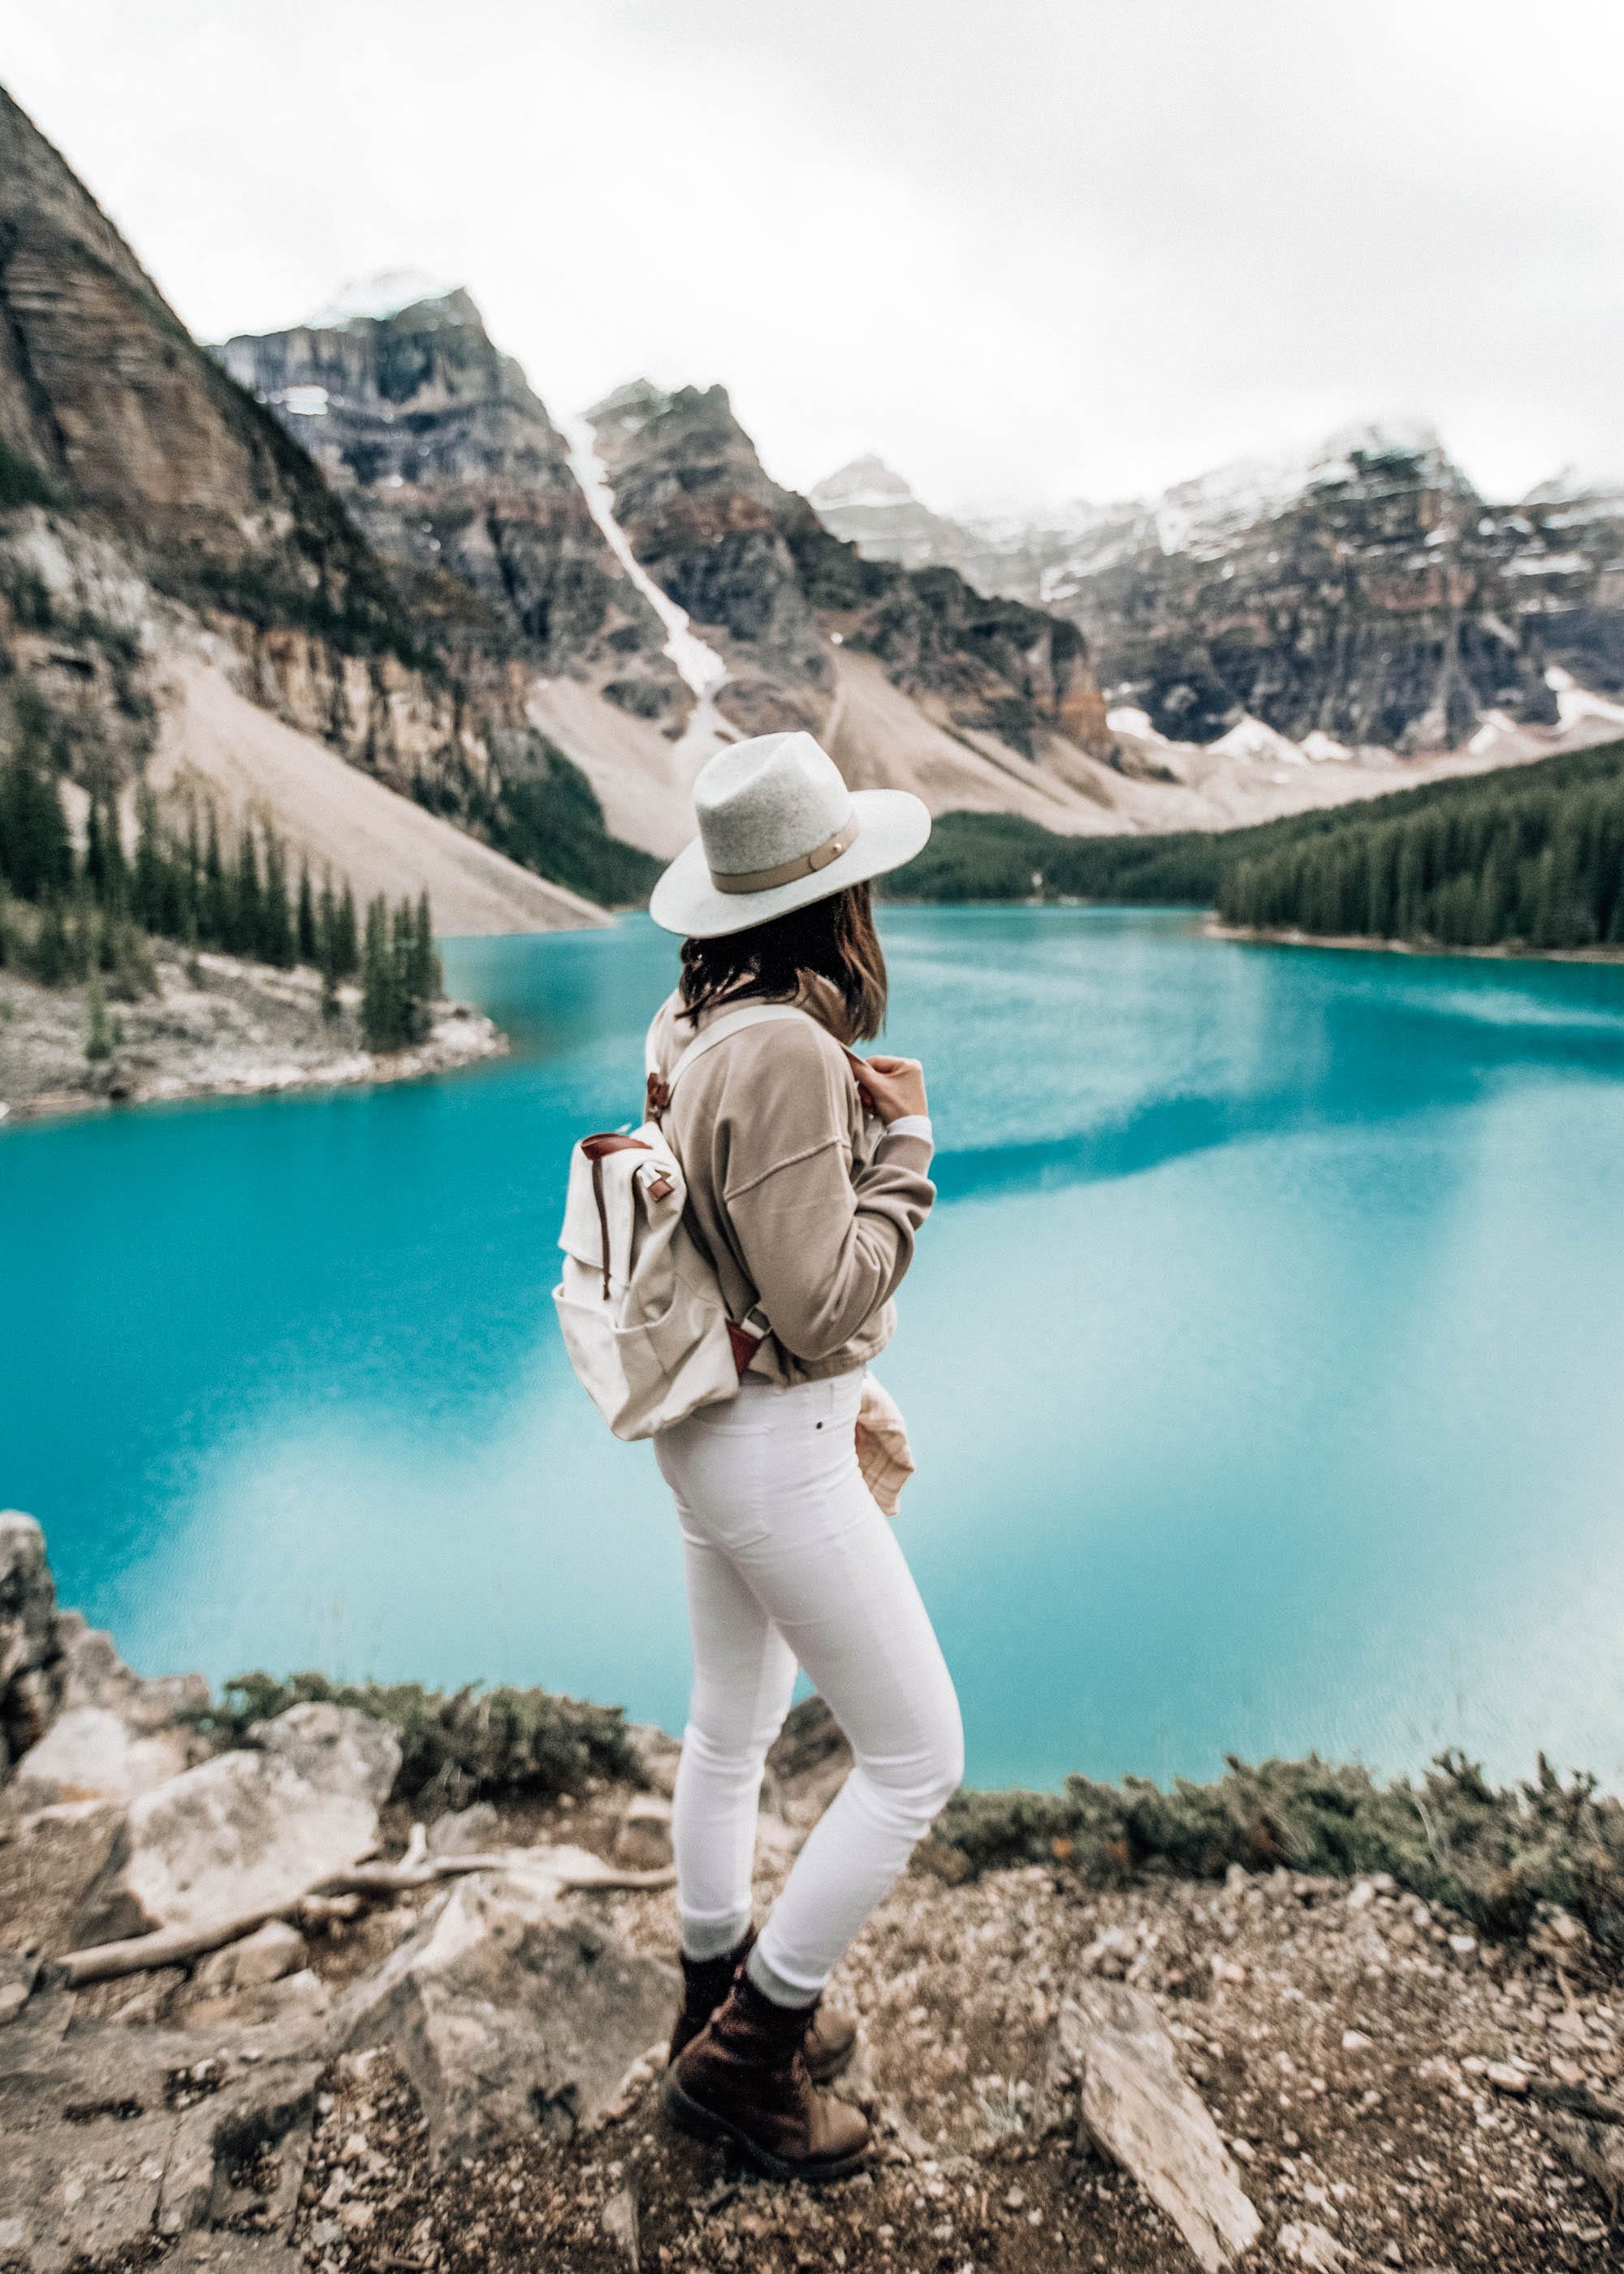
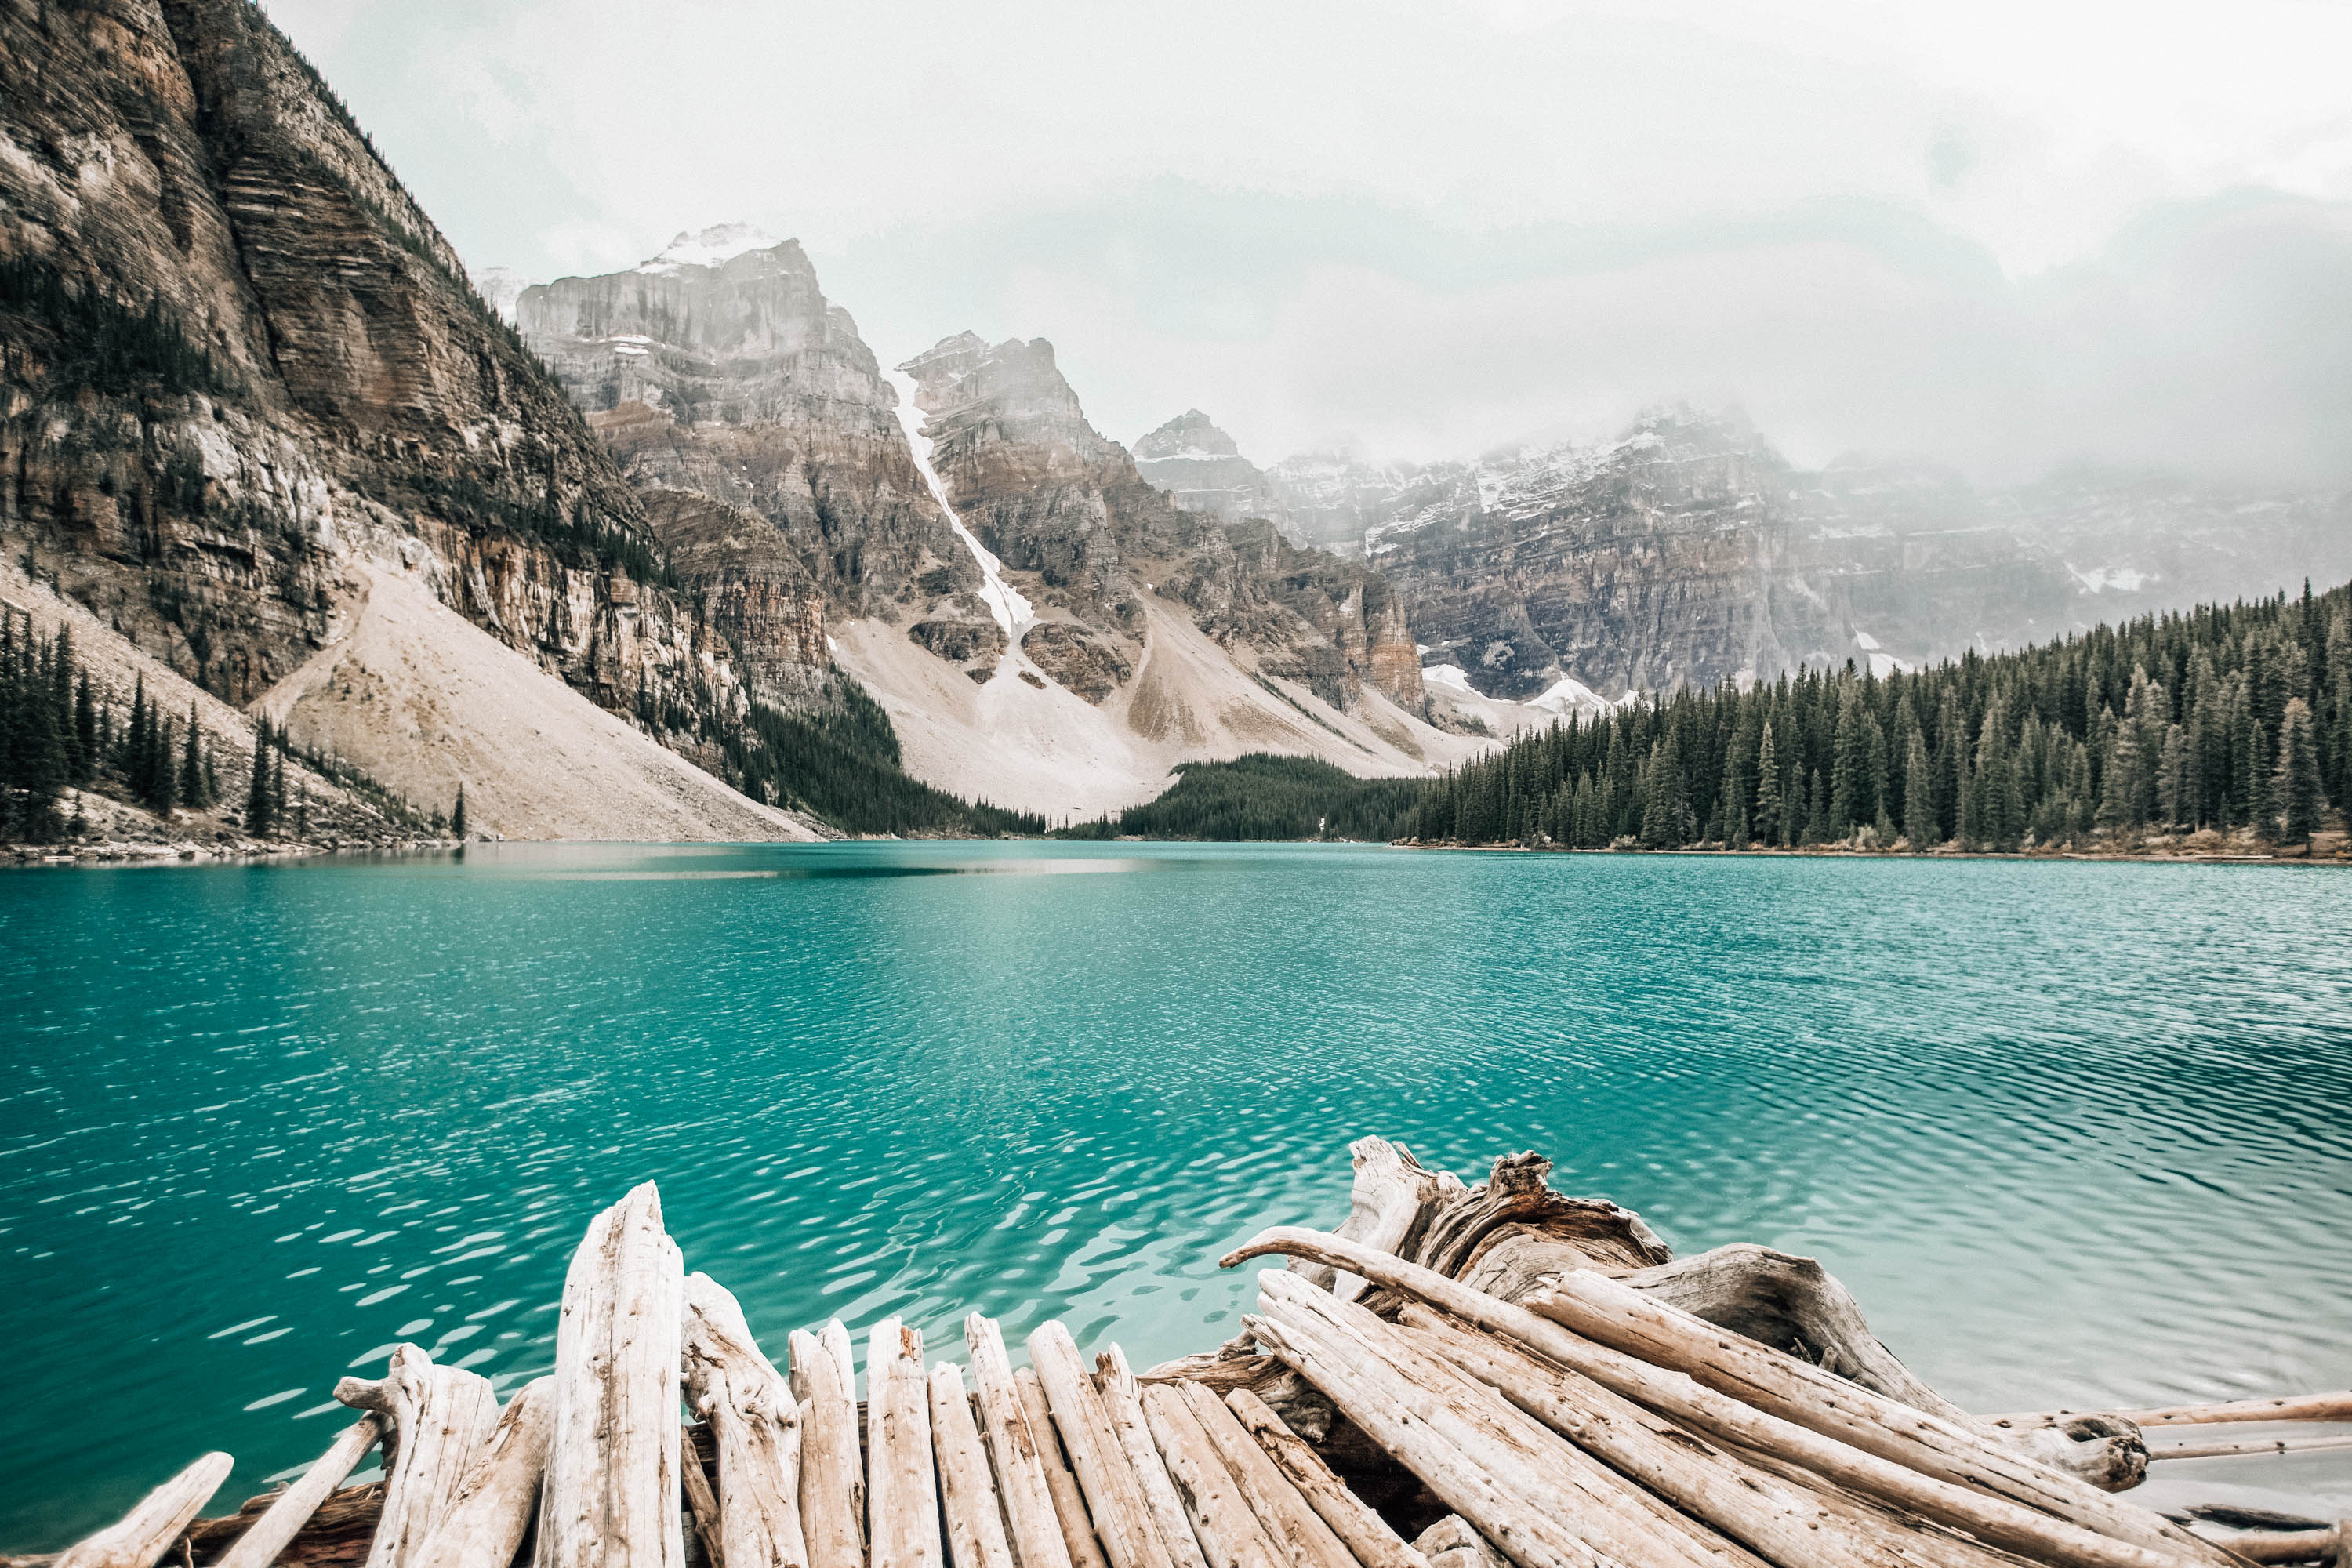
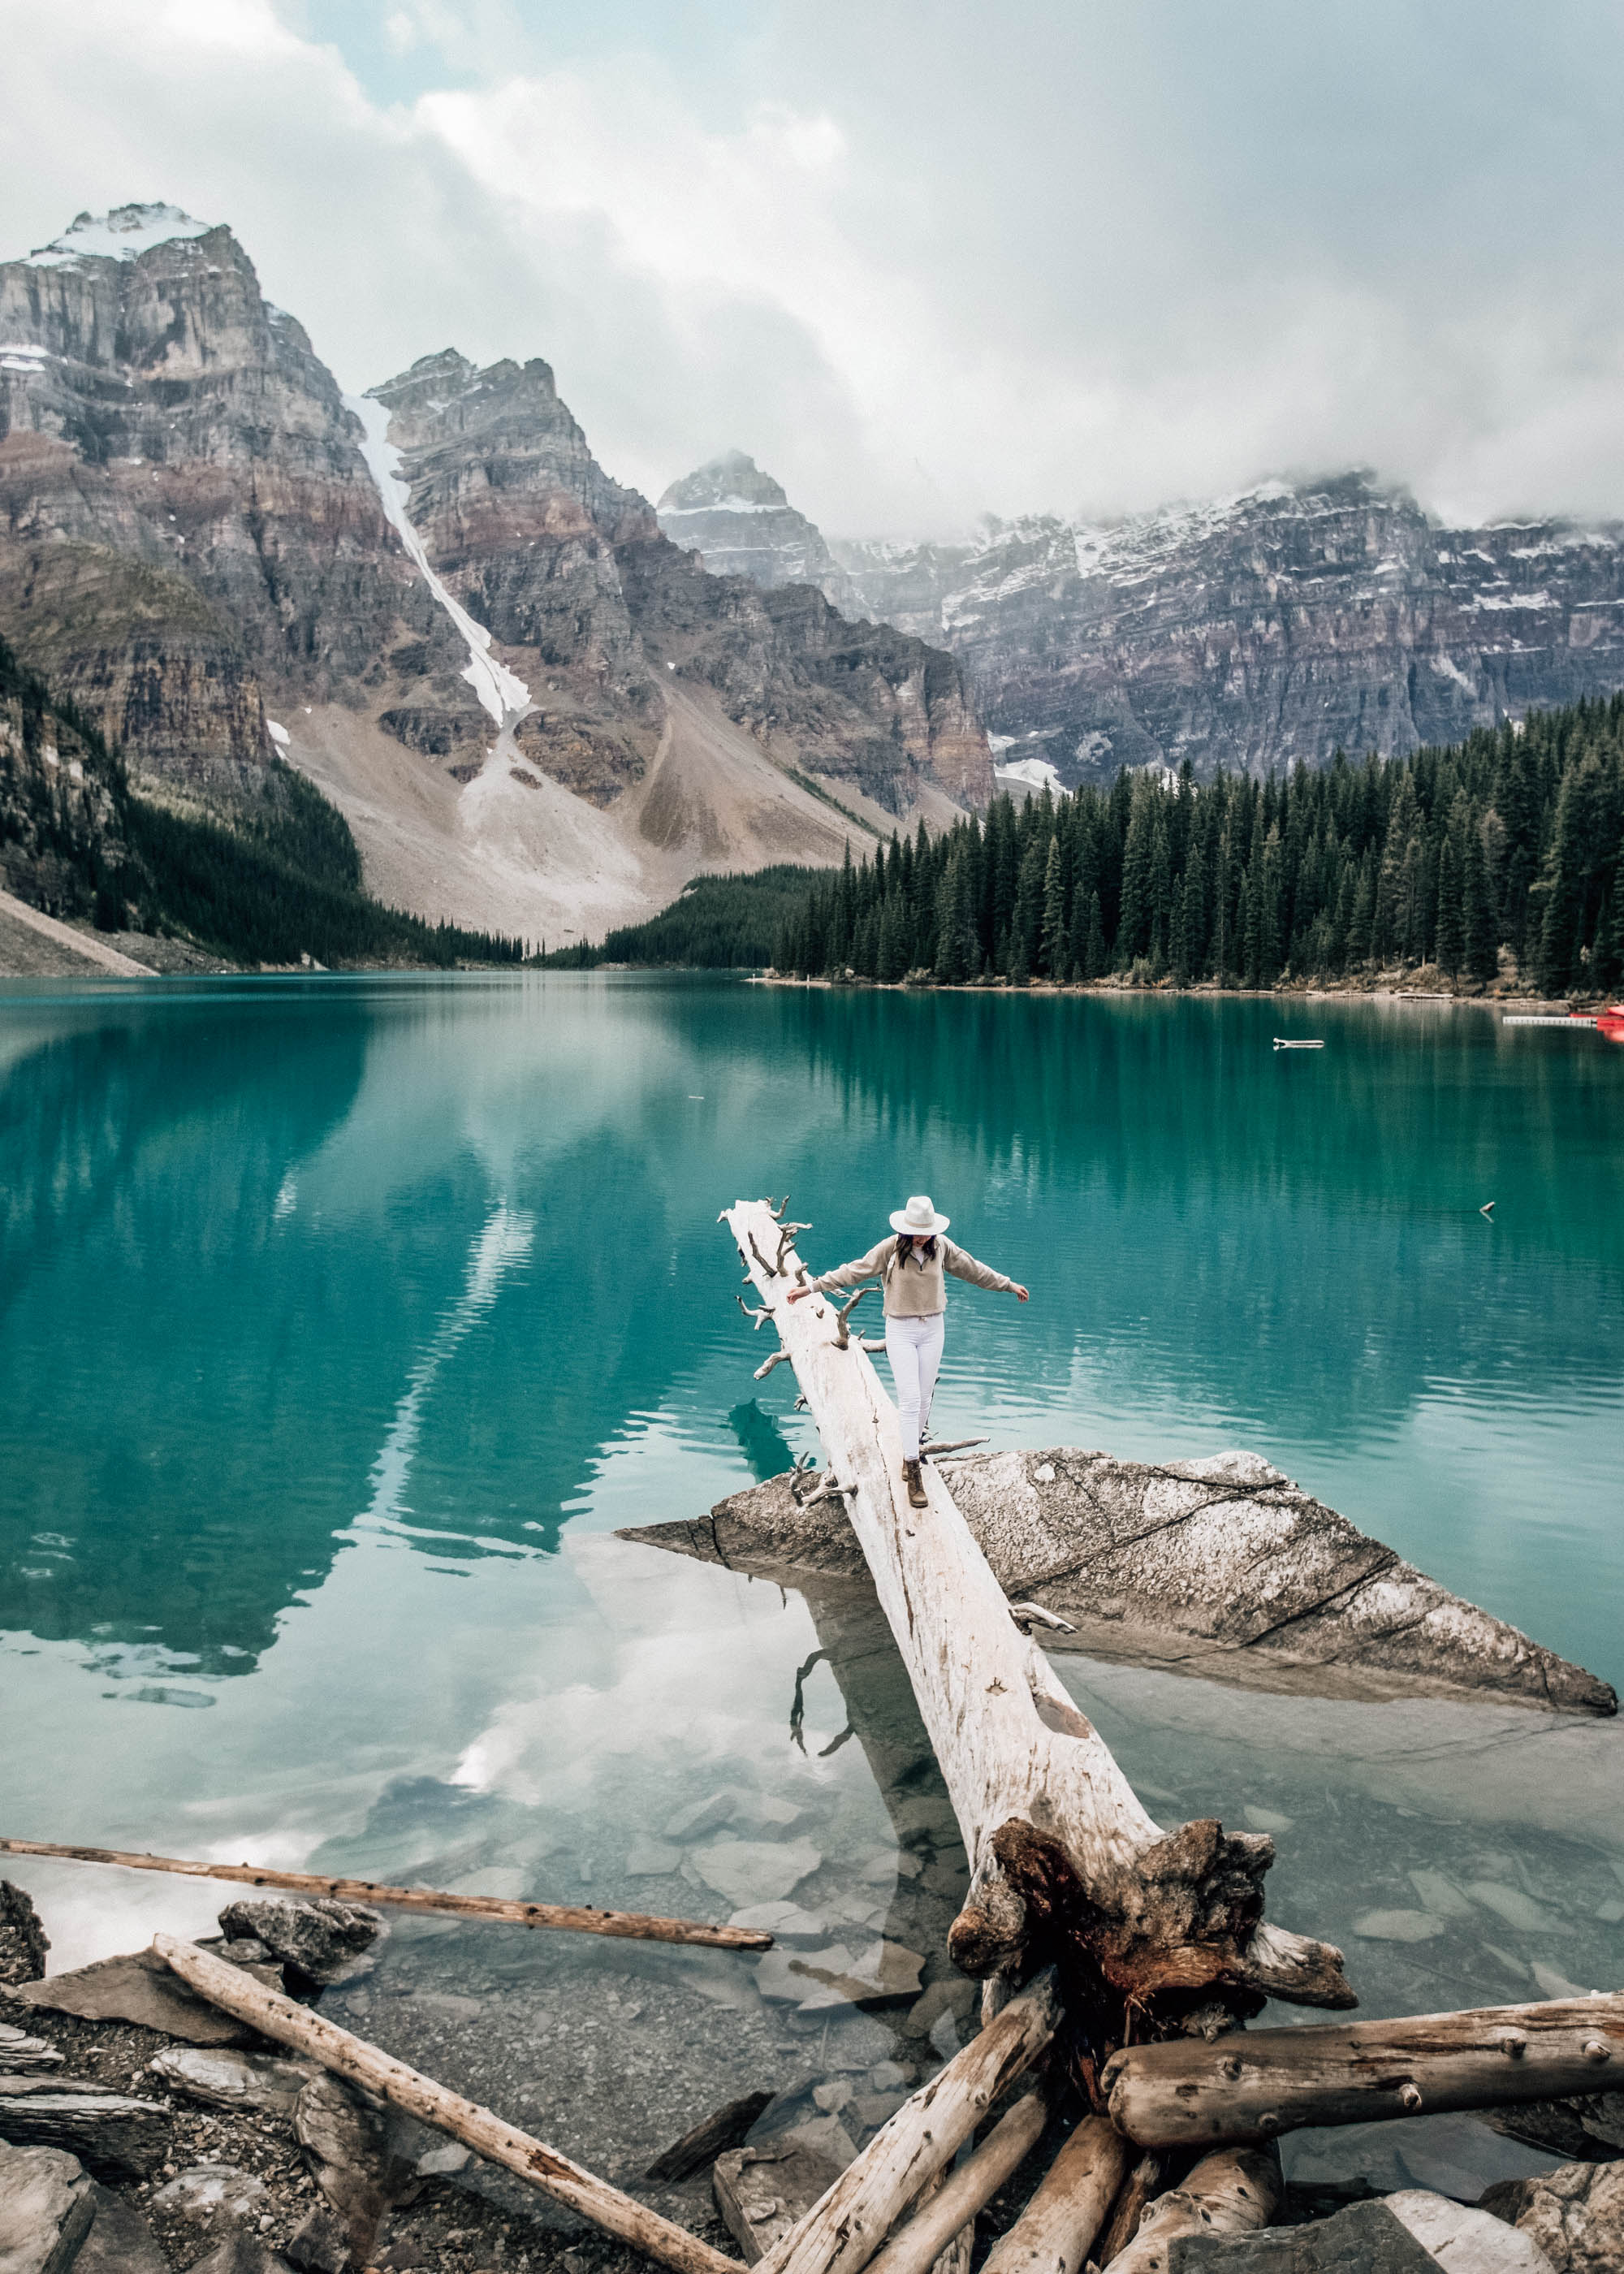
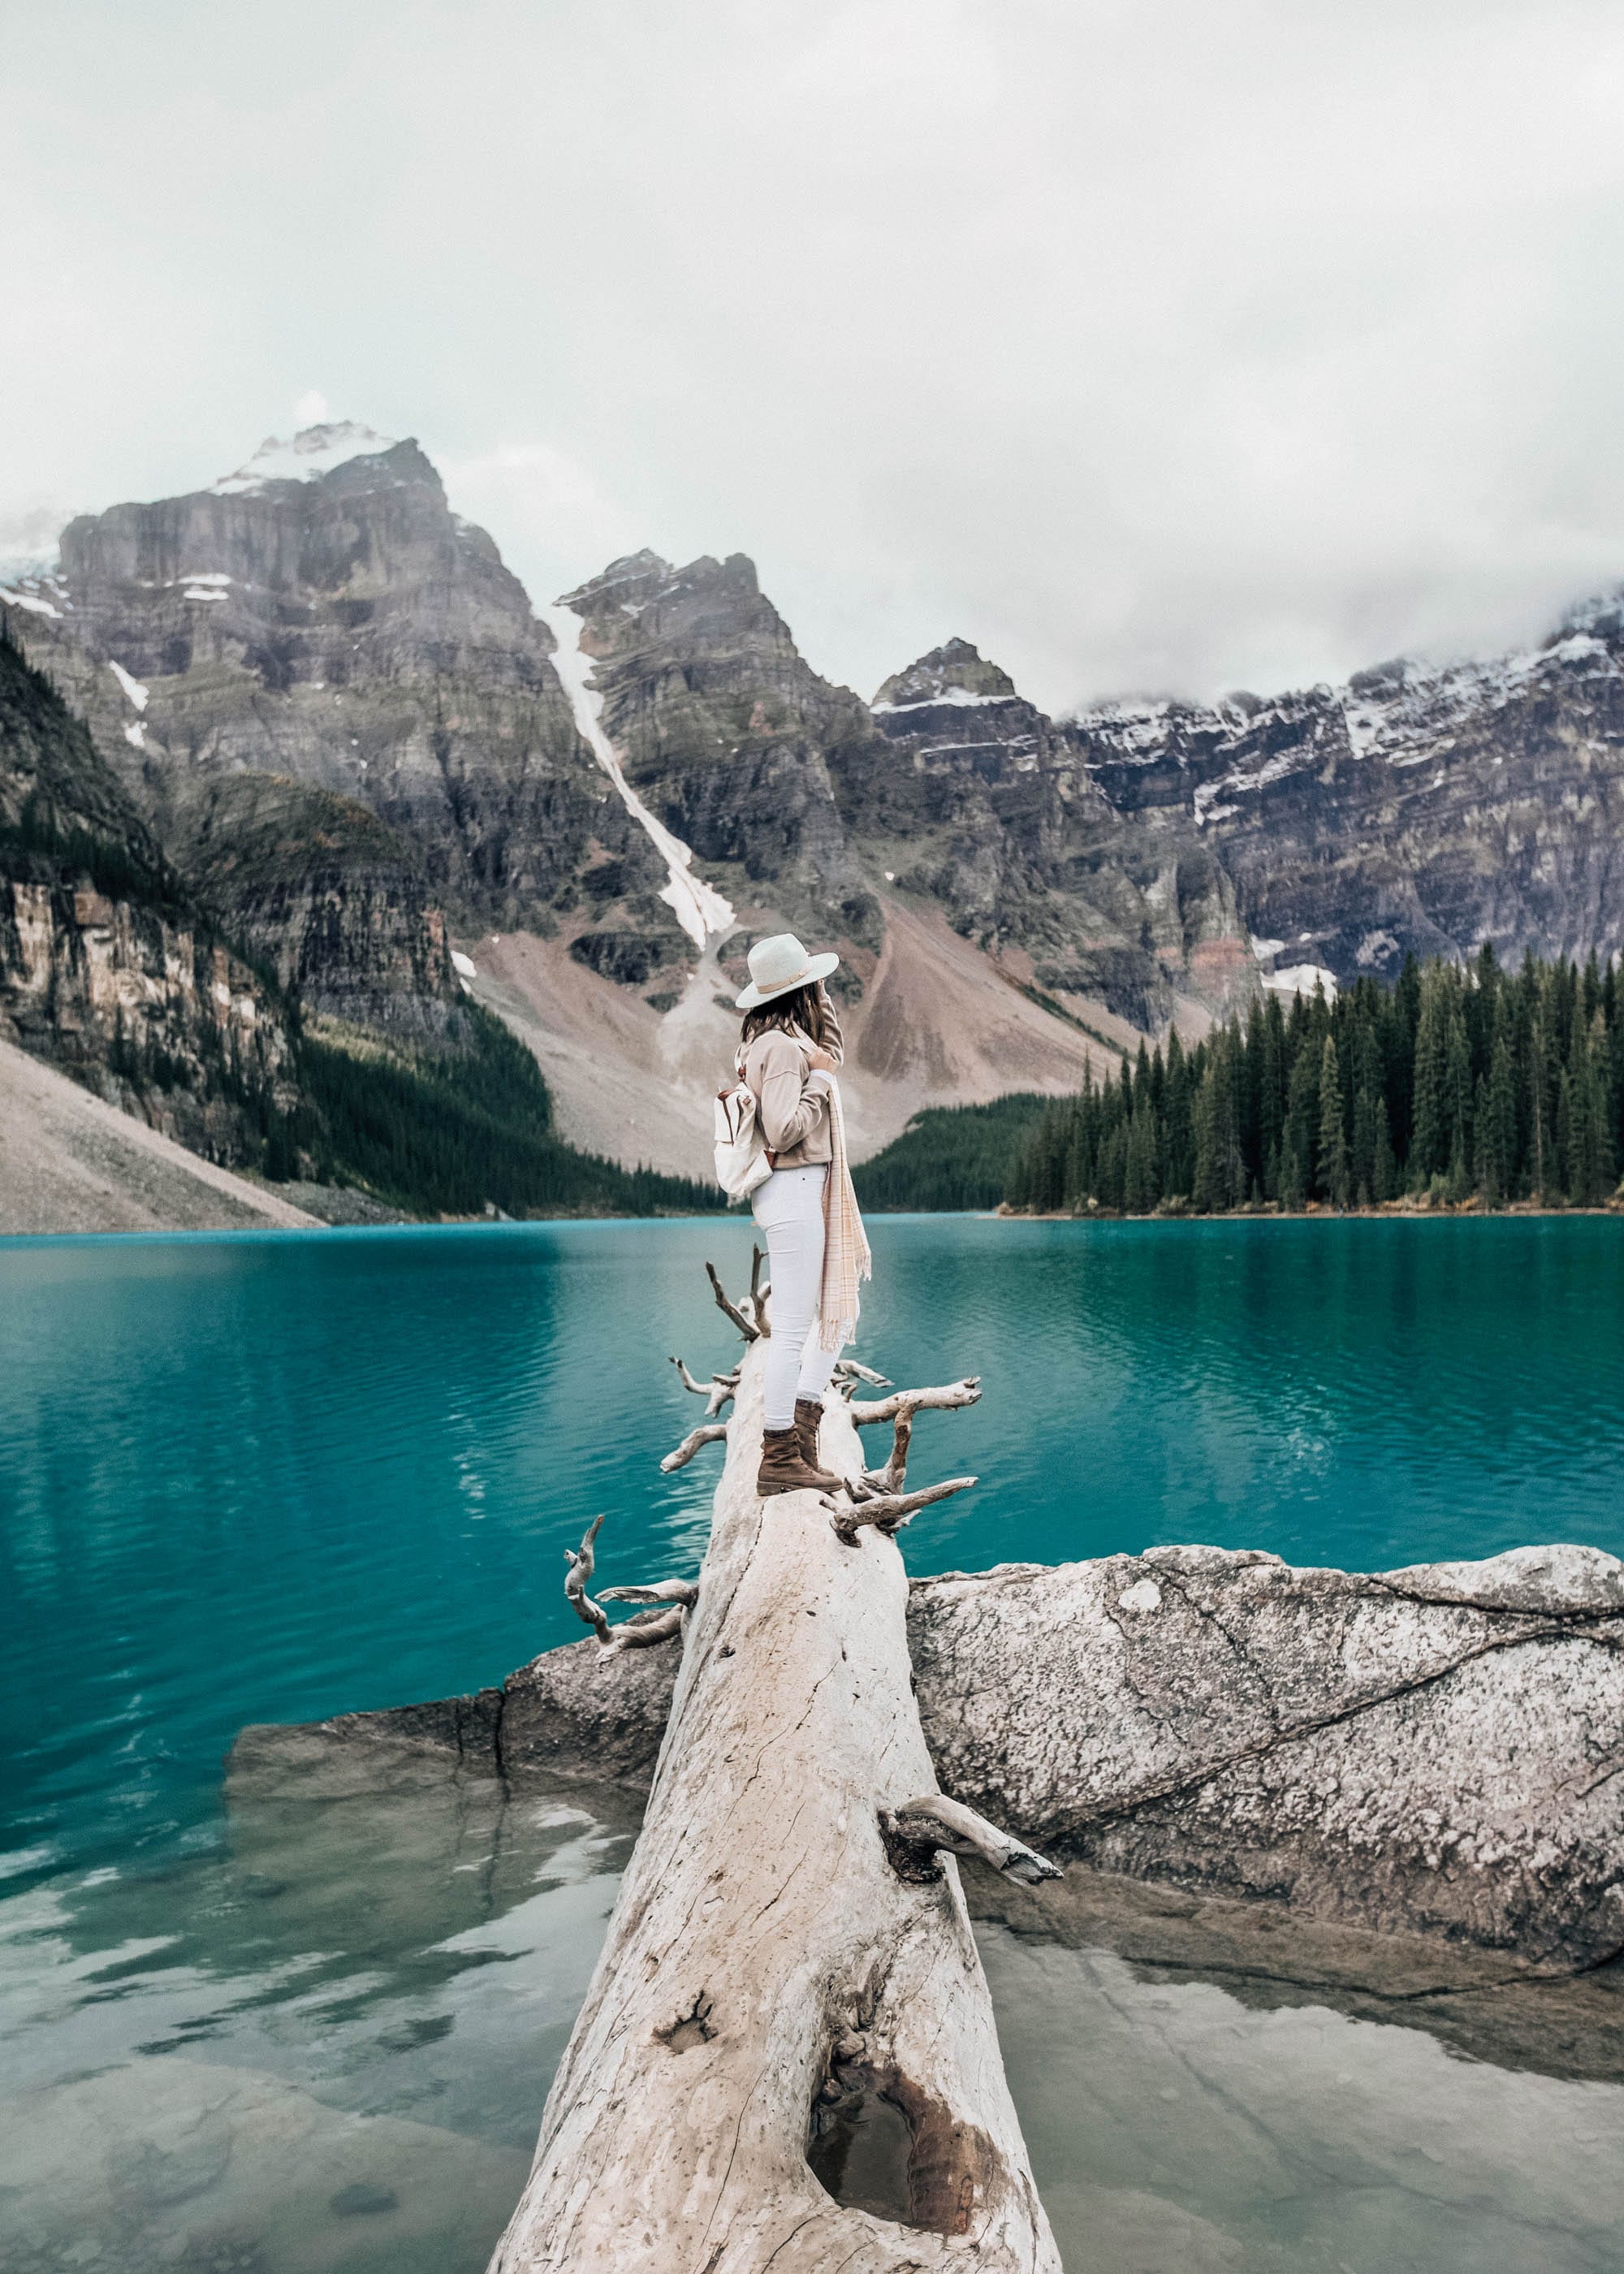
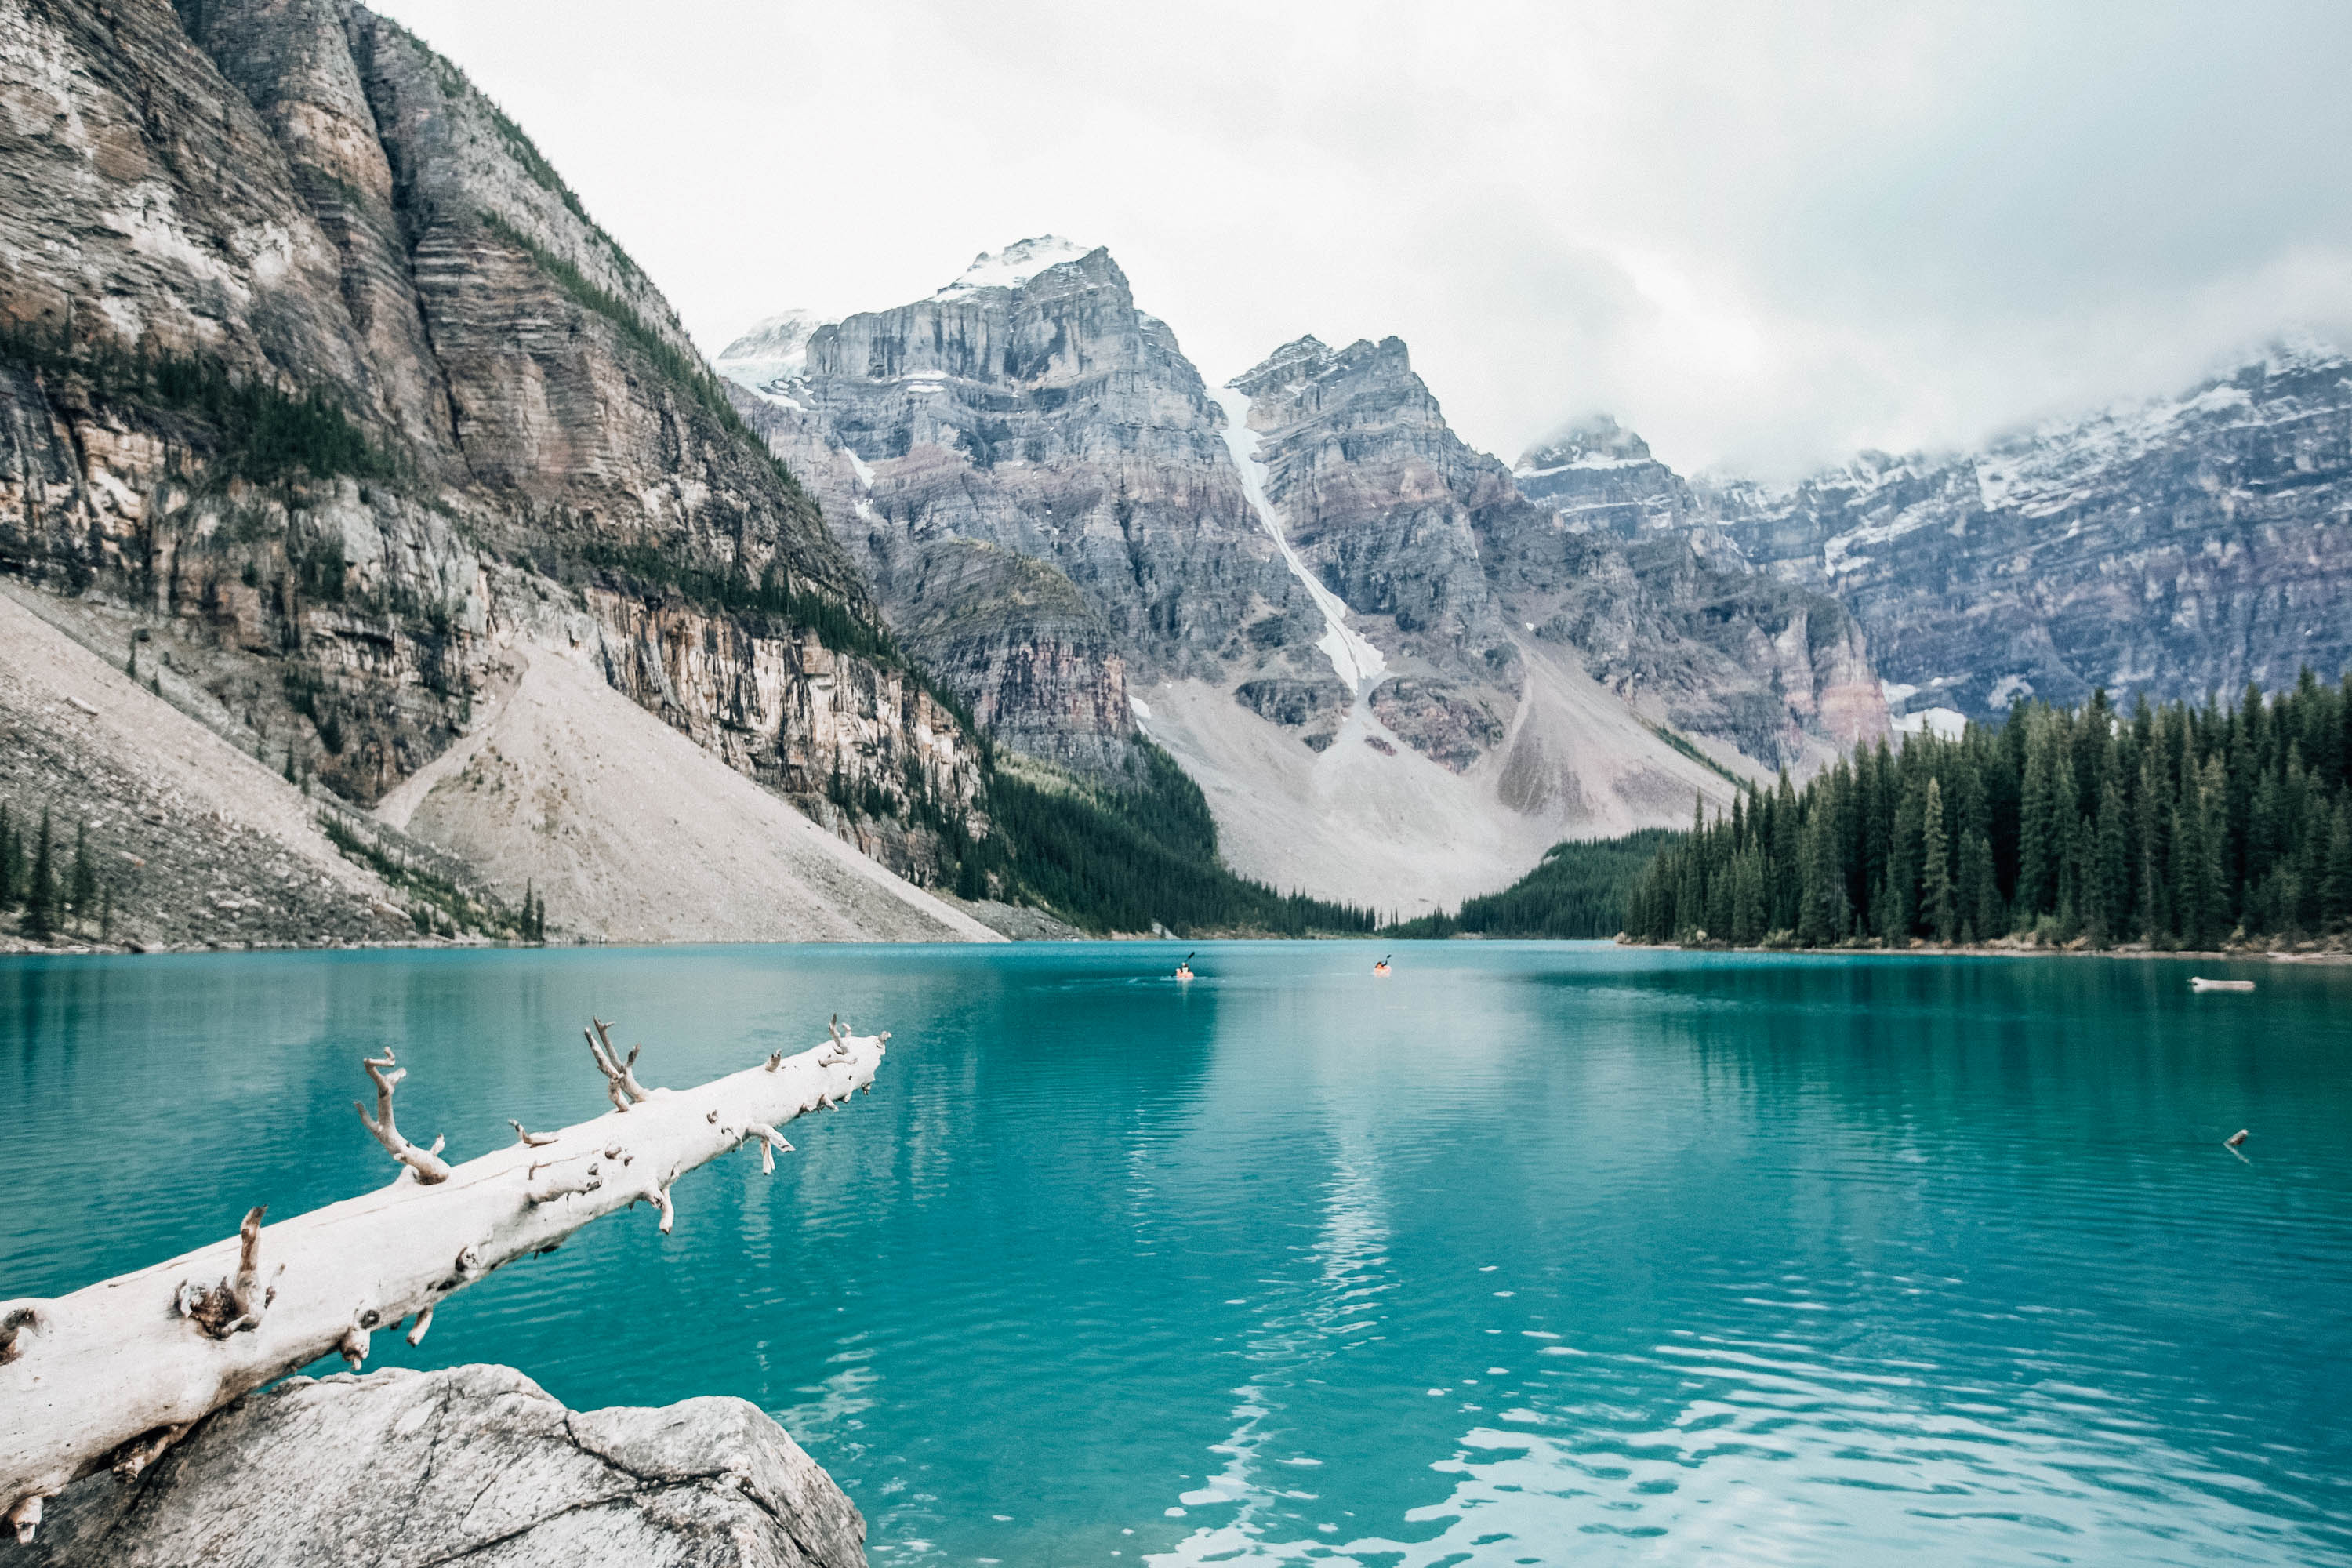
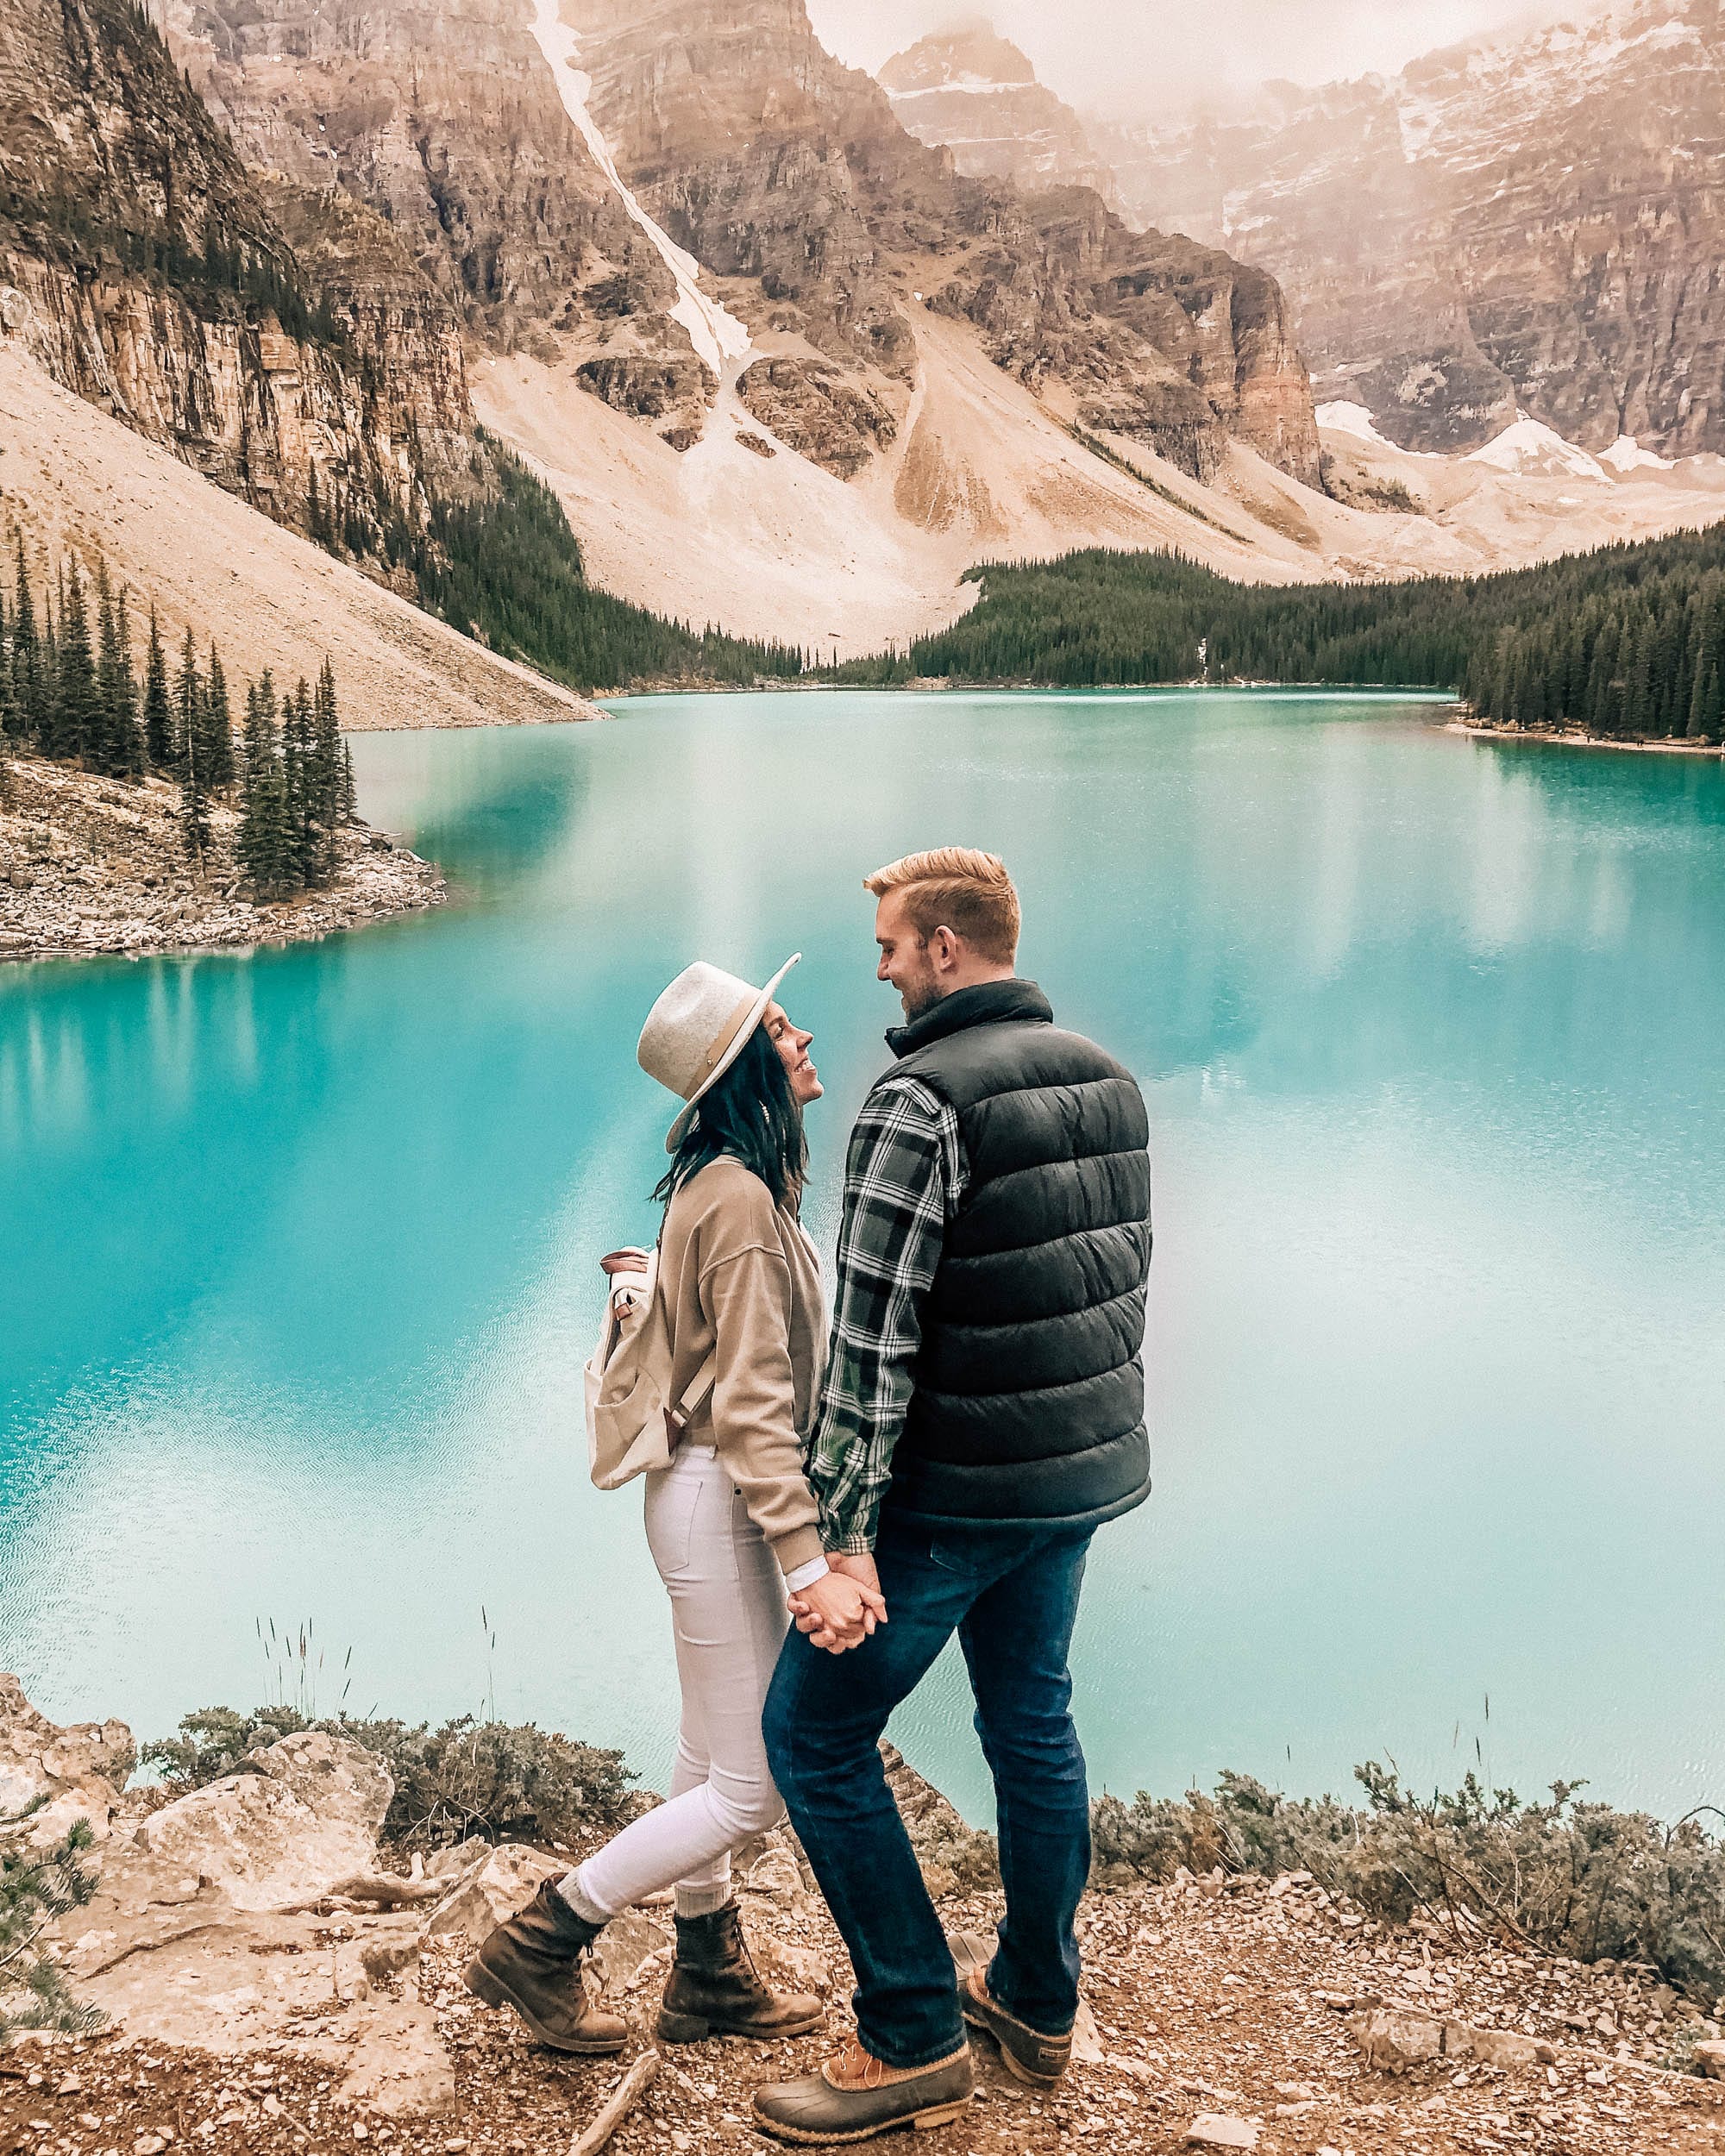
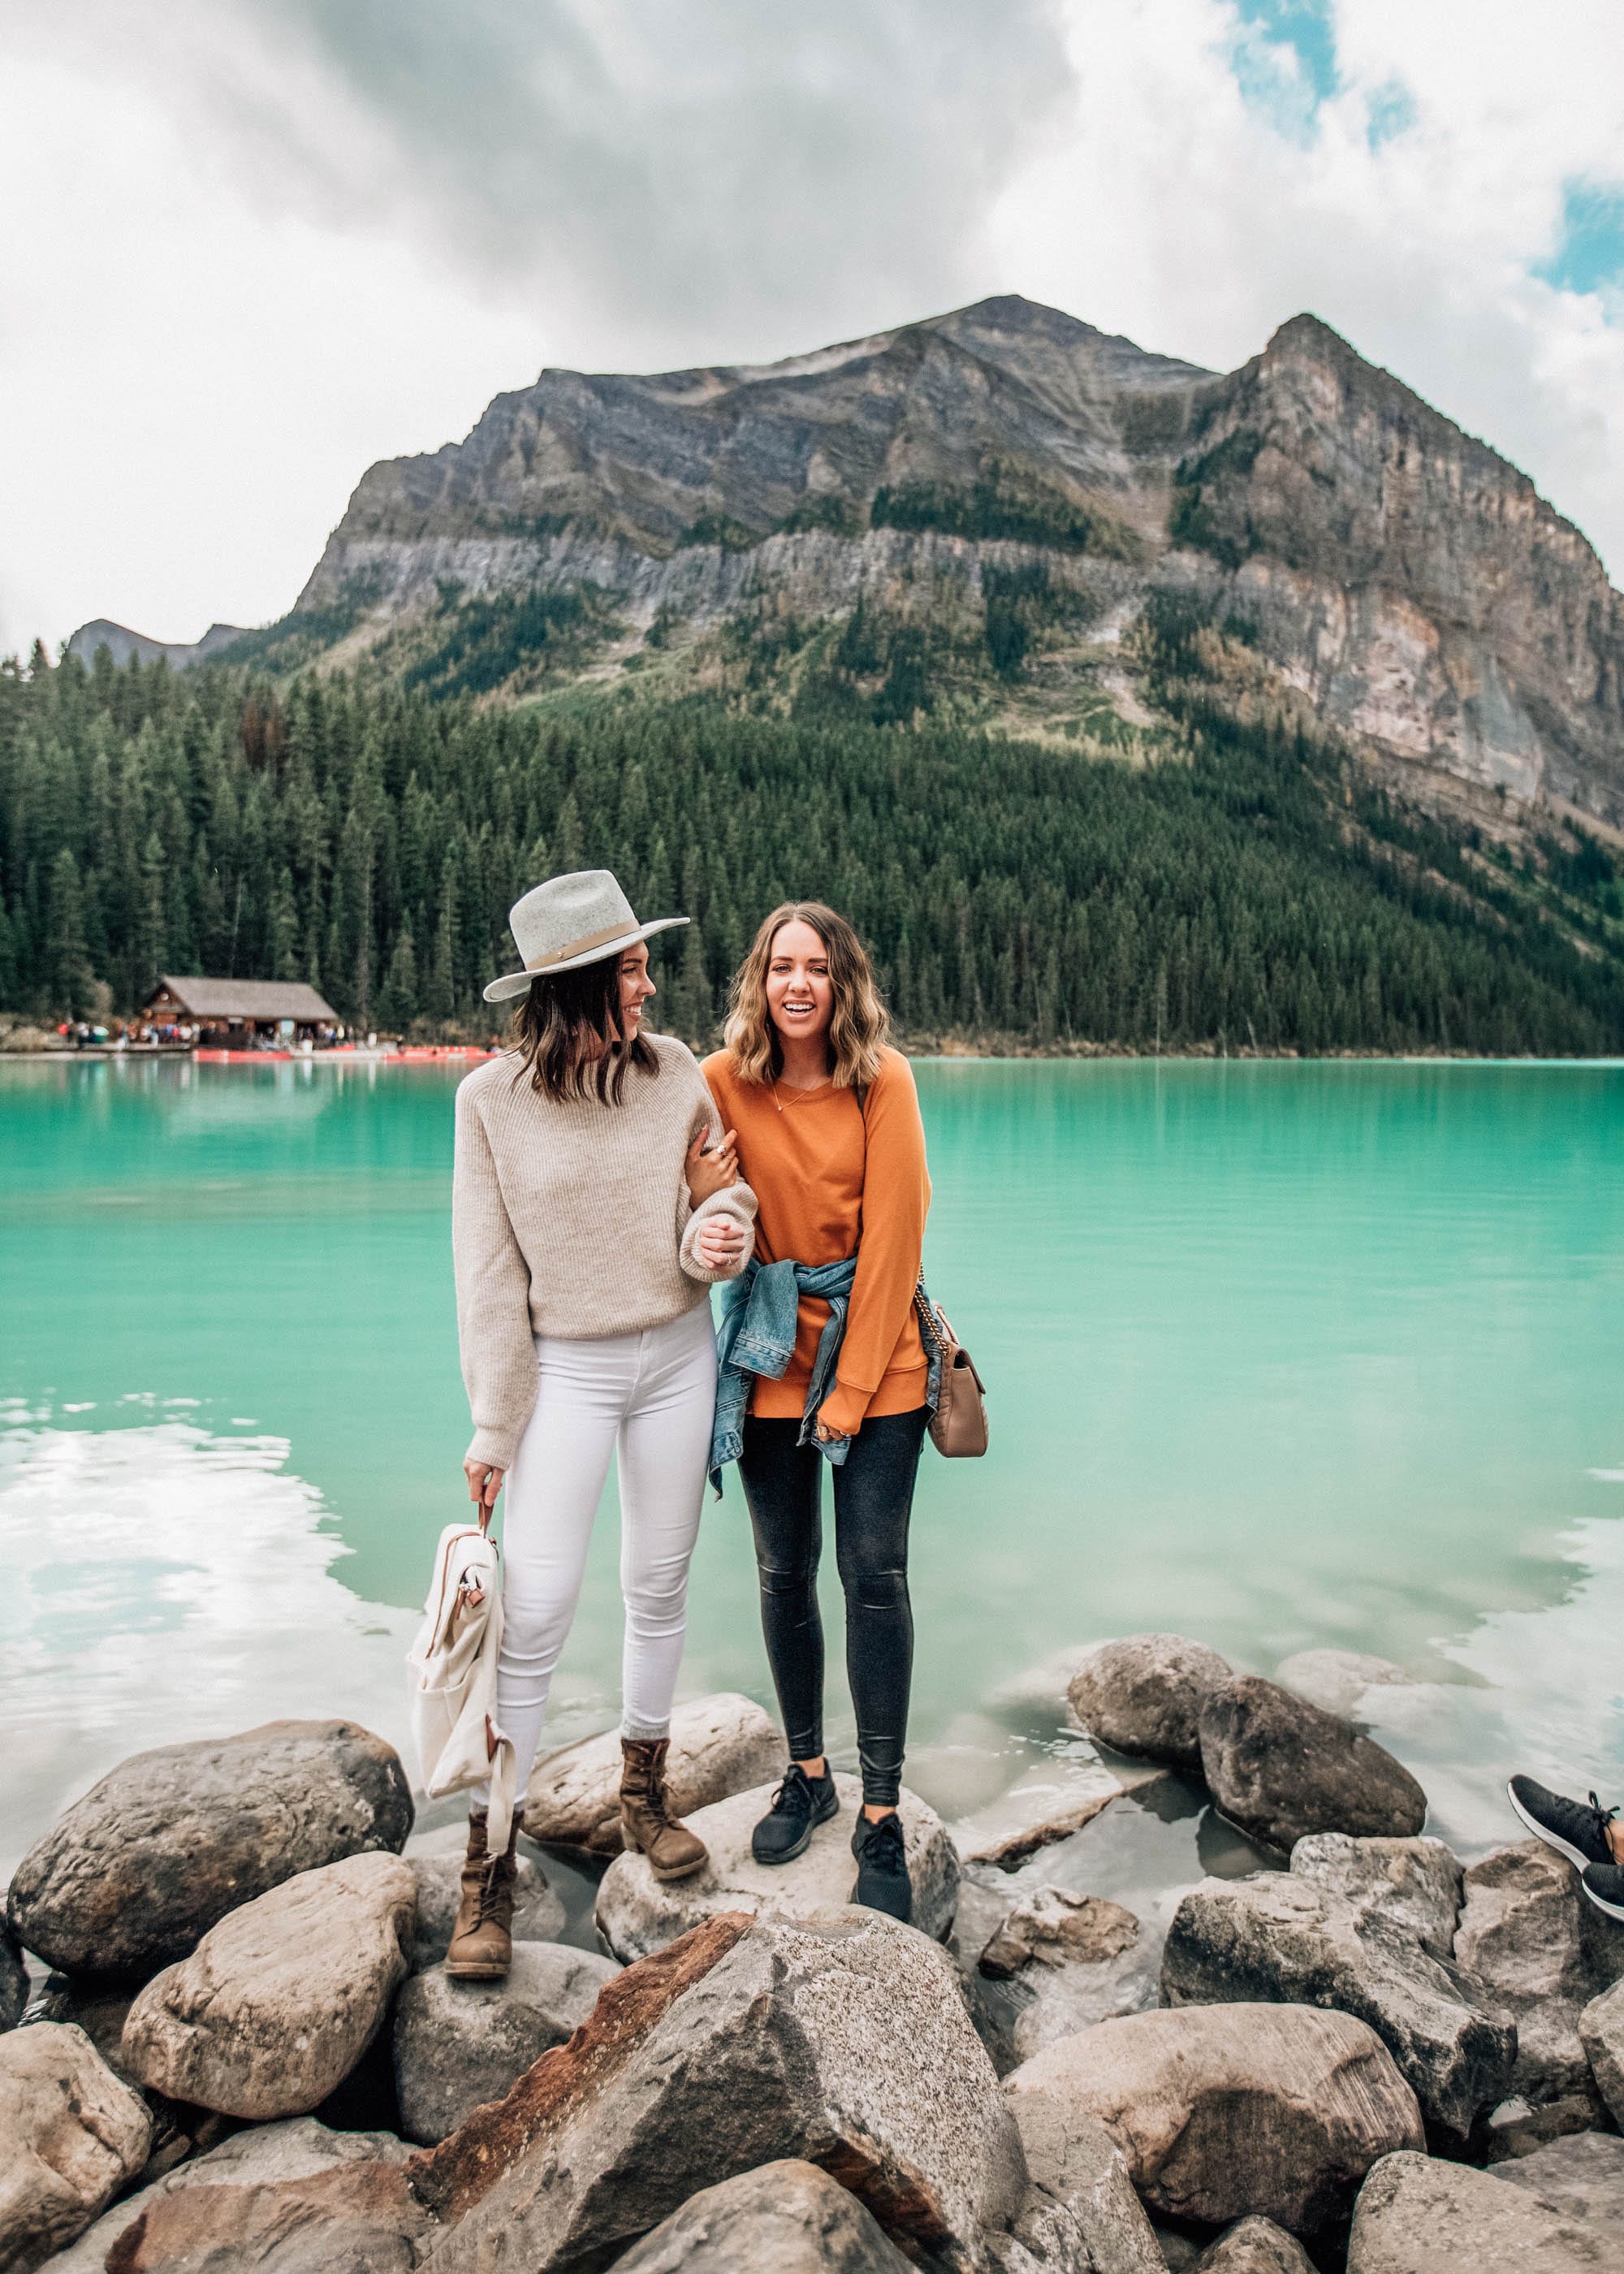
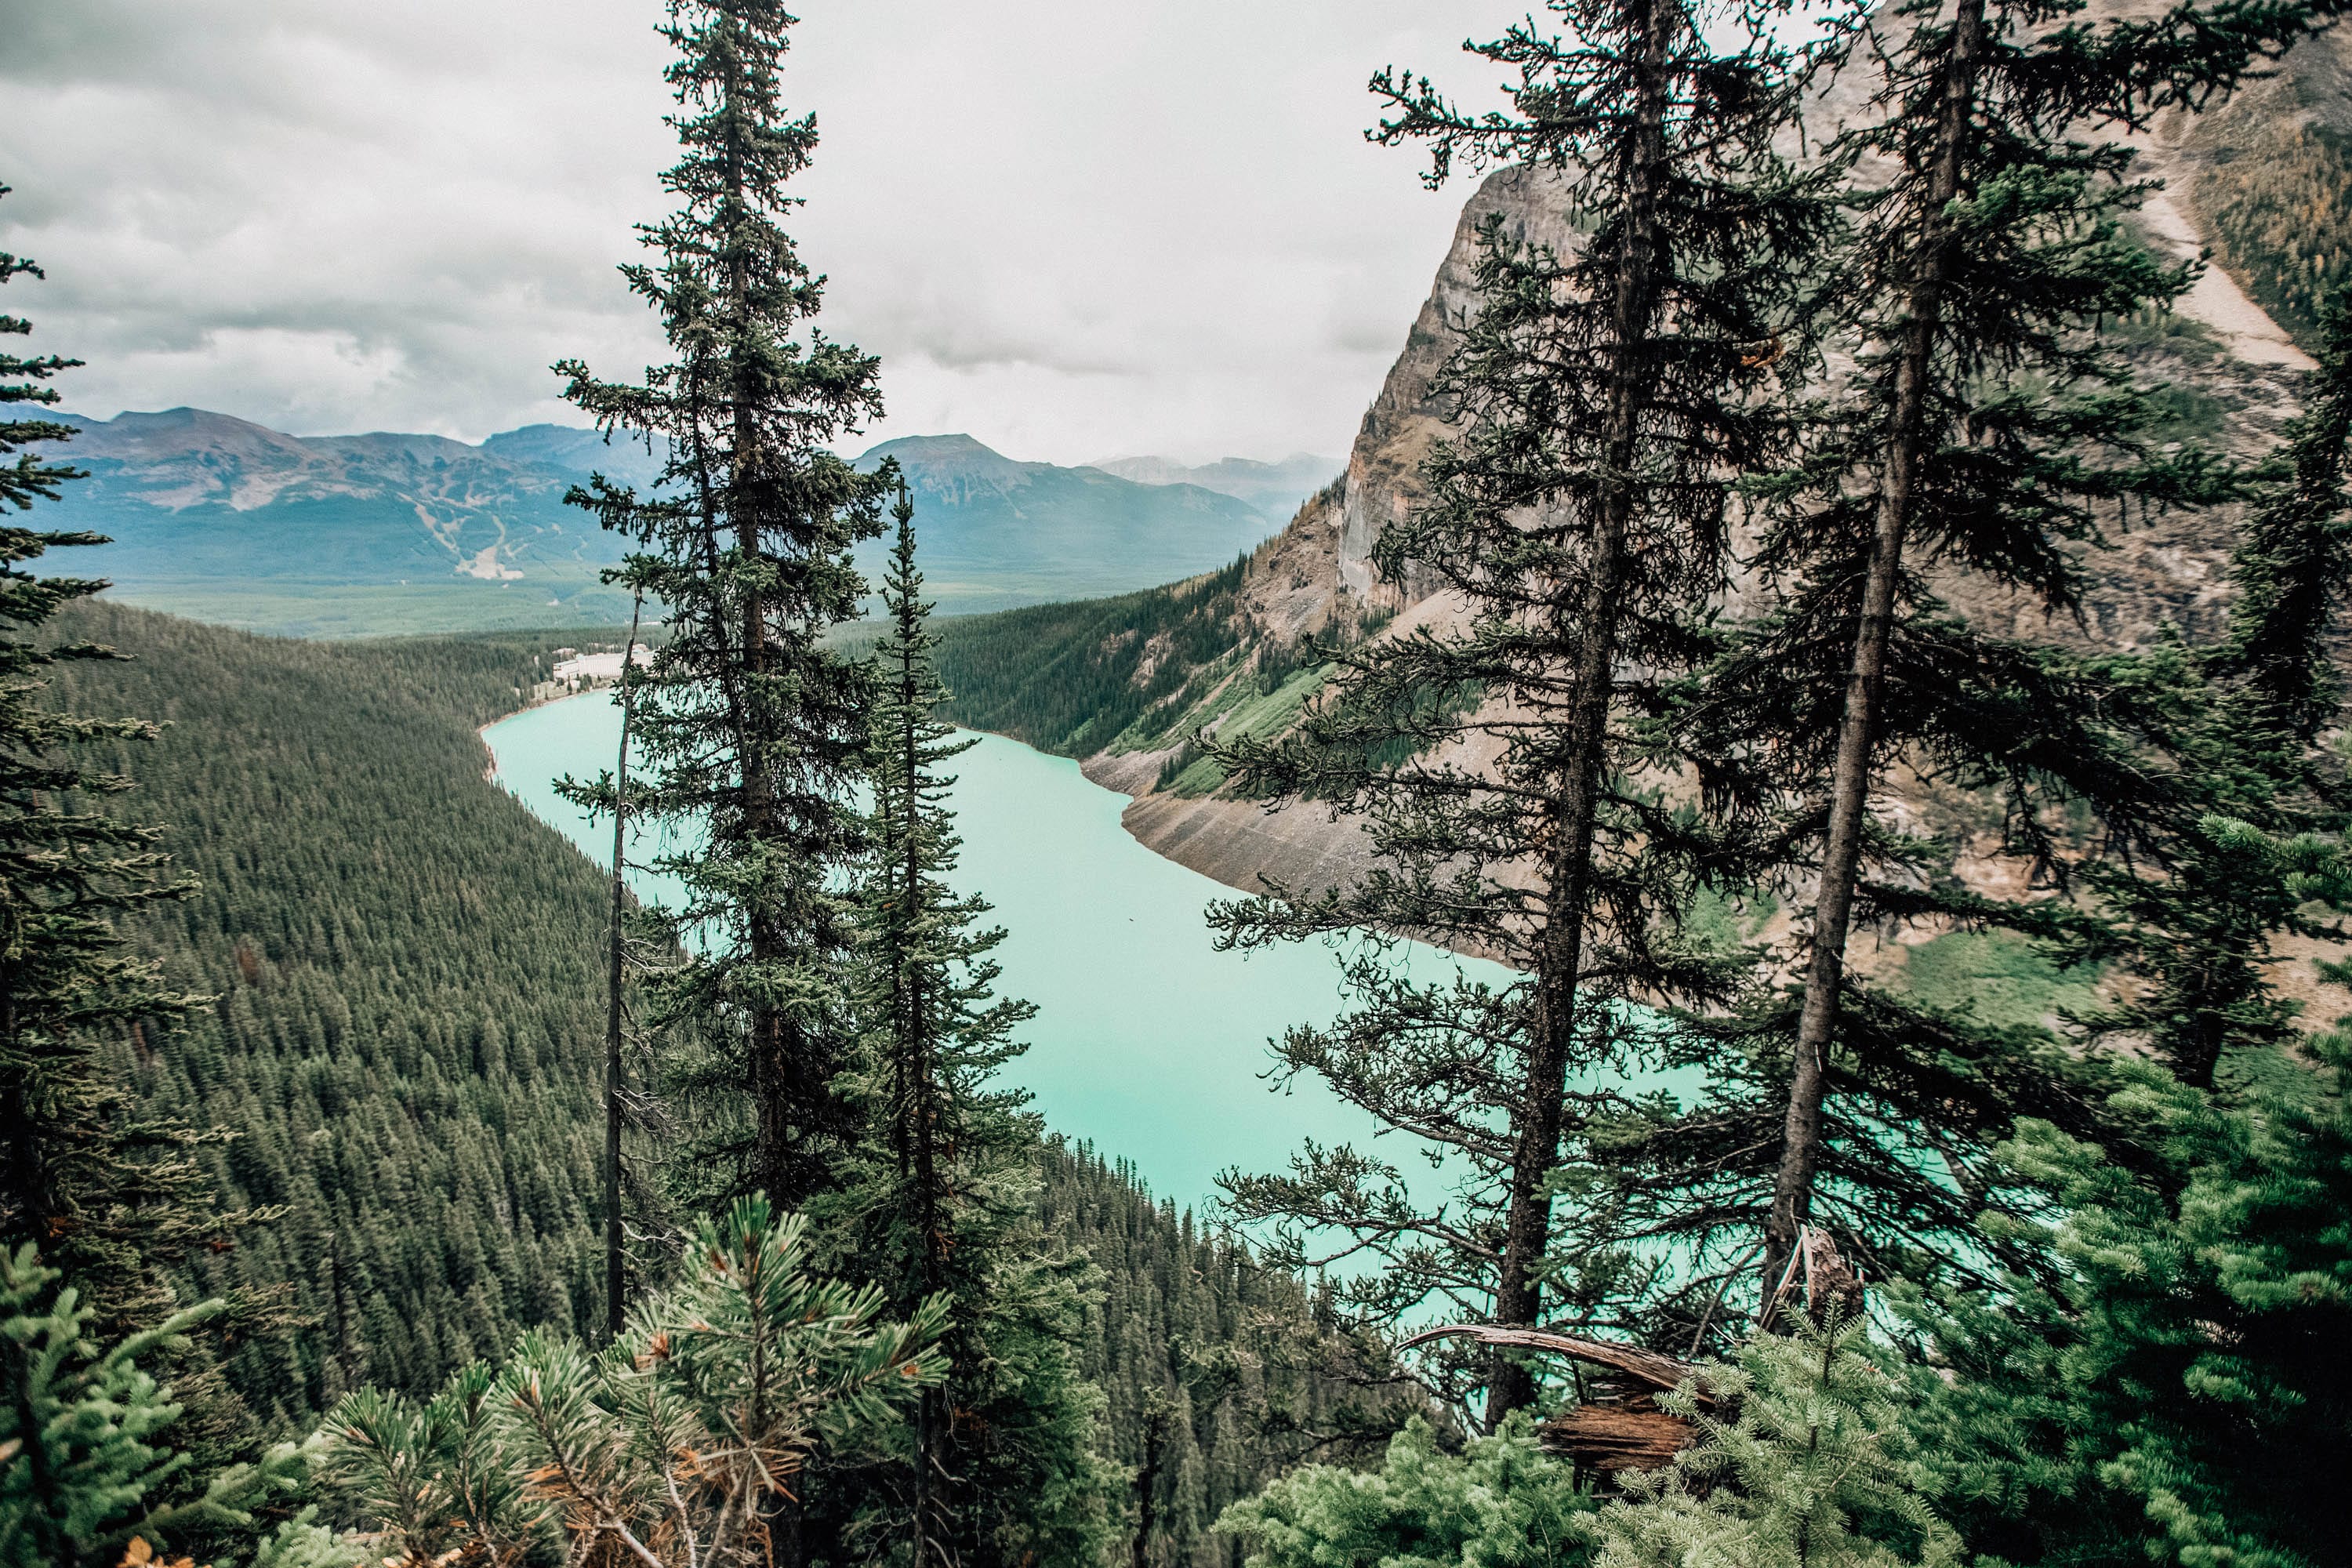
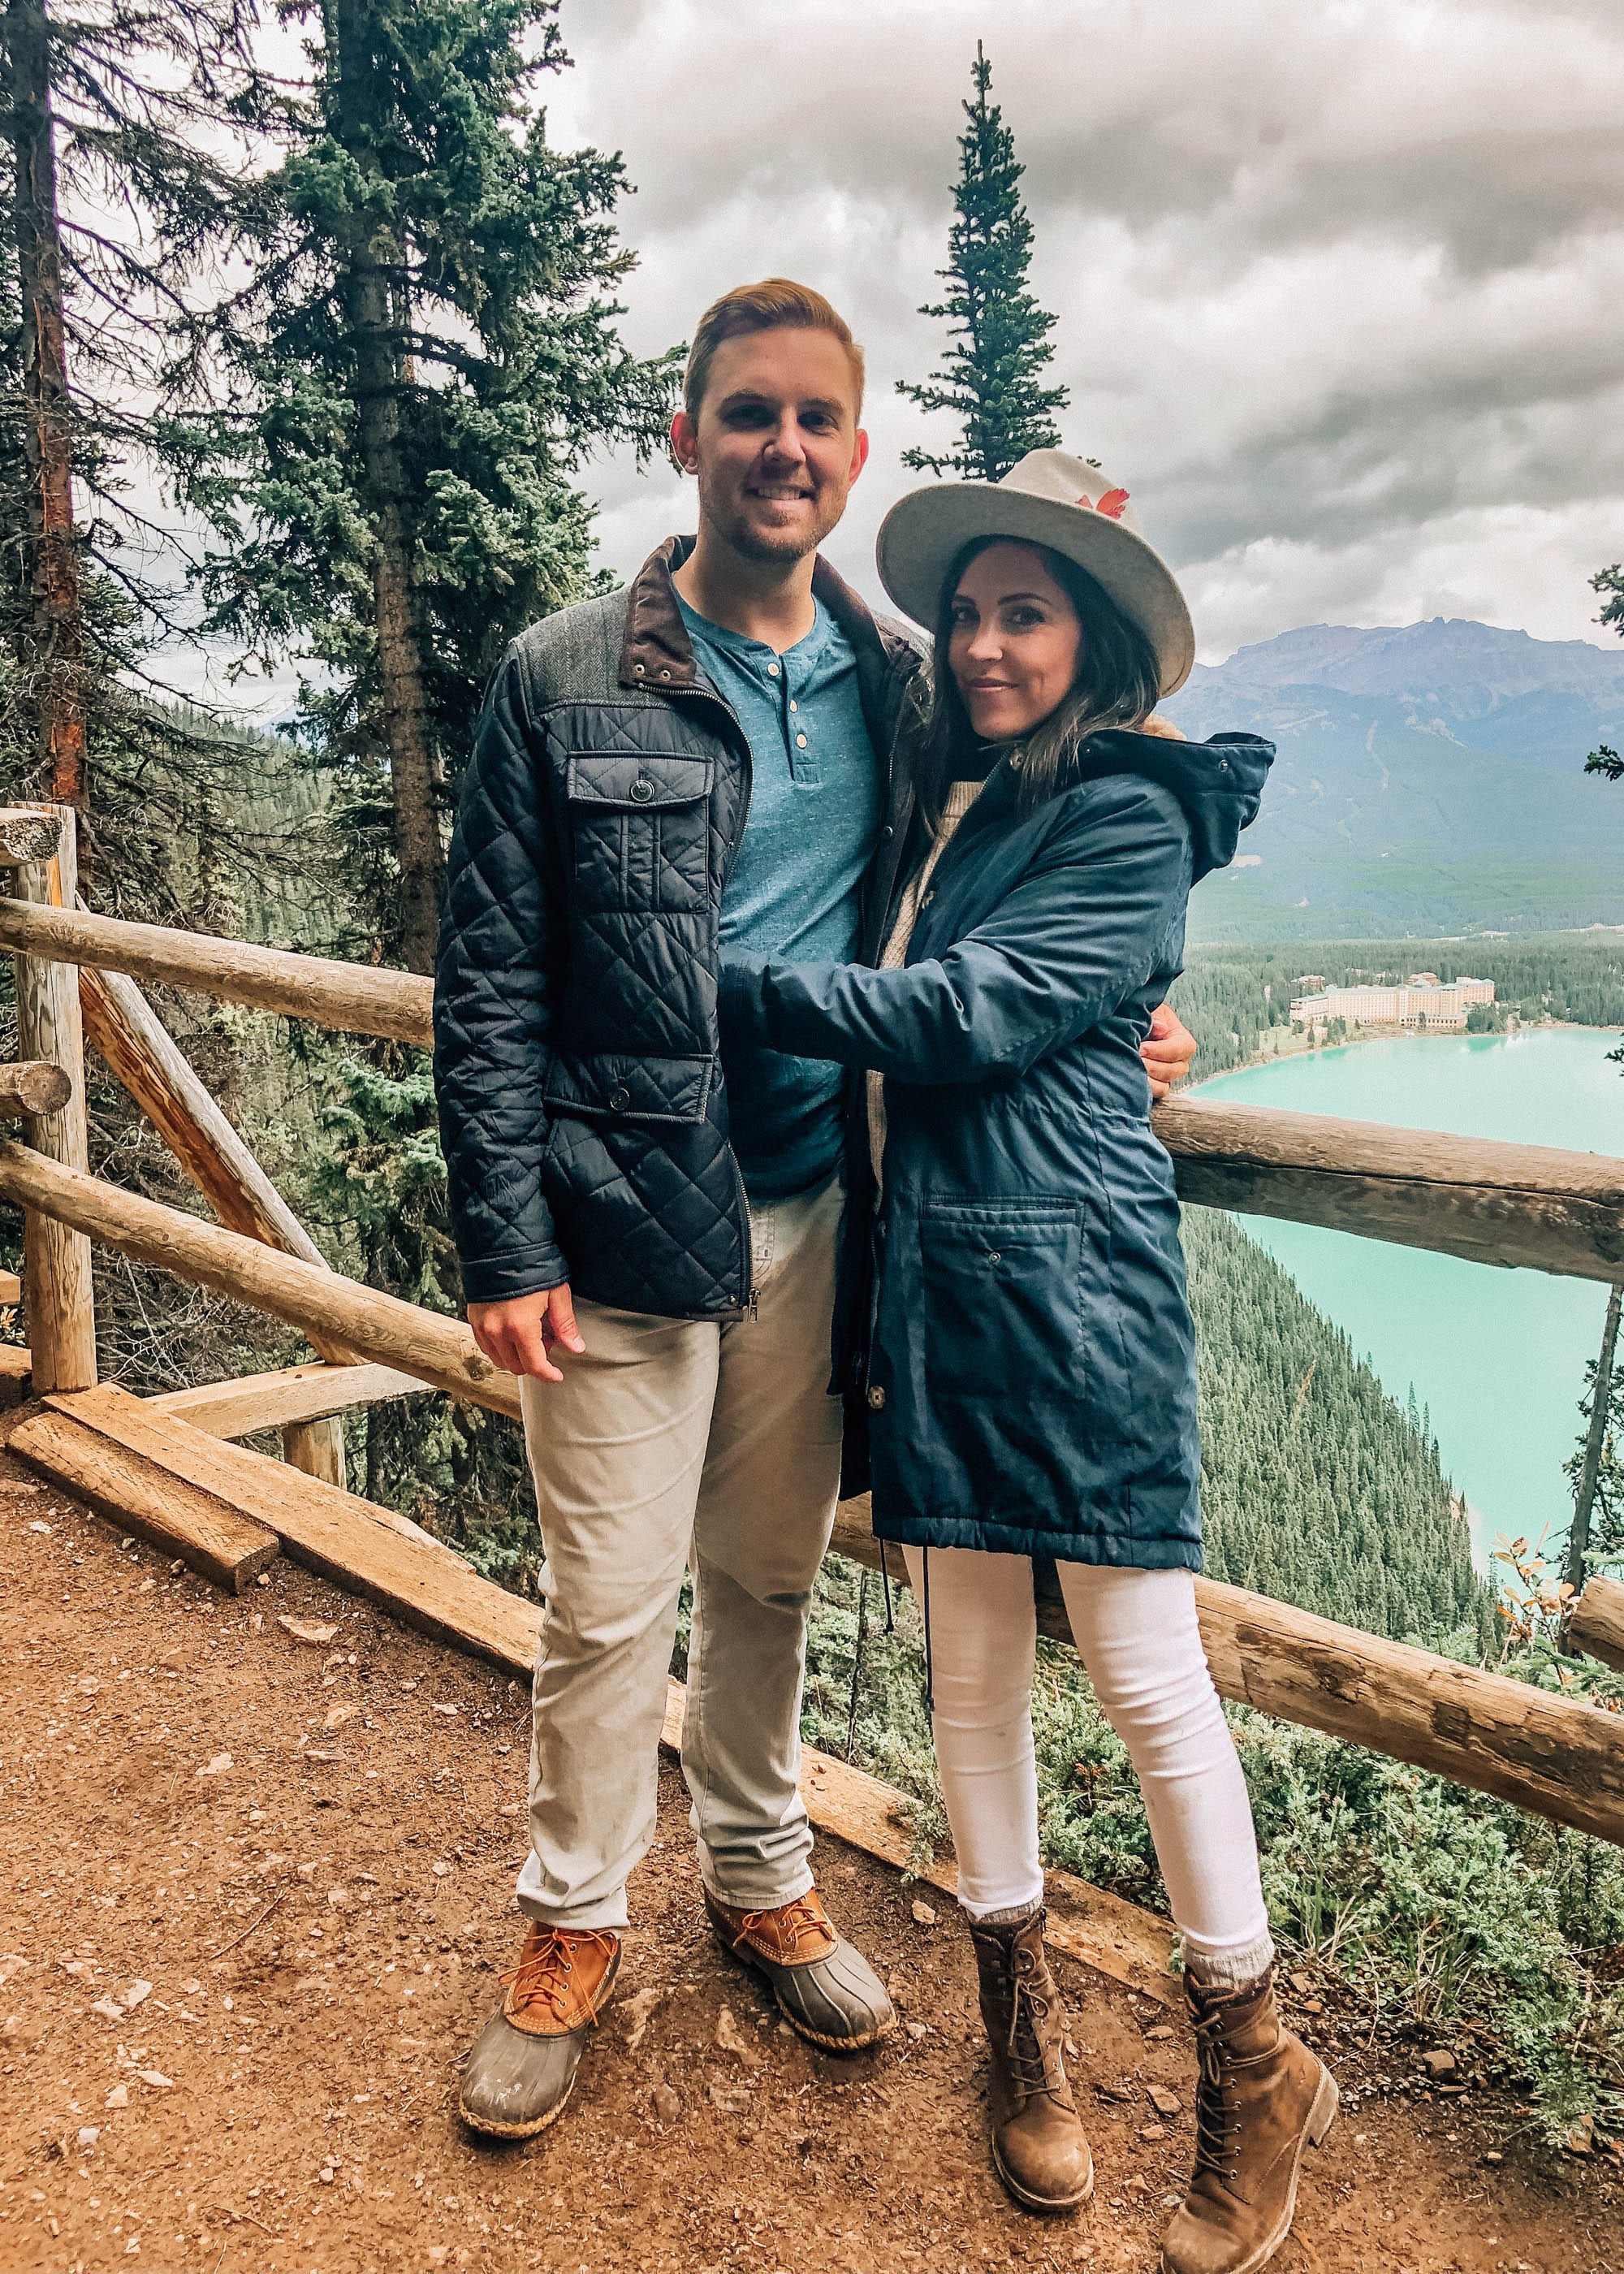
  1. Visit Moraine Lake and Lake Louise (and Peyto Lake if it’s open). The color of the water is breathtaking. 
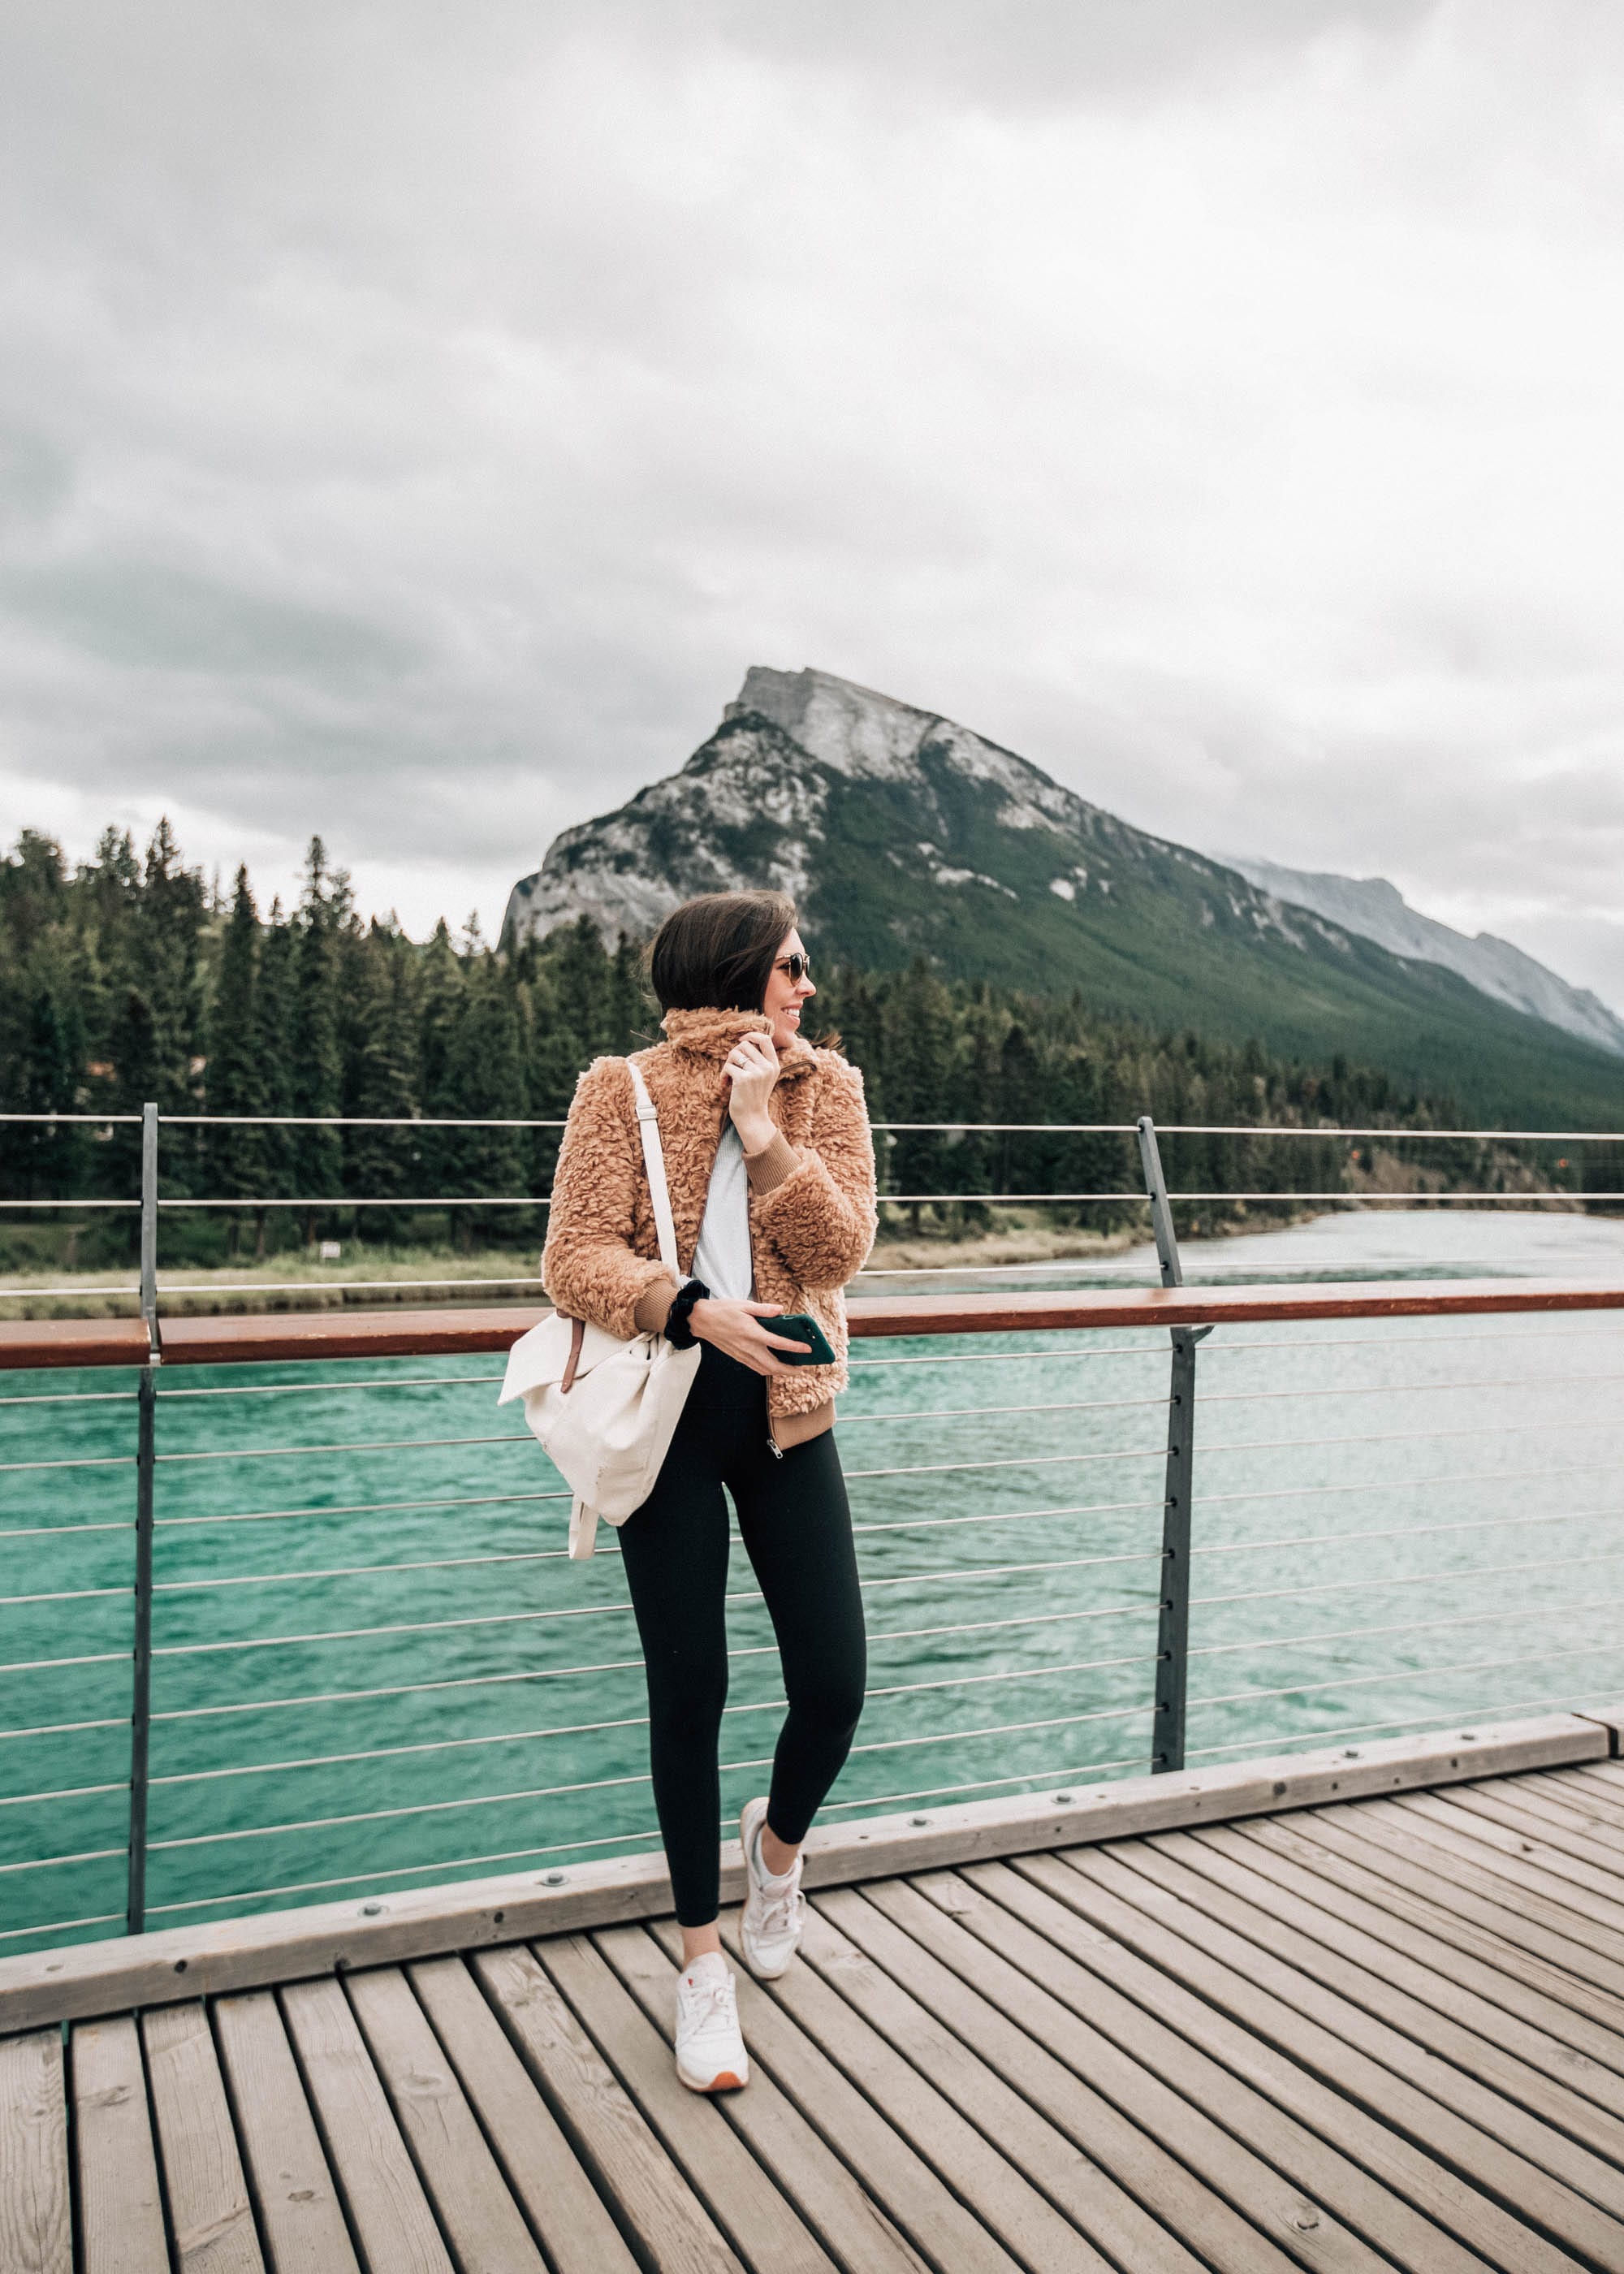
  2. Spend time walking around downtown Banff exploring the town and walking the Bow River Trail!
  3. Eat at the Bison!


Activities you haven’t done, but considered for next time? 

A few things we wish we could have done is gone on the Banff Gondola. We saw it from a distance and the view looked incredible. At the top of the Gondola there is also a restaurant, the Sky Bistro that we heard was very tasty. We only had a quick dinner on the way to the airport in Canmore, but it seemed like there was a lot of fun things to do in the town. We would have loved to spend more time and explore that area. There is also a pretty well known rope swing in Canmore as well.

If I missed any questions, let me know! Also, if you missed our first post about our trip during October, you can read that here.

Happy Friday!

Our Home

Small Dining Area Decor Finds

I’ve shared some behind the scenes videos of our DIY breakfast nook on my other Instagram page but this is the first time I’m sharing a complete look at the finished space! I’ll be sharing some more info on how we took the previous desk and cabinets and turned it into this peaceful breakfast area soon but today I wanted to share a few decor pieces I’m loving for small (or even larger) dining areas. I’ve been searching for a lot of pieces on Walmart’s website ever since they upped their decor game (plus, they’re sister companies with another fave, Hayneedle).

The first piece I found was this Vintage Medallion Fringe Area Rug in a 4×6 size (perfect for a smaller round dining table). It has a very neutral color palette but ties the space together and makes it feel 10x more cozy and not to mention it was only about $60! It is pretty thin compared to other rugs in our house but it works well for a dining space! My exact dining table sold out really quickly but I found a majorly affordable and similar option here

To tie in some more color, I picked up this Sage Stoneware Dinnerware Set for just $25 (also comes in gray) that will go well with every season and also looks great styled on the shelves. For a flatware update, I ordered this set in a matte black finish for under $20 (also comes in rose gold). 

Another great ($10) addition for any kitchen are these towels that come in a set of 3 different neutral prints and look great for any time of year. 

Hopefully this gives you a little bit of simple tablescape or dining area inspiration whether you’re looking for a little something to complete some shelves or even looking for some housewarming gift ideas. You can shop more of Walmart’s home decor options here and I hope you have a great week! 

Thank you to Walmart for sponsoring this post. 

Europe

South of France Travel Diary, Part 2

Incase you missed it, I wrote the first part of our travel diary here. I also added a “France” highlight on Instagram Stories so you can see exactly where we went and our thoughts. Today I’m picking back up with where I left leaving St. Tropez! We woke up Friday morning ready to keep our road trip moving. After a quick stop in centre ville St. Tropez for croissants and coffee, we began the 1.5 hour trip to Cassis to hike in Calanques National Park. The Calanques, translated to the cove or inlet, have beautiful views of turquoise water and a great beach to relax and swim. This was a spot, particularly Calanque d’En’Vau, that we wanted to make sure we got to visit on our trip. Cassis is about 30 minutes south of Marseille and this was not really “on the way” to our next stop but somewhere that I really wanted to go so we decided to do a detour road trip. 

Once we got to Cassis, we stopped in centre ville to get lunch. We ended up dropping in to a bakery for ham and cheese sandwiches and bottles of water for our hike. The entrance to the park is off a very narrow and winding road, a little bit outside of Cassis. As we got to the entrance of the park we were greeted by Park Rangers telling us that, unfortunately, the park and hike was closed due to a fire hazard. In hindsight, we should have checked the park website before heading there as they update the status each morning. 

We asked the Park Ranger if there was any other spot we could go to see the water and he pointed us in the direction of “flat rock”. We parked the car and made the short walk to this little village that had 1 small restaurant and a small bar, accented by this flat rock that had people swimming, sunbathing, and cliff jumping. We set up camp on the rock and chowed down our sandwiches. We ended up staying at the flat rock for a couple hours before heading to our Airbnb in Provence. Even with the Calanques closed, the view at flat rock ended up being spectacular and we definitely enjoyed our time there. 

Our first Airbnb was right outside of a town called Cavaillon. Every Airbnb we stayed at had dogs and it honestly made the trip way better. It felt like a home away from home! The 2 pups at this first Airbnb were so lovable, one named Swift and one named Lola. The house was in the middle of the Provence region and located near some of the top villages on our list to see. It had an apple orchard on site, and TJ and I have our own private room with another family staying right above us. 


We ended up arriving around 5pm from Cassis and settled into our room. We were pretty hungry, so we asked out host for recommendations on dinner and she suggested we head to Menerbes, which was about 20 minutes away. We took her up on her suggestion and made the drive and, luckily, it didn’t get dark until about 10:00pm. The little village was set upon a hill overlooking vineyards for as far as the eye could see. The restaurant we ate at was called Bistro le 5, and it was right at the entrance to the village. There were a few other activities going on in the village (free wine and cheese tasting), but we were already starving, so we went right to the restaurant. The bread, the cheese, the wine, the entrees…. Everything was amazing! If you’re ever in Provence, I highly recommend eating dinner here, even just for a glass of wine and the view! Once we finished at the bistro, we headed back to our Airbnb for much needed relaxation and a good night’s sleep for the following day.  


Each morning, our host made us breakfast that included traditional French foods (croissants, breads, oatmeal, yogurt, fresh fruit), along with the tastiest scrambled eggs. It was so nice waking up, sitting on our private patio, and sipping coffee before starting our day. I could have extended this trip for another week just in this one area and will likely do that at some point in the future because it was just so peaceful. Our first stop was the town of Apt, where there is a well known, large market on Saturdays. Apt was about 40 minutes away from Cavaillon and when we got there it was crazy! Imagine a farmer’s market times 20. We ended up having to park a good distance away and walk into the center of town. We walked up and down the side streets, looking at the produce, goods, and talking with the merchants. I ended up getting some dried lavender to give out as gifts to friends and family, as well as a couple cute baby dresses, while TJ got a new French hat (his second of the trip, lol). 


Our next stop was probably one of our favorites. We headed back toward Cavaillon, but went a little bit farther north to the village of Gourdes. The village was set on a hill (like every village in Provence it seems!) with amazing panoramic views. TJ and I were able to park relatively easily in a lot and walk around the village for a couple hours. There were so many secret side streets, restaurants, and bakeries. To change things up we decided to make dinner at our Airbnb, so we stopped in a bakery and picked up a baguette, ham, cheese, grapes, tomatoes, and wine to have ourselves a feast! Gourdes Pro Tip: the real view is from outside of Gourdes near the resort. You can see all of the tiered ledges, buildings, and landscaping that make this village unique. This village is a must-see!

It was close to the middle of the afternoon when we got back to our Airbnb. We put our dinner ingredients in the fridge and decided to make a quick trip up to St. Remy, which was only about 15 minutes away. We wanted to spend about an hour there before heading back for dinner. St. Remy was very quaint. It is shaped in a circle and the main roads make a ring around the village. We were able to find street parking and headed into the middle of the village. St. Remy had a lot of good shops for gifts, clothes, or travel knick knacks. We were starting to feel the effects of the lack of sleep, so we stopped by a cafe for a much needed latte. We got the lattes (and a cookie!) to go and made our way to a little square to sit down. We were treated to a very French musical artist playing a traditional wind up music box. It was serene!

With caffeine in our systems, we headed back to the Airbnb to make dinner before the evening’s adventures. We made our dinner using what we picked up from the market in Gourdes and played with the dogs before it was time to go Lavender fields. I’ve always loved everything lavender! Soap, ice cream, candles, lattes. I cannot get enough, so I knew I wanted to see the fields in person. There is a town called Sault, which was about an hour or so away from Airbnb. To get to Sault, you have to drive up into the mountains and this drive was very eventful. This was the only part of the trip where I had any sort of anxiety. I thought we were going to drive off a cliff. You couldn’t go more than 35 or 40 miles an hour because the roads were so winding. As we got closer to Sault, we began to see wild lavender fields. There were so many that we pulled over to walk through them and get a few pictures before heading up into Sault. Note: Valensole is one of the other popular Lavender areas but we didn’t want to spend that much time driving there! Next time!


It was a good thing we did! While Sault is the lavender capital of the world, it did not provide very good opportunities for us to really experience the fields. Also, Sault was a ghost town! We got there around 8pm and maybe saw 3 people out in the streets. Most restaurants were closed already, and every store had shut it down as well. It was kind of eerie. Actually, very eerie. We didn’t spend too much time in Sault, but I am sure if you came closer to the middle of the day, there would be a lot more things to do. On the way back to our Airbnb, we stopped a couple more times at the untamed lavender fields to get our last little fill. 

We got back to the Airbnb and packed up most of our things since it was our last night there before heading back towards Nice. We had one final lovely breakfast the next day, said goodbye to the dogs (and our host), and made our way southeast. 


France Travel Pro Tip: At this point we had driven about 500 miles around France and were in need of gas. One thing we quickly learned is that American debit and credit cards do not always work at French gas stations. Also, not all gas stations take cash. We had a crazy hard time trying to find a station that took cash, so be prepared if you rent a car. 

SHOP ART PRINTS FROM THE TRIP:

[show_shopthepost_widget id="4537961"]
Our Home

Neutral Throw Pillows on a Budget

I’ve been meaning to refresh a few of our throw pillows lately but knew I wanted to keep them neutral and textured while still being under a certain price-point. After a couple of years, that’s the downside of light colored pillows that don’t have detachable covers that you can easily wash… they just start to look dirty and old, especially with two dogs! Luckily, I came across some beautiful pillows for such a great price along with a few other bedroom decor finds at Walmart and am so happy with all of them! The quality, the fabrics, I’m really impressed! Because these are so versatile, I can incorporate them into my fall and winter decor too or switch out some in a guest bedroom or living room/breakfast nook when needed.

Another recent find I’m so excited about are these 2-tone wood and white frames! I picked one up in every size to decorate other areas of our house too and can’t wait to share more of those!

I’ve included a few more of my favorites below:

MORE DECOR FINDS:

Thank you to Walmart for sponsoring this post.

Follow us on Instagram