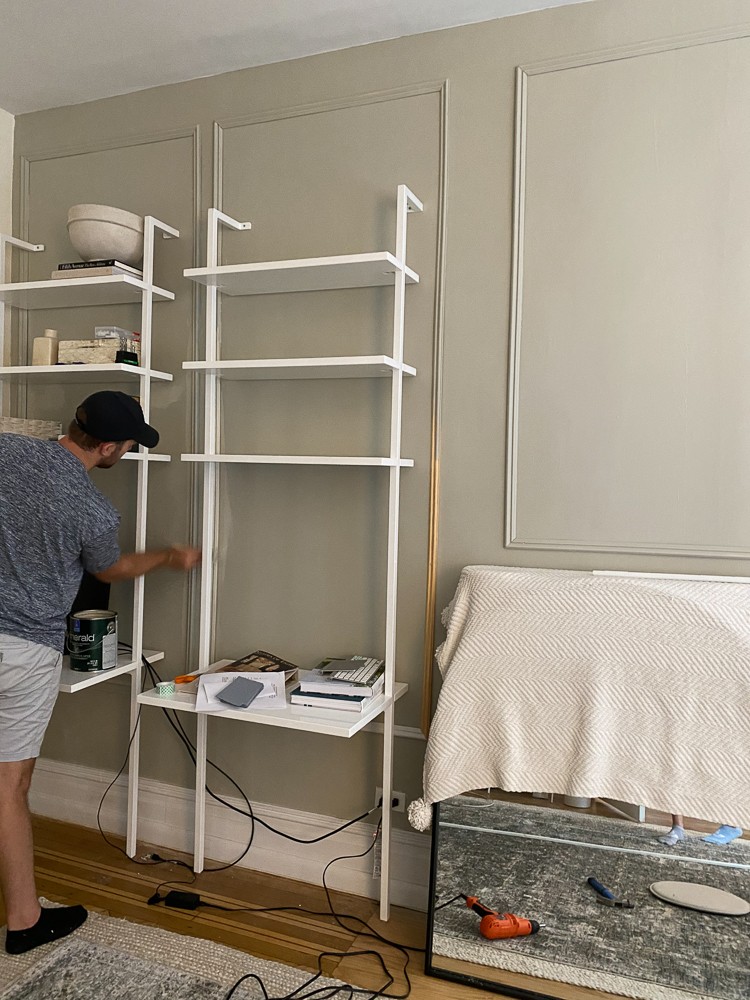
We’ve have a lot of empty wall space in one specific room in our apartment and, for months, I’ve been thinking about how I can add more character while keeping it reversible and something I can potentially take with us whenever we decide to no longer rent. We wanted to do something that would make a statement, but also be budget and renter friendly. First, since this is multi-purpose room/office, we set up some desks from CB2 on one side of the room. This has been TJ’s office for the past couple of months and I finally got my matching desk a couple weeks ago. We have been able to work here together during the day, but also not impose too much on each other’s work space. Now we are just waiting on the desk chairs we ordered back during a big sale a couple of months ago.
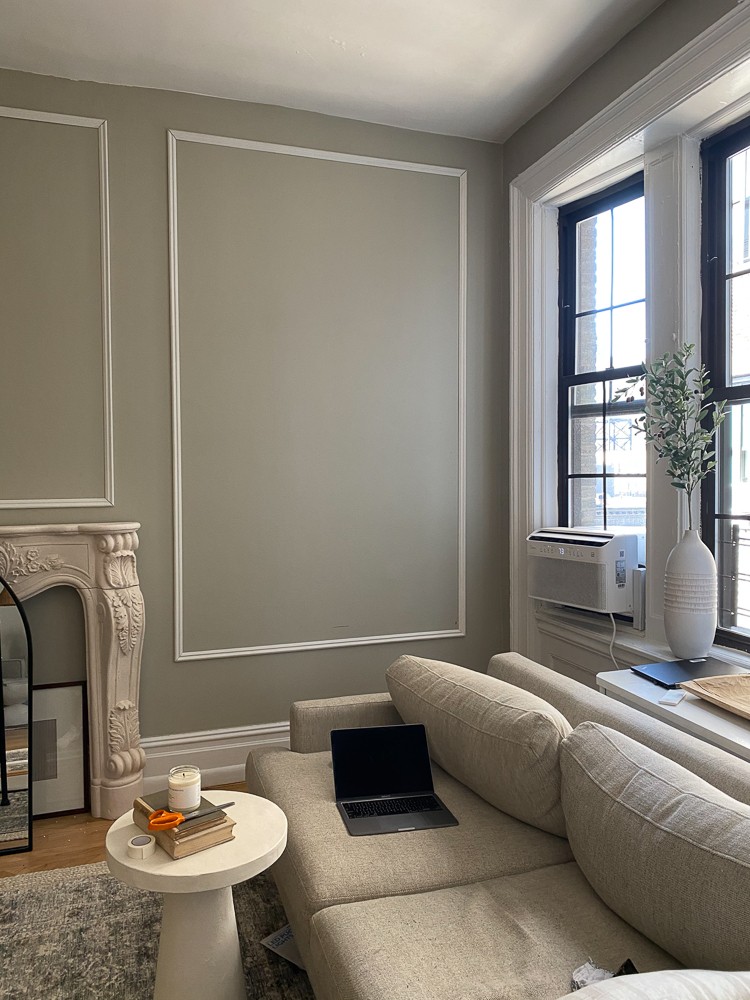
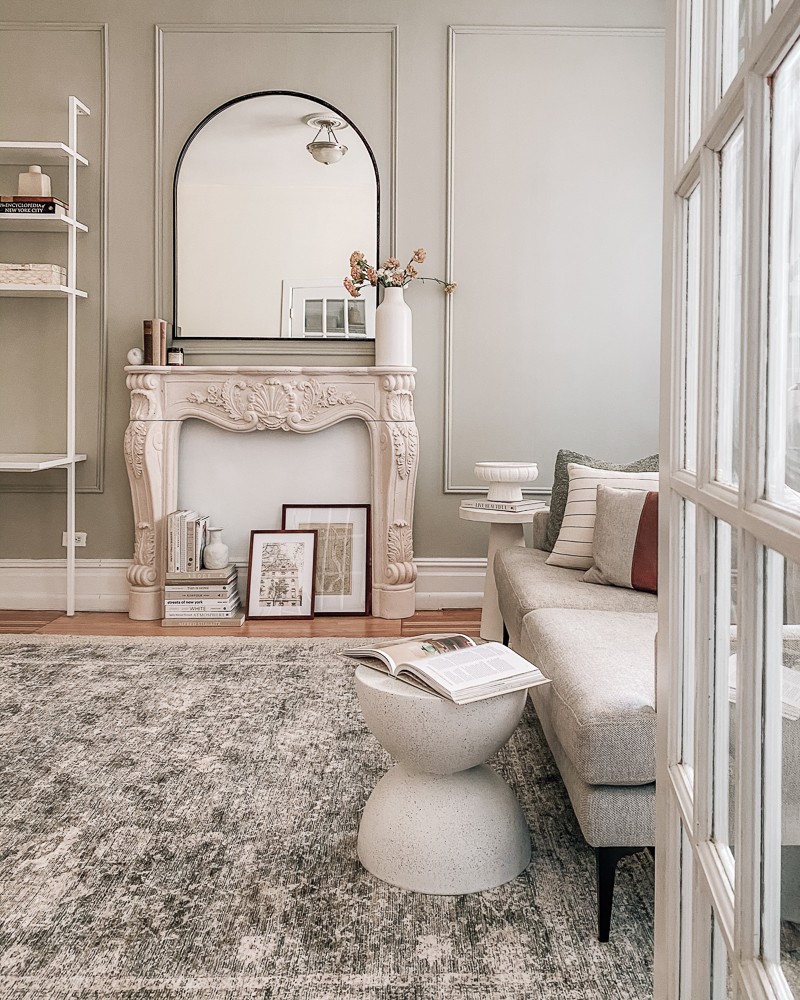
To center and ground the room, I ordered this beautiful stone mantle that would be the statement piece of the room. I ordered the mantle from Houzz and it’s pretty dreamy; however, if you’re looking for something less expensive, I would 100% search on Facebook marketplace for a vintage one. Ours will be a piece that we will keep forever. With the desks and mantel secured on the wall, we felt the room was still missing something. As soon as we started apartment hunting here late last year, I became very inspired by the interior details commonly seen in the older apartments including all of the gorgeous picture frame moulding, which is also called “boiserie” paneling. While our apartment does have some pretty stunning trim detailing throughout, the walls in this room needed a bit more texture.
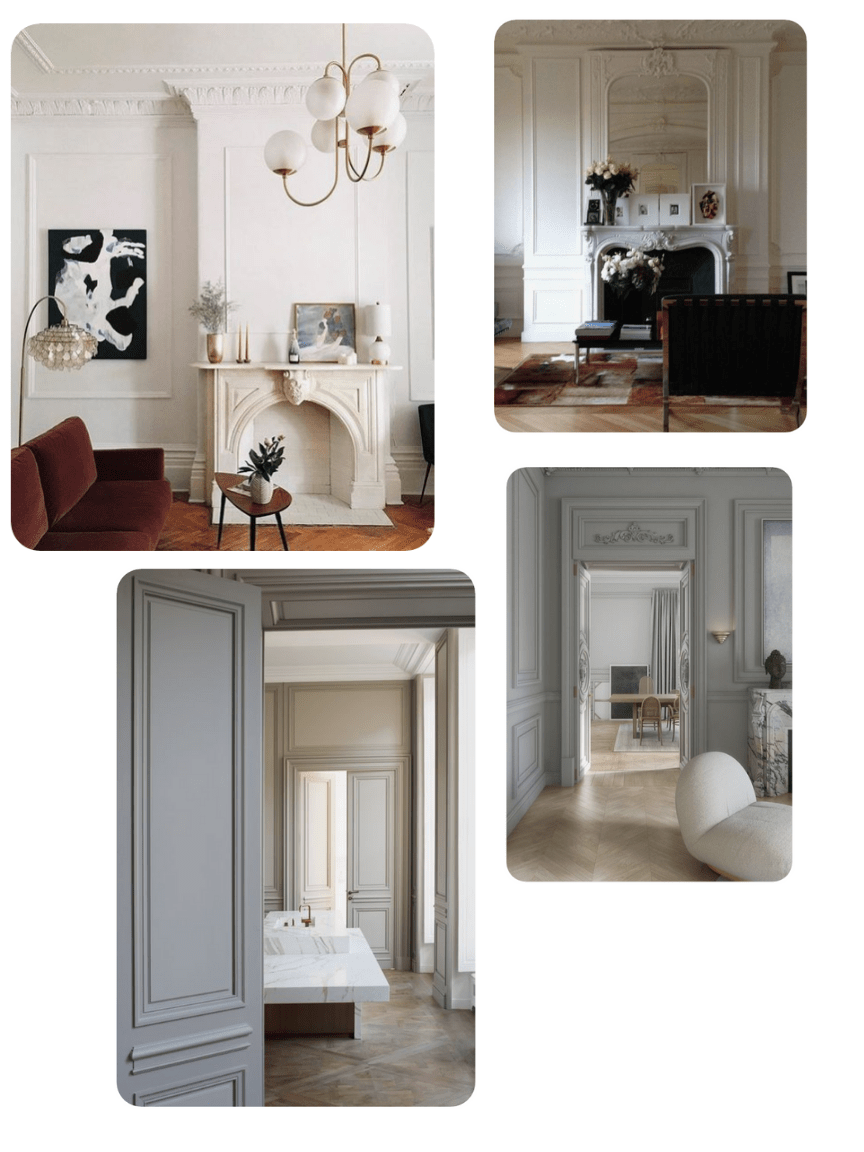
As most projects start, I find some inspirational images on the interwebs:
We wanted to keep this as simple and budget friendly as possible, so we picked up some trim from our local hardware store – Mike’s Lumber Store, if you’re in the Upper West Side. In case you’re wondering, there are Home Depot locations in Manhattan (I haven’t seen any Lowe’s locations here) but, with everything going on, we’ve been trying to be way more intentional about shopping at local businesses in our neighborhood when we can. Anyways, the first step of the process was knowing how much trim we would need and figuring out where we wanted to the trim to go. I started creating a layout with blue painter’s tape to give us a preview of our options. We ultimately decided to put the trim over the mantle in a large rectangle, to the right of the mantle in an even larger rectangle, and then 2 rectangles that outline where the desks are right now.
WHAT YOU’LL NEED:
Trim/moulding (ours was a little under 1.5 in)
Mitre box/saw
Double-sided mounting tape
Painters Tape
Paint
Tape Measurer
Level
Our measurements broke down like this but every room will look totally different and there are so many directions you can take this!
Over mantle: 48in x 64in
To the right of the mantle: 60in x 90in
Around the desks: 38in x 90in
These dimensions kept the top and bottom horizontal trim pieces at the same height (except the horizontal bottom piece above the mantle).
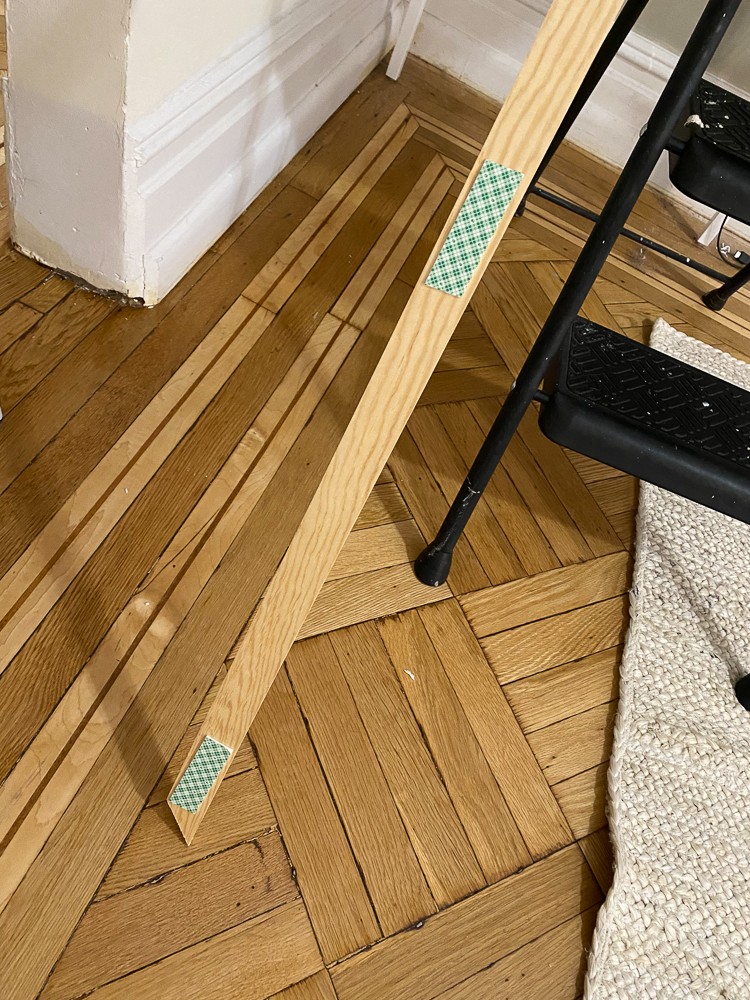
We picked up the trim pieces from Mike’s Lumber Store in fourteen 8 foot sections. This allowed us to keep our longest pieces as one, minimizing the cuts. I’ve been told that they will also cut them for you there but, because this was our first time doing this, we wanted to be sure our measurements that we planned would actually work. Plus, it gave us the opportunity to put this handy miter box and saw set to the test! When it came to selecting the trim, we didn’t want anything too ornate, but something that would also suit the mantel’’s design. We also picked up some double sided mounting tape because we wanted to attempt a reversible/temporary solution. This tape would allow us to keep this a renter friendly project and limit any nail holes needed. If we owned this place we would have definitely used a nail gun and brads. For the mounting tape, we used a couple of different brands: this one and another one that I cannot find online anywhere but the brand is Tuff Stuff (found it at the hardware store). There are SO many options out there though, some are just stronger than others. You also want to be super careful when you remove it so it doesn’t take the paint off your walls.
Once we got back with the trim and tape, we began to cut the boards. TJ is a fan of measuring and cutting all pieces at once, so that you can keep the mounting going and not need to stop to cut more wood. We used this mitre box which we got off of Amazon to make the mitre cuts. It came with a saw and everything and it ended up being very easy to use. Each cut we needed was at a 45 degree angle.
With our measurements, TJ cut each piece to the length we needed and we began to mount them to the wall using a level to make sure they were straight. We mounted the trim using the double sided tape, putting a piece at each end and a couple in the middle for the longer trim pieces. To make sure we put them in the right places, we held up the trim on the wall where the painter’s tape was, made sure it was level, and put a tiny mark where each end would be. This allowed us to take the tape off the remaining covered side and put the board exactly where it needed to be with the markings. We repeated the steps for each piece of trim. Once adhered to the wall, we made sure everything was level again.
One challenge we had was with the desks. We did need to move one desk over a small bit to make sure the trim was evenly spaced on the wall and there was room for the trim to go vertically between the desk. We also had to reinforce a couple pieces of trim with screws since our walls were not completely flat. There are still a couple gaps that we will fill with removable caulk. The final step before painting was to add some wood filler in the corners where the trim meets at right angles. This gave the trim a polished and complete look.
We decided to paint the trim the exact same color as the wall, Jogging Path, that we got from Sherwin Williams. Now that all of the paneling is up, the room has major Parisian vibes and I am here for it. The biggest thing is we will be able to remove all of this when we move out!

If you have any other questions about the process, let me know! Overall, it was pretty simple and straightforward once all of the measurements were planned.

Hi! What is the sage paint color on the wall?
This color is called Jogging Path by Sherwin Williams!
Hi! Do you still feel like this was a good brand of tape to use, now that you’ve removed it when you moved? (ie. not much damage after removal?)
Thanks!! It’s gorgeous!
Yes! Whatever you do, don’t use “Nano tape”. I liked the Command brand poster tape as well as Scotch double-sided tape but my favorite was definitely poster tape.
Hi! Did you find any tape particularly better from a ‘less damage when removing’ perspective?
Yes! Whatever you do, don’t use “Nano tape”. I liked the Command brand poster tape as well as Scotch double-sided tape but my favorite was definitely poster tape.
Looks beautiful! Did the thickness of the double-sided tape prevent the molding from laying flush on the walls? Was there a noticeable gap in between?
Since you’re using mounting tape do you find the moulding does’t lay flush against the wall and is floating a bit? Thanks!
Not super noticeably at all! Try double-sided poster tape instead which tends to be thinner but still effective.
Thank you for breaking this down and sharing 🙂 You’ve given me confidence that I can tackle this on my own!
Is the poster tape one you liked the Command brand that has Velcro on one side?