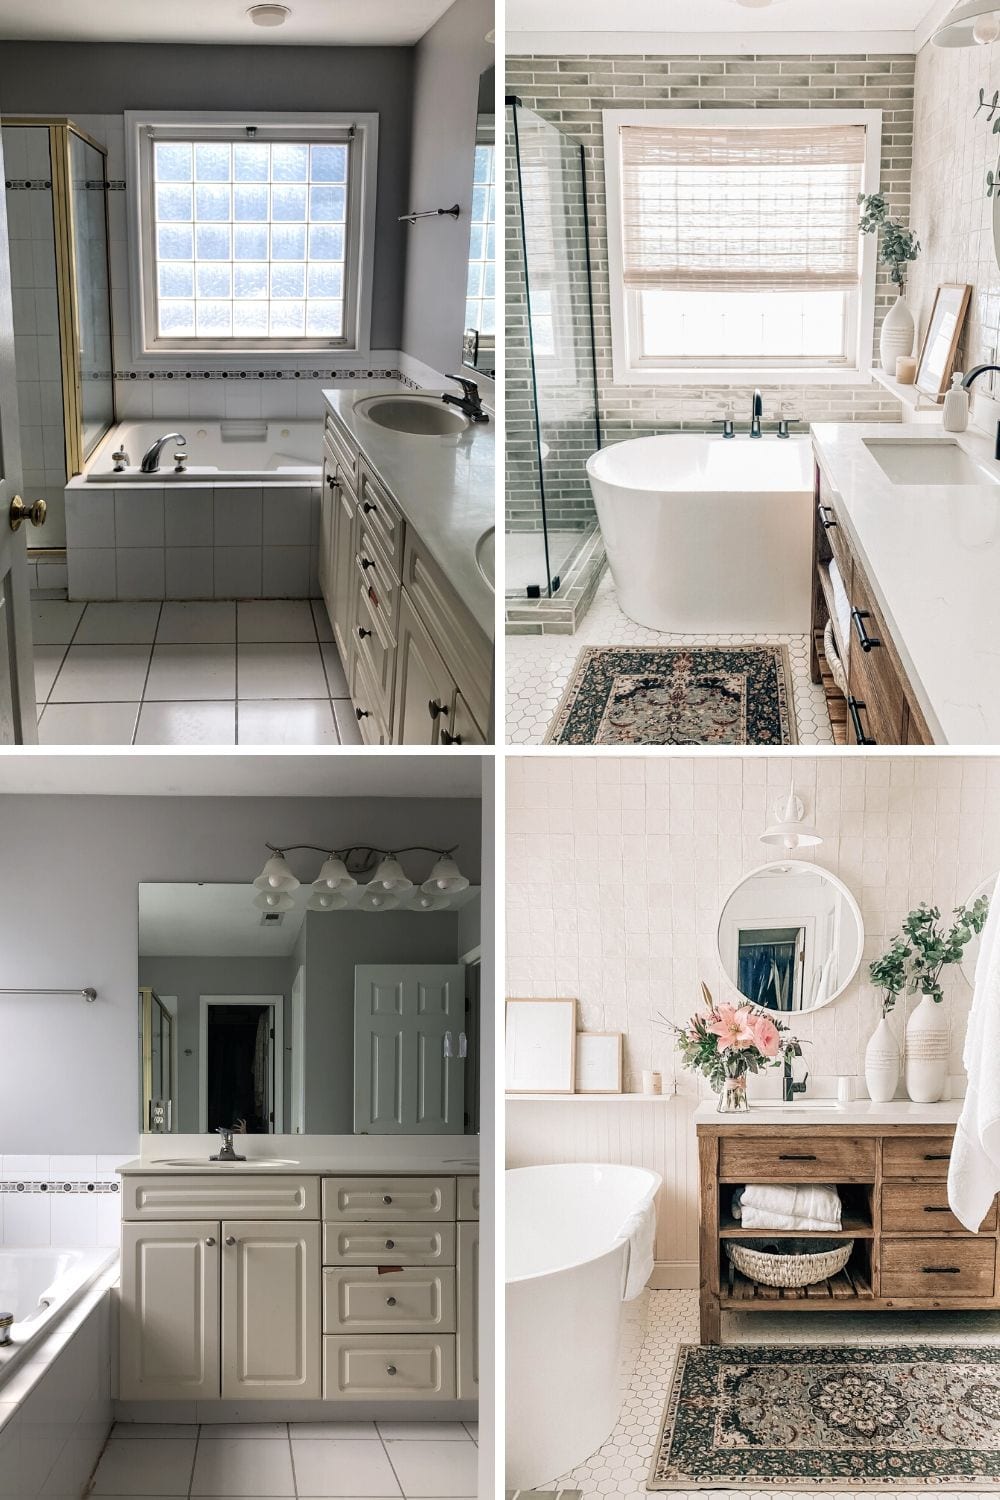
One of the last home projects that we completed before making the move to NYC was our bathroom. This was something that I wanted to do since we moved in but it was a few rooms down on the priority list. When we eventually decided to re-do our bathroom, we obviously had NO idea we would be moving anytime soon. So, I ended up only using the bathtub a few times, sadly. It was a pretty big undertaking and took a couple of long months to complete (but not as long as the kitchen!).
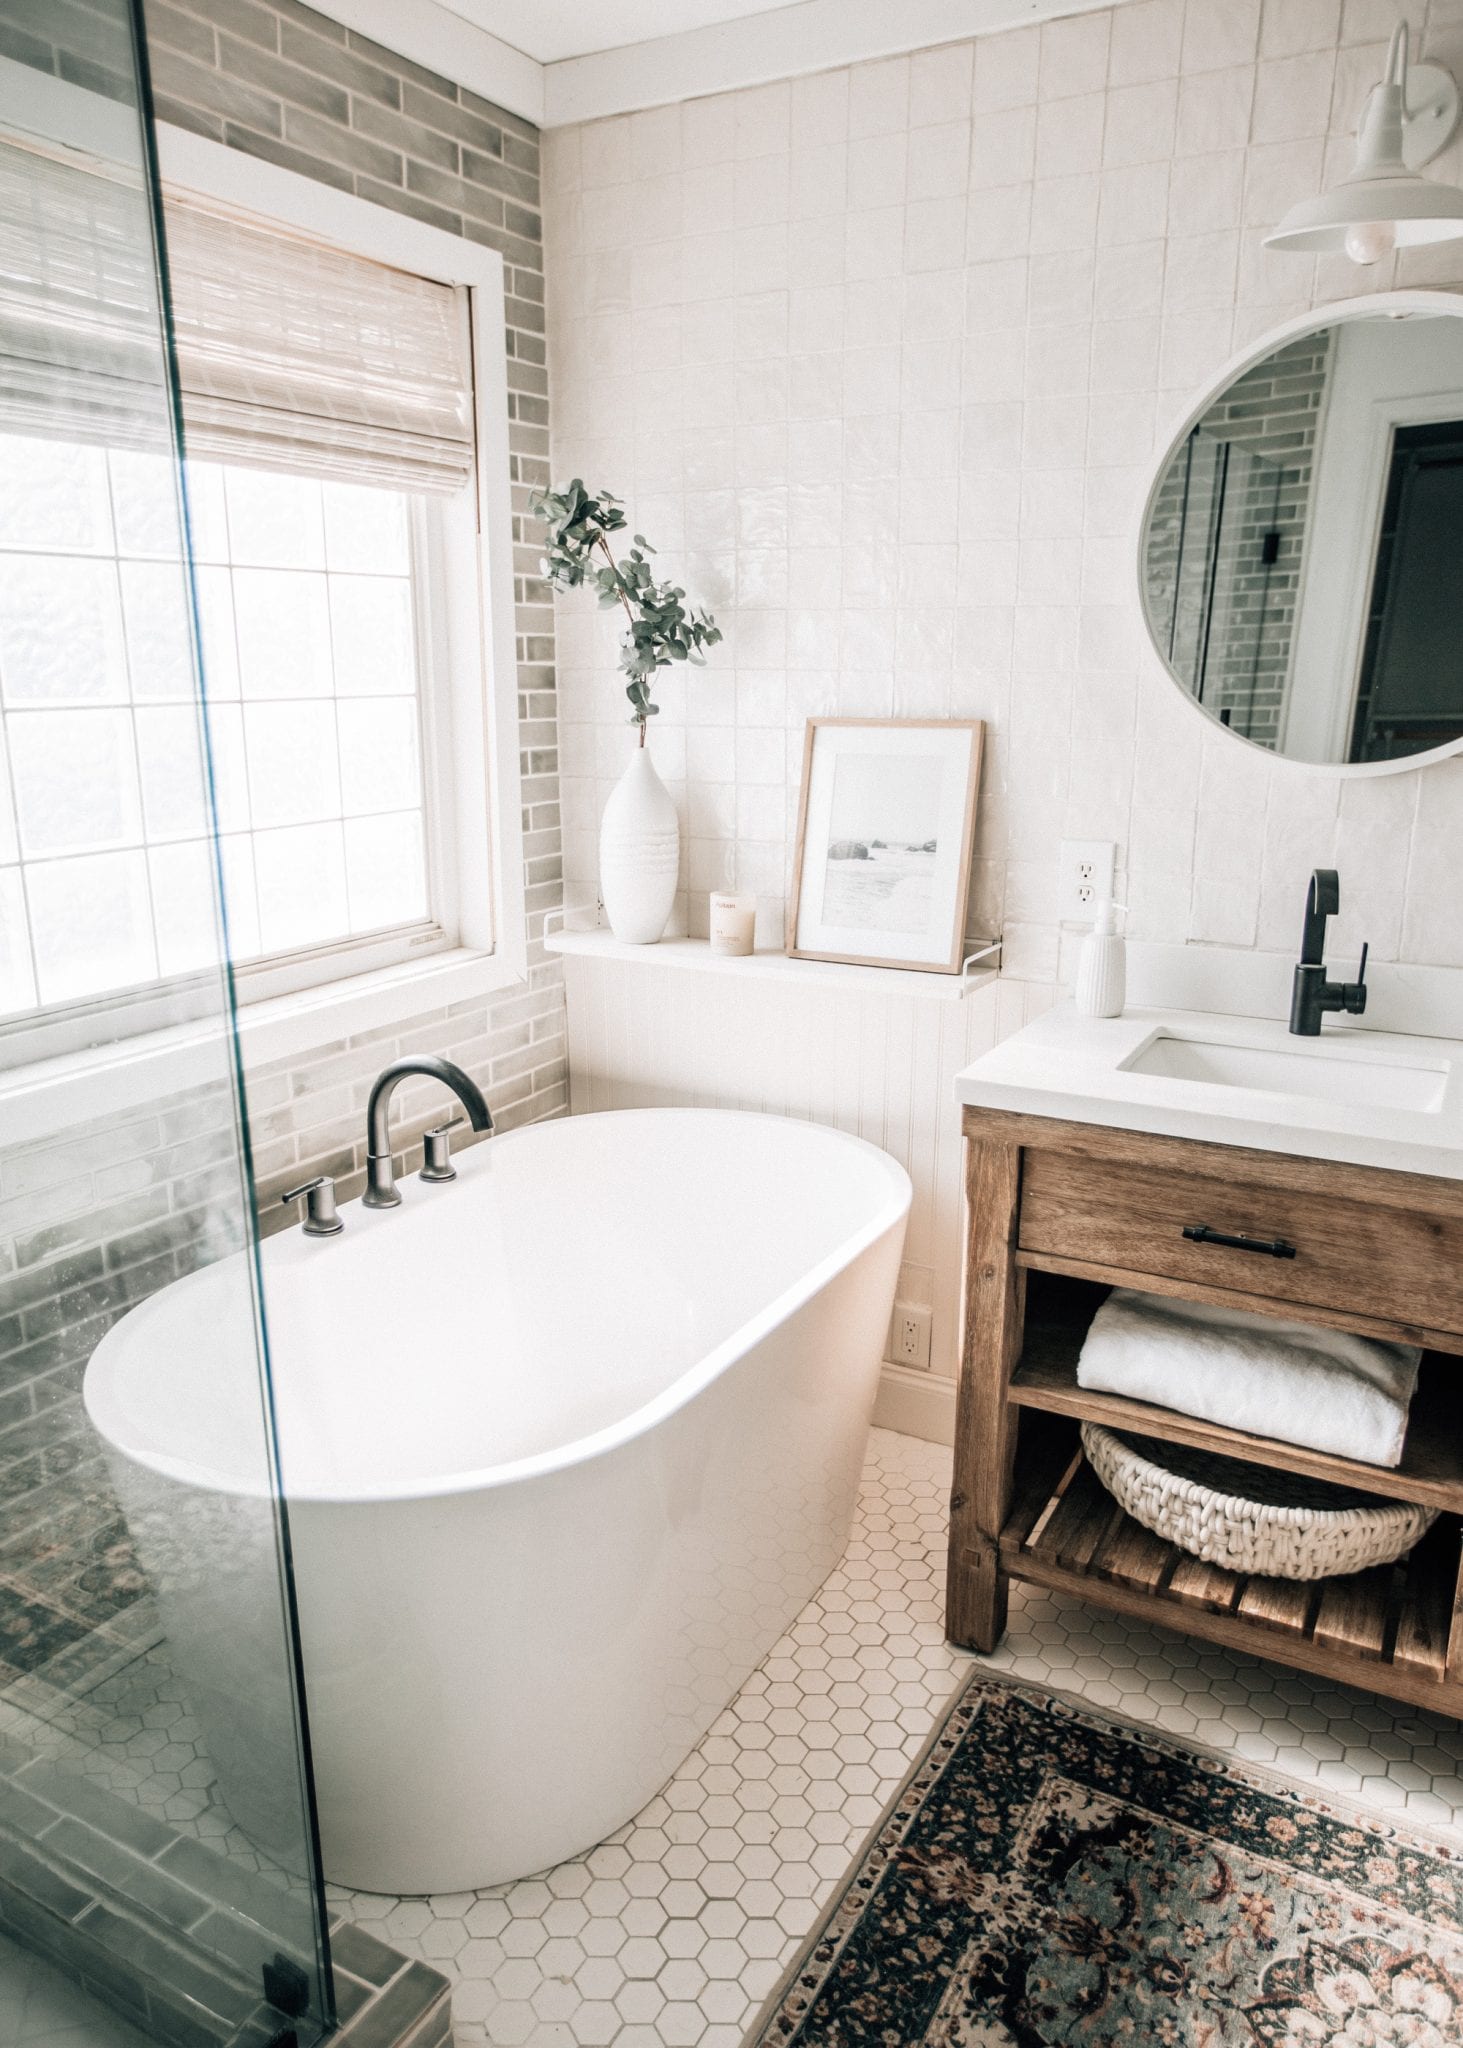
Let’s first talk about the design. I mocked up a mood board for the bathroom before getting started. This was the most fun part for me: selecting tile combos and color schemes. I wanted to go with an airy, calming feel with soft muted blues and neutral textures with natural elements. The only thing I didn’t end up getting to do was adding a pendant light above the bathtub. As we approached the end of this renovation and realized we would be moving, I learned that the pendant light I wanted to install would not meet inspection requirements for safety reasons, so I decided to just leave the original light.
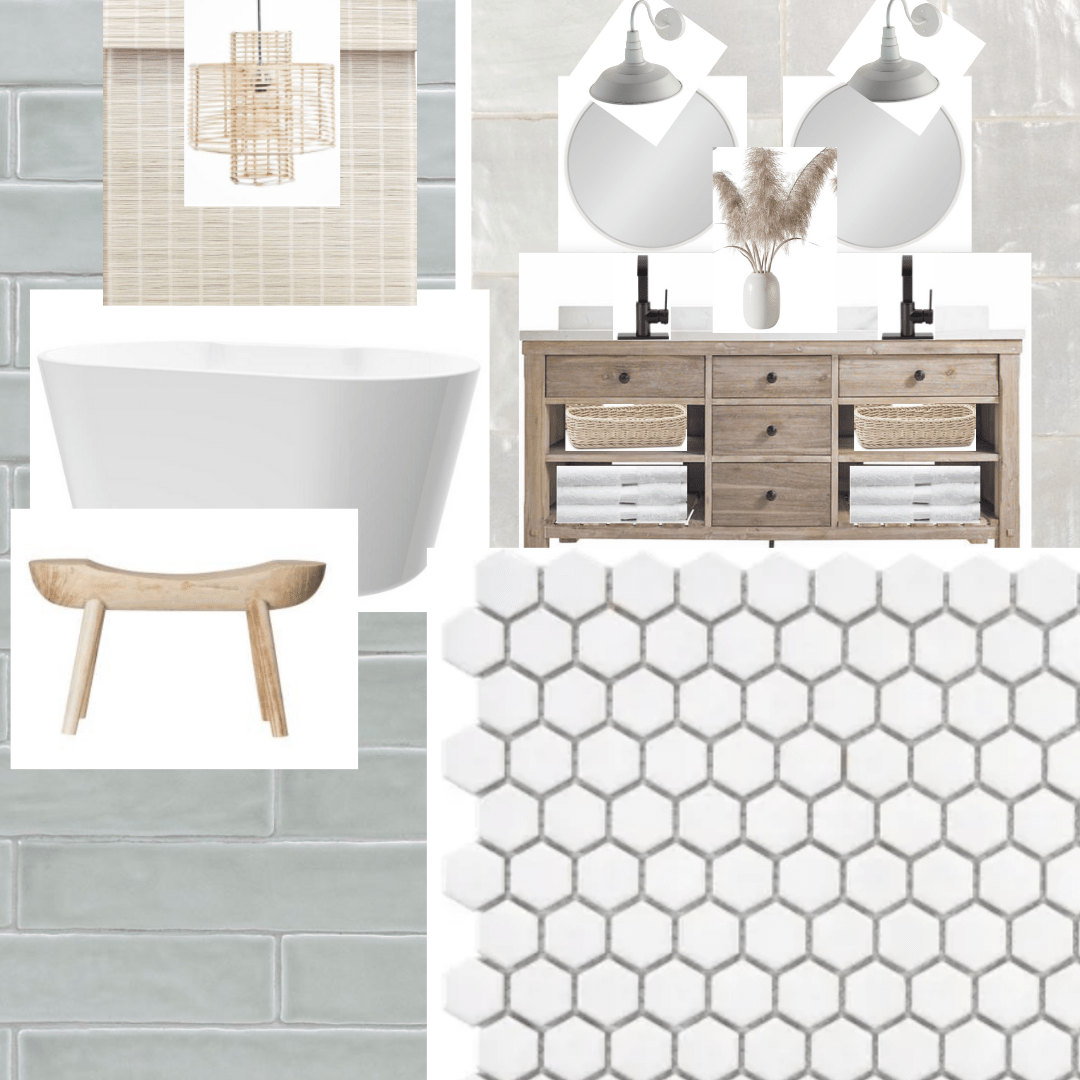

Incase you’re wondering, I use Canva for all of my moodboards and just drag and drop/layer different images of products I love to get a feel for the look I’m going for.
As a general rule, we usually hire someone to help us with anything plumbing or electrical related. We had to be a little more careful with this demo since there was plumbing throughout everything we were taking out. Our friend Todd had recently finished his bathroom so we called him to come over and help. He was also the one who helped us with our kitchen demo! God bless Todd. We ended up hiring someone for our electrical and plumbing work but we did end up doing the demo and everything else ourselves.
We decided to do a complete gutting of the current bathroom – vanity, flooring, walls, bathtub, shower, and shower doors. Note from TJ: If you are handling any sort of demo yourself, whenever doing any type of renovation that involves plumbing, you want to make sure the water is turned off. There is usually a main line shut off (ours was in our utility closet off the kitchen). If you can’t find the main shut off, you can always pop out to the street and turn it off there.
The first thing to go was the old vanity. The original vanity was a double sink, so it was fairly large and, in order to get it out cleanly, we had to make sure that all the water lines and plumbing is disconnected, otherwise we would risk damage to the connections. To make it a little more manageable, we removed the cabinet doors and sink counter before trying to get the rest of the vanity out.
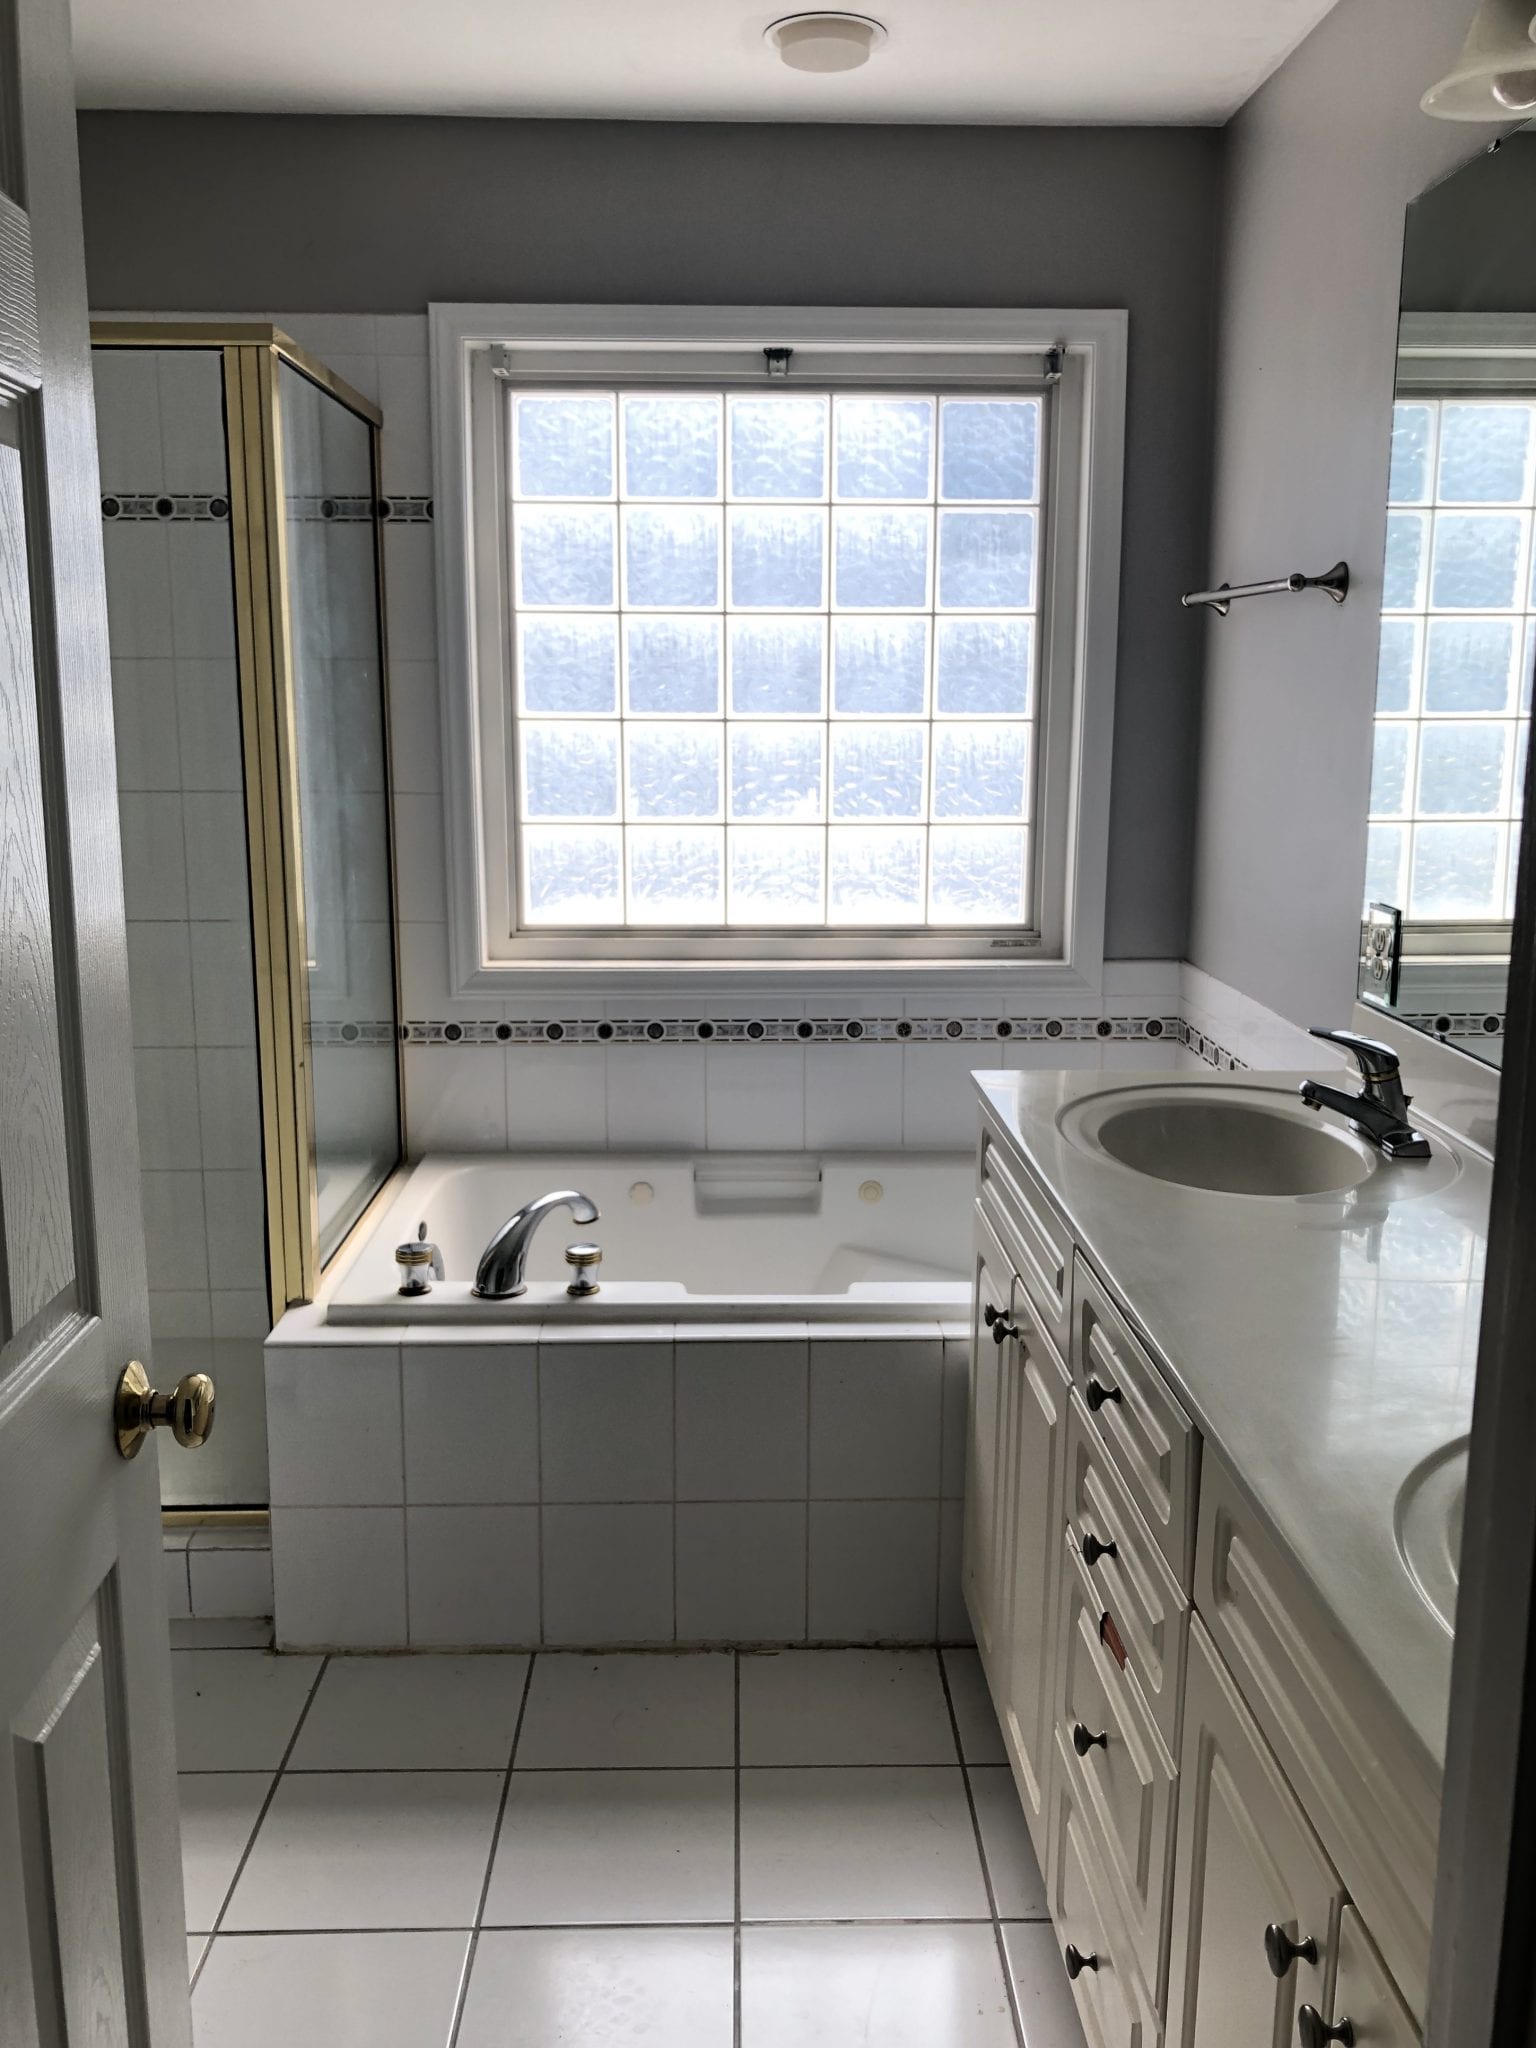
Once the vanity was out, we had access to disconnect the jacuzzi tub water supply and electrical. This was one of the more difficult parts of the demo, as the tub was encased in tile. The first step was to remove all the tile and then pull out the tub from its 2×4 base. After the tub was out, we took out the shower doors. Shower doors are usually drilled into the studs in the wall since they are so heavy, so if you are removing yours make sure to take that into account. There is a lot of caulk around the shower doors, so be sure to remove that as well, unless you are planning to remove the tile like we did. The next step was to remove all of the hardware like the shower head, shower handle, and drain cover.
At this point we had all the big things out and moved onto the tile. There are a couple of options when it comes to removing and laying down new tile. You can remove all the tile from your desired area and then 1) chisel all the excess mortar from the cement backer board or 2) pull up the cement backer board from the floor and lay down new backer board. We wanted a fresh palette, so we opted to pull up all the old backer board to lay down new ones. If you are doing a similar project, make sure the subfloor is in good enough shape to lay down new backer board. One thing we did not want to redo was the shower basin. Typically replacing a shower basin is very long process that involves laying down concrete, ensuring you have the right angle, and making sure the drain is in the correct spot. After removing all the tile from the floor and walls we put up the new backer board. We used screws instead of nails to make sure the backer board was securely on the floor and the wall studs.
Cement backer board tip from TJ: Score and cut the backer board in a well ventilated area since there is a good bit of dust that flies when cutting the board to the size you need.
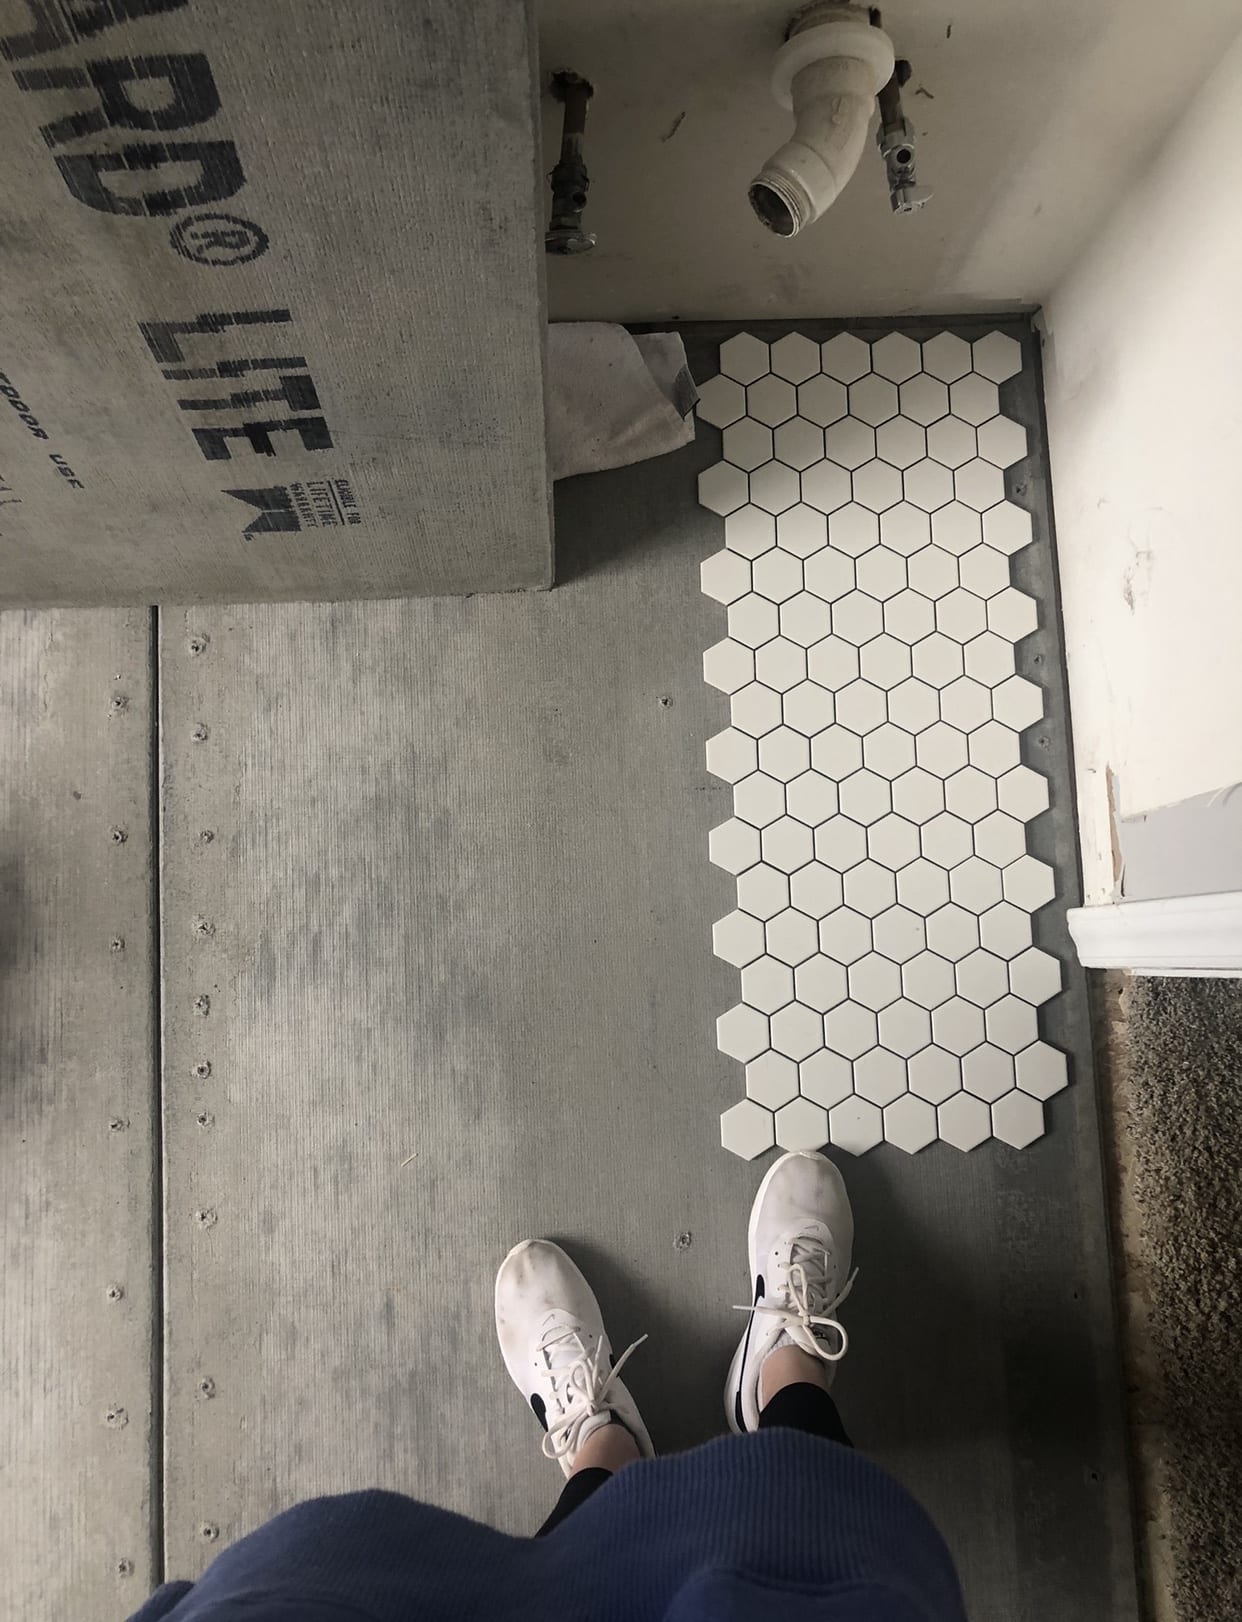
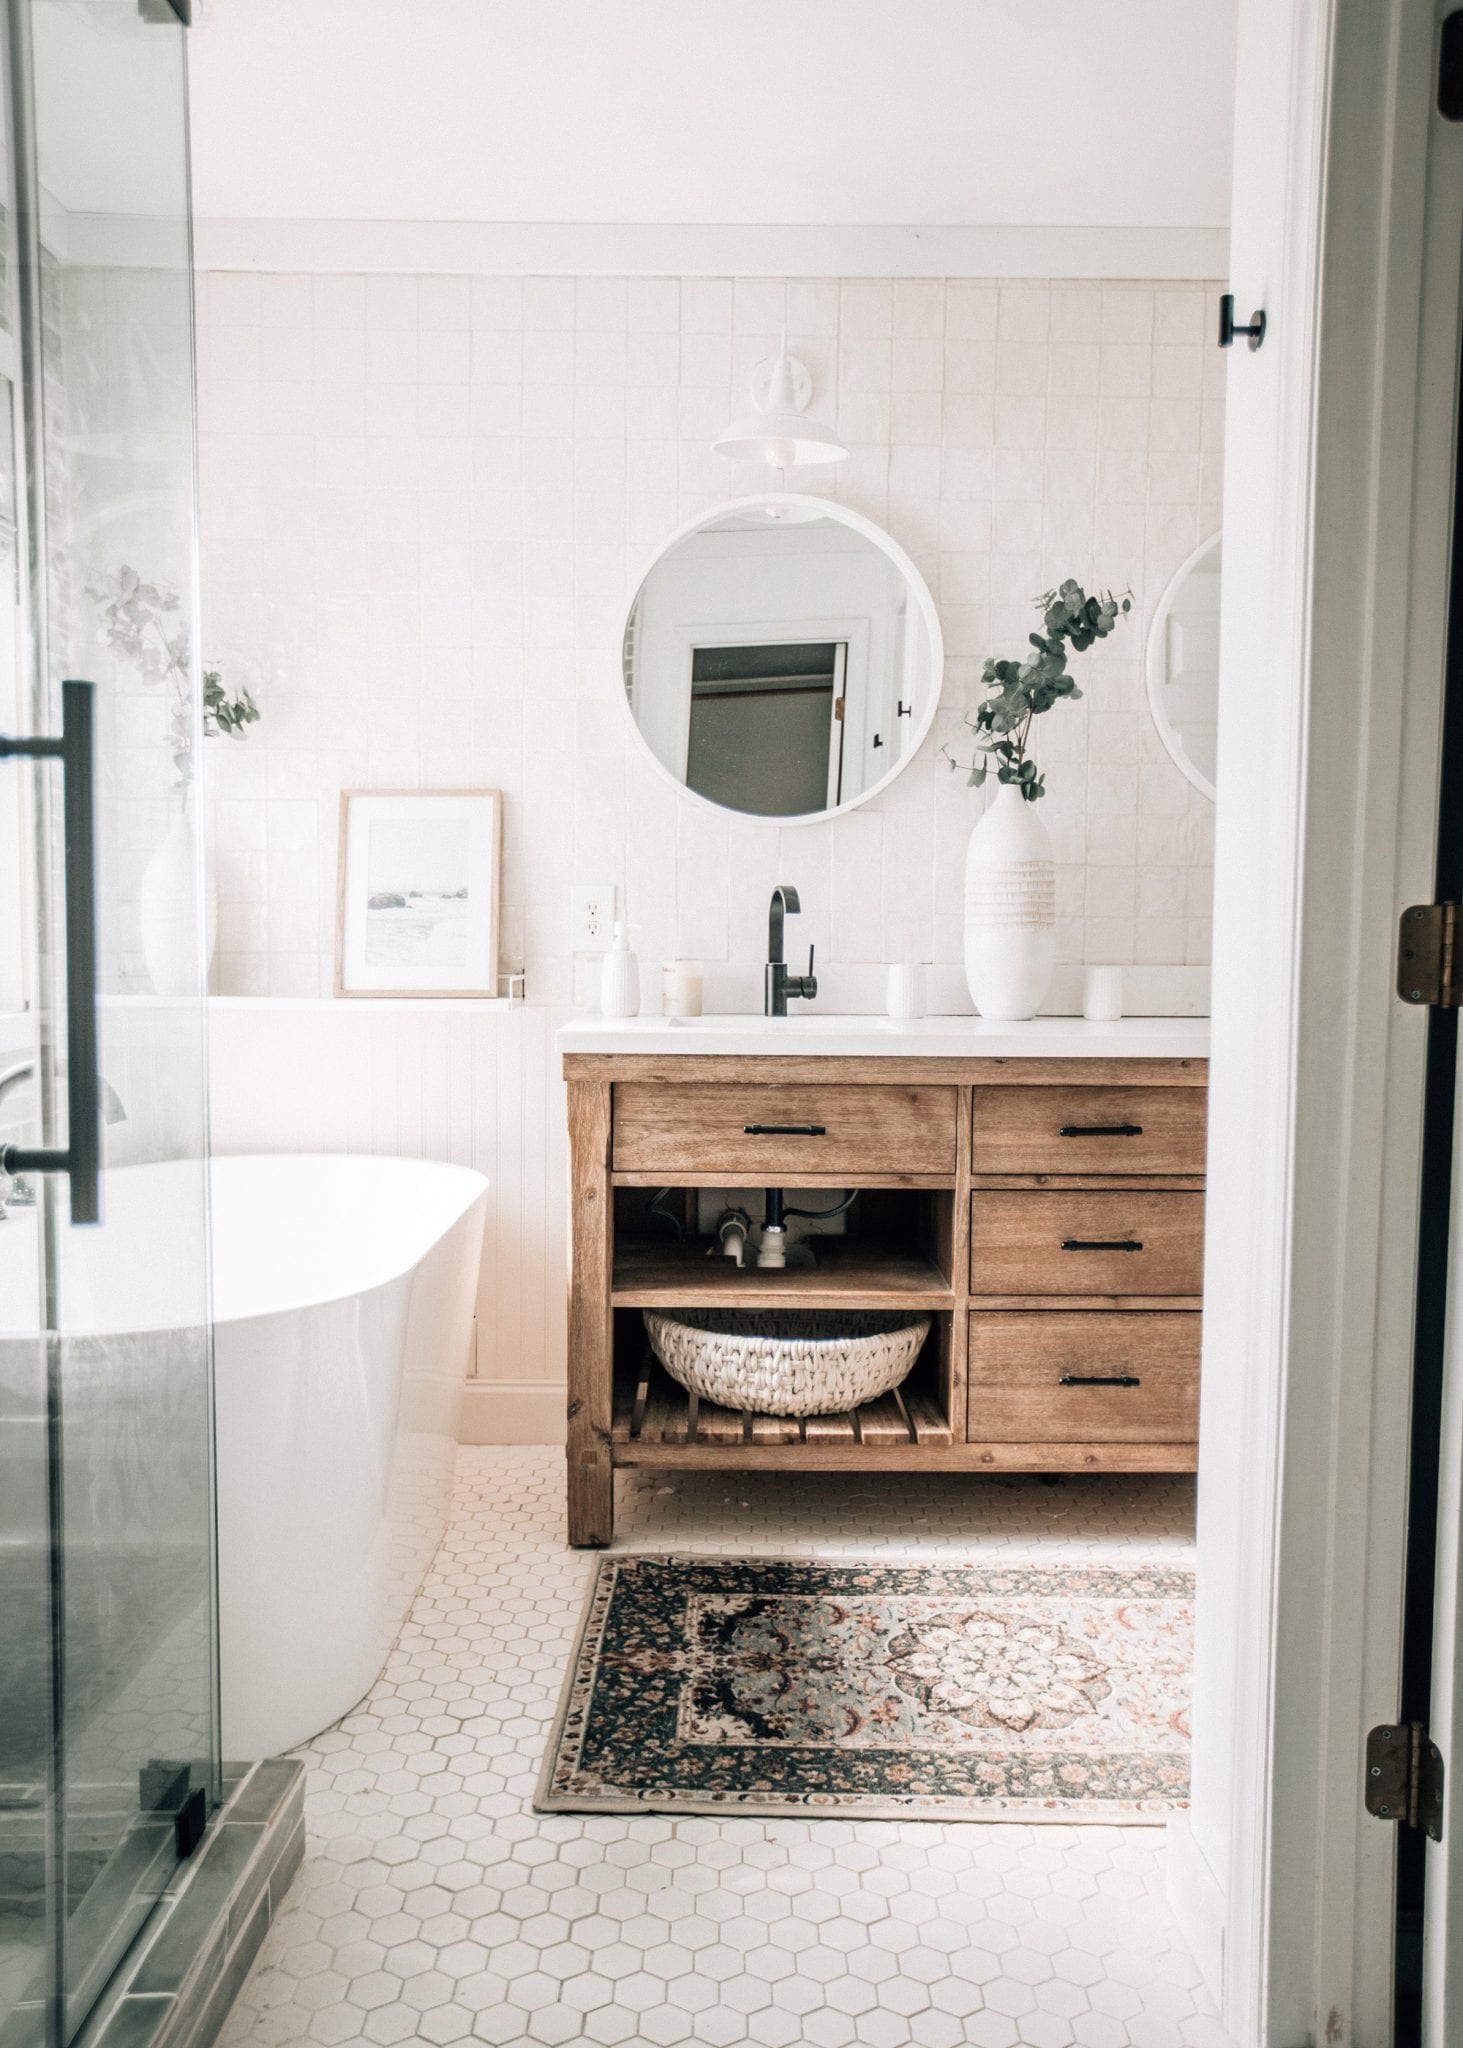
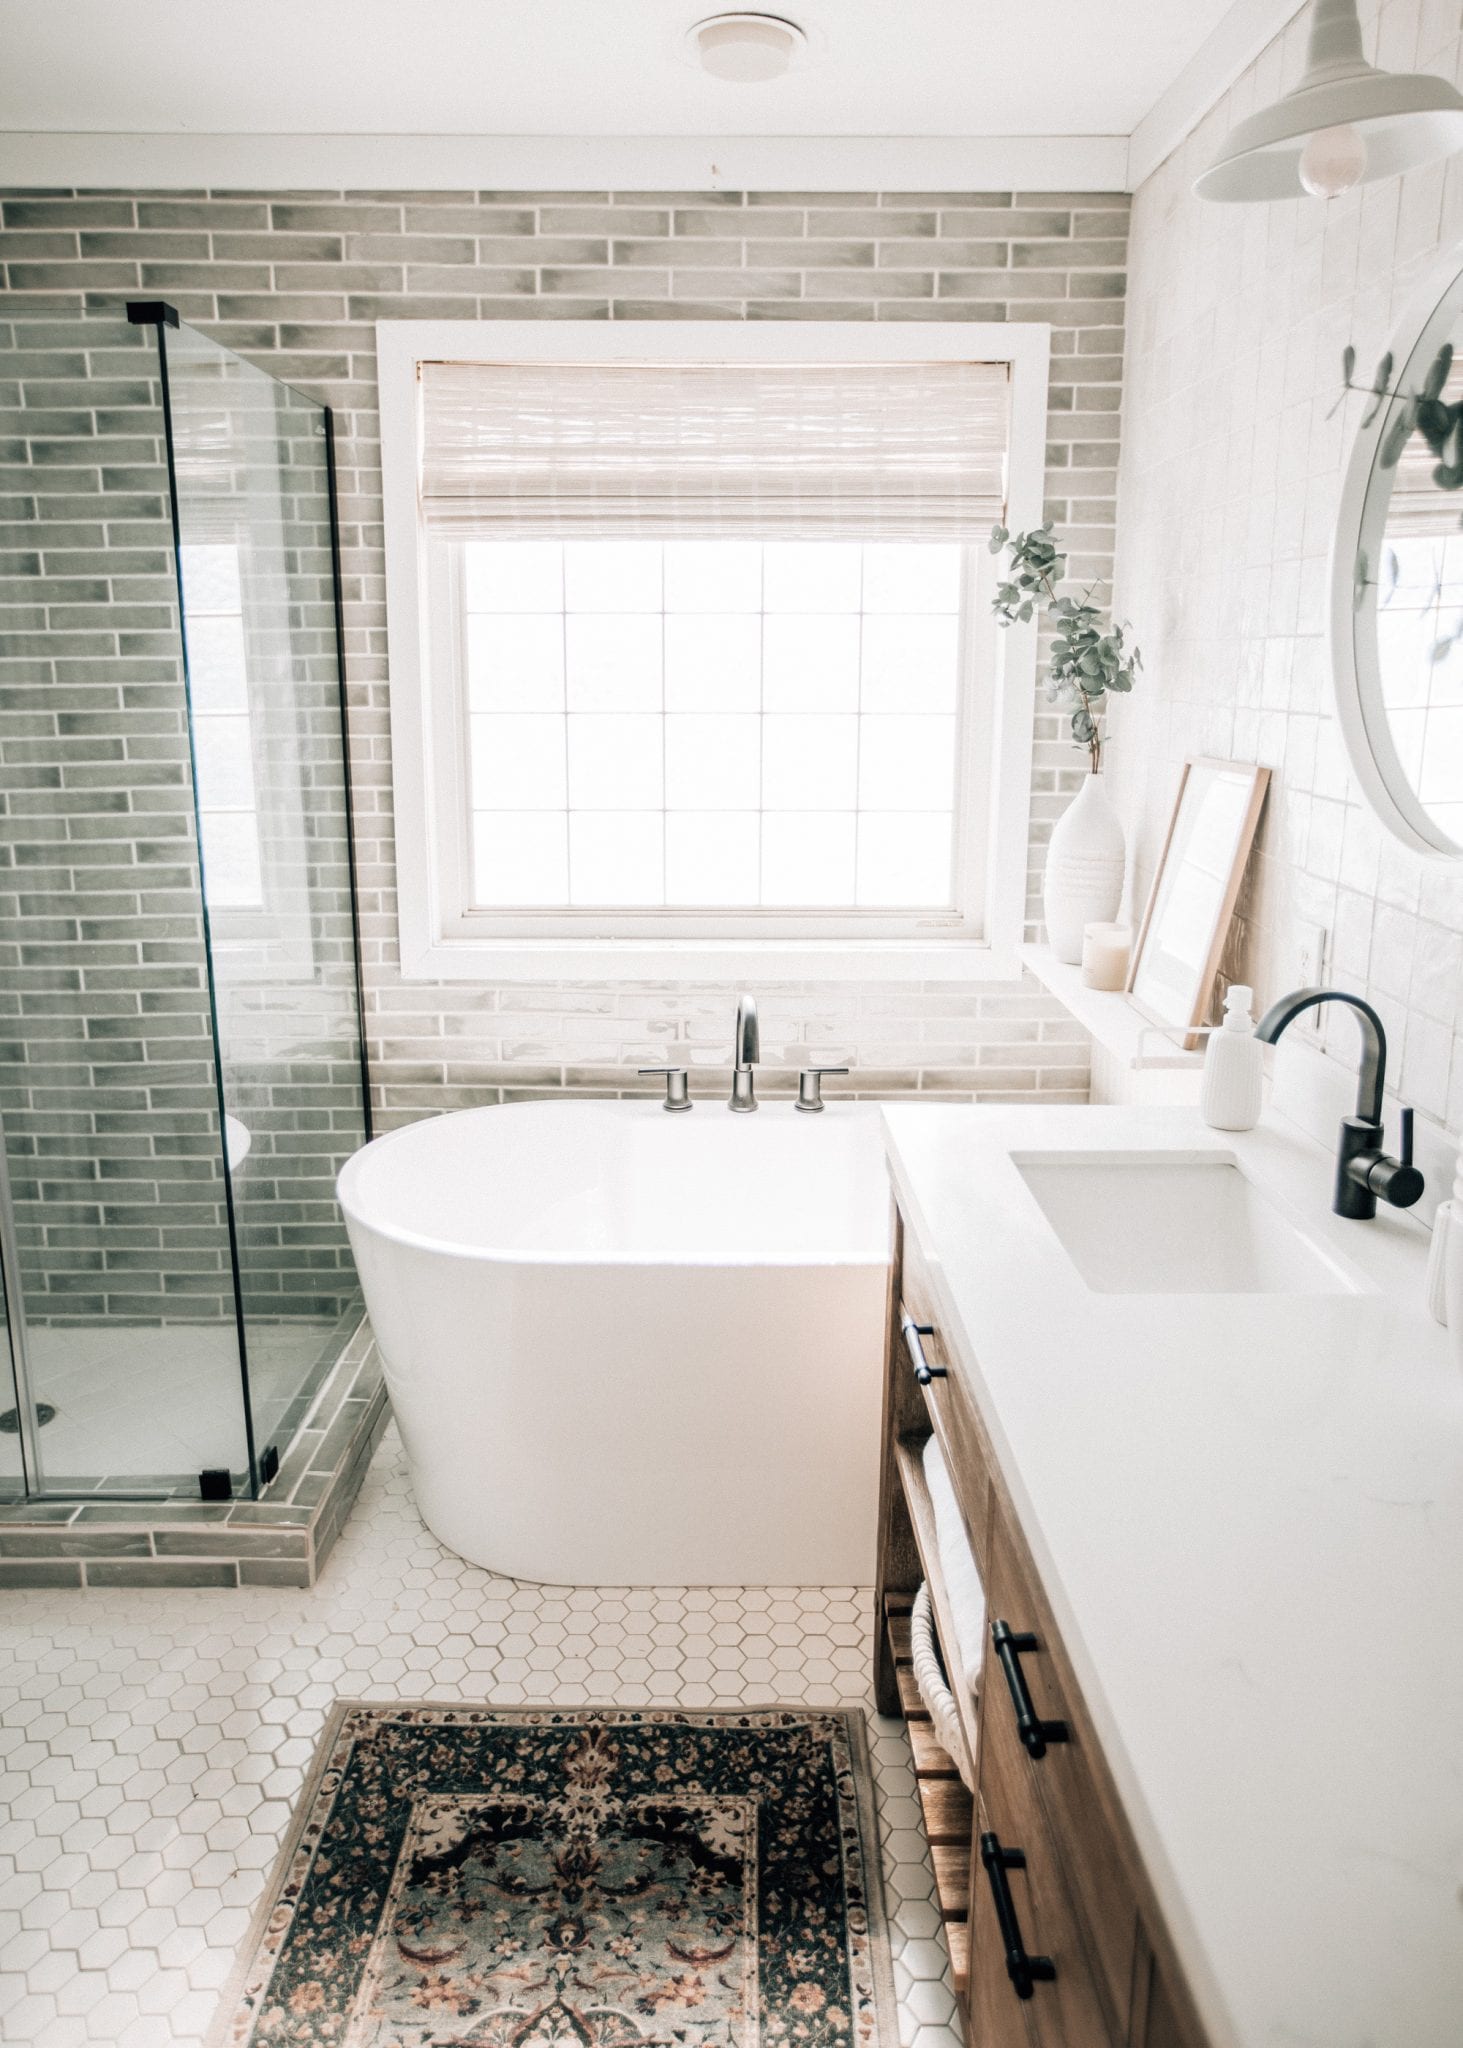
Once everything was out and the new backer board was laid down, it came time for laying new tile. For the floor tile, we chose a clean white, hexagonal pattern that came in 12in x 12in sheets. We found them at Floor and Décor in Greensboro, NC. They had SO many options and if you live close by to a location (within an hour or so), it’s totally worth it. In order to keep your tile lined up and straight use a laser level that projects onto the floor. This will keep you on track with the mortar and laying down the tile. We had never tiled floors before (our previous projects had been all walls), but this was much easier to stay on track and moved pretty quickly. The only area where we didn’t tile on the floor was where the drain and water lines came up from the tub.
Once the floors were finished, we moved onto the wall tile. Previously, the tile in the shower only went up to about 6.5 feet in the shower and to the window sill around the bathtub. We wanted a cleaner and more complete look, so we decided to tile the entire wall with the shower and tub. In addition to that tile, we also decided to tile the wall above the vanity. It had been just drywall and paint before, but we wanted a cool contrast with a textured tile look. The tile we chose for both walls came from Home Depot. The shower wall tile we picked were long rectangles in a pale green color. Before laying the tile on the walls in the shower, we made sure to prepare the backerboard with a waterproof membrane as a little extra protection. We ended up picking 2 different color grouts – “space gray” for the floor tile and “snow white” for the wall tile.
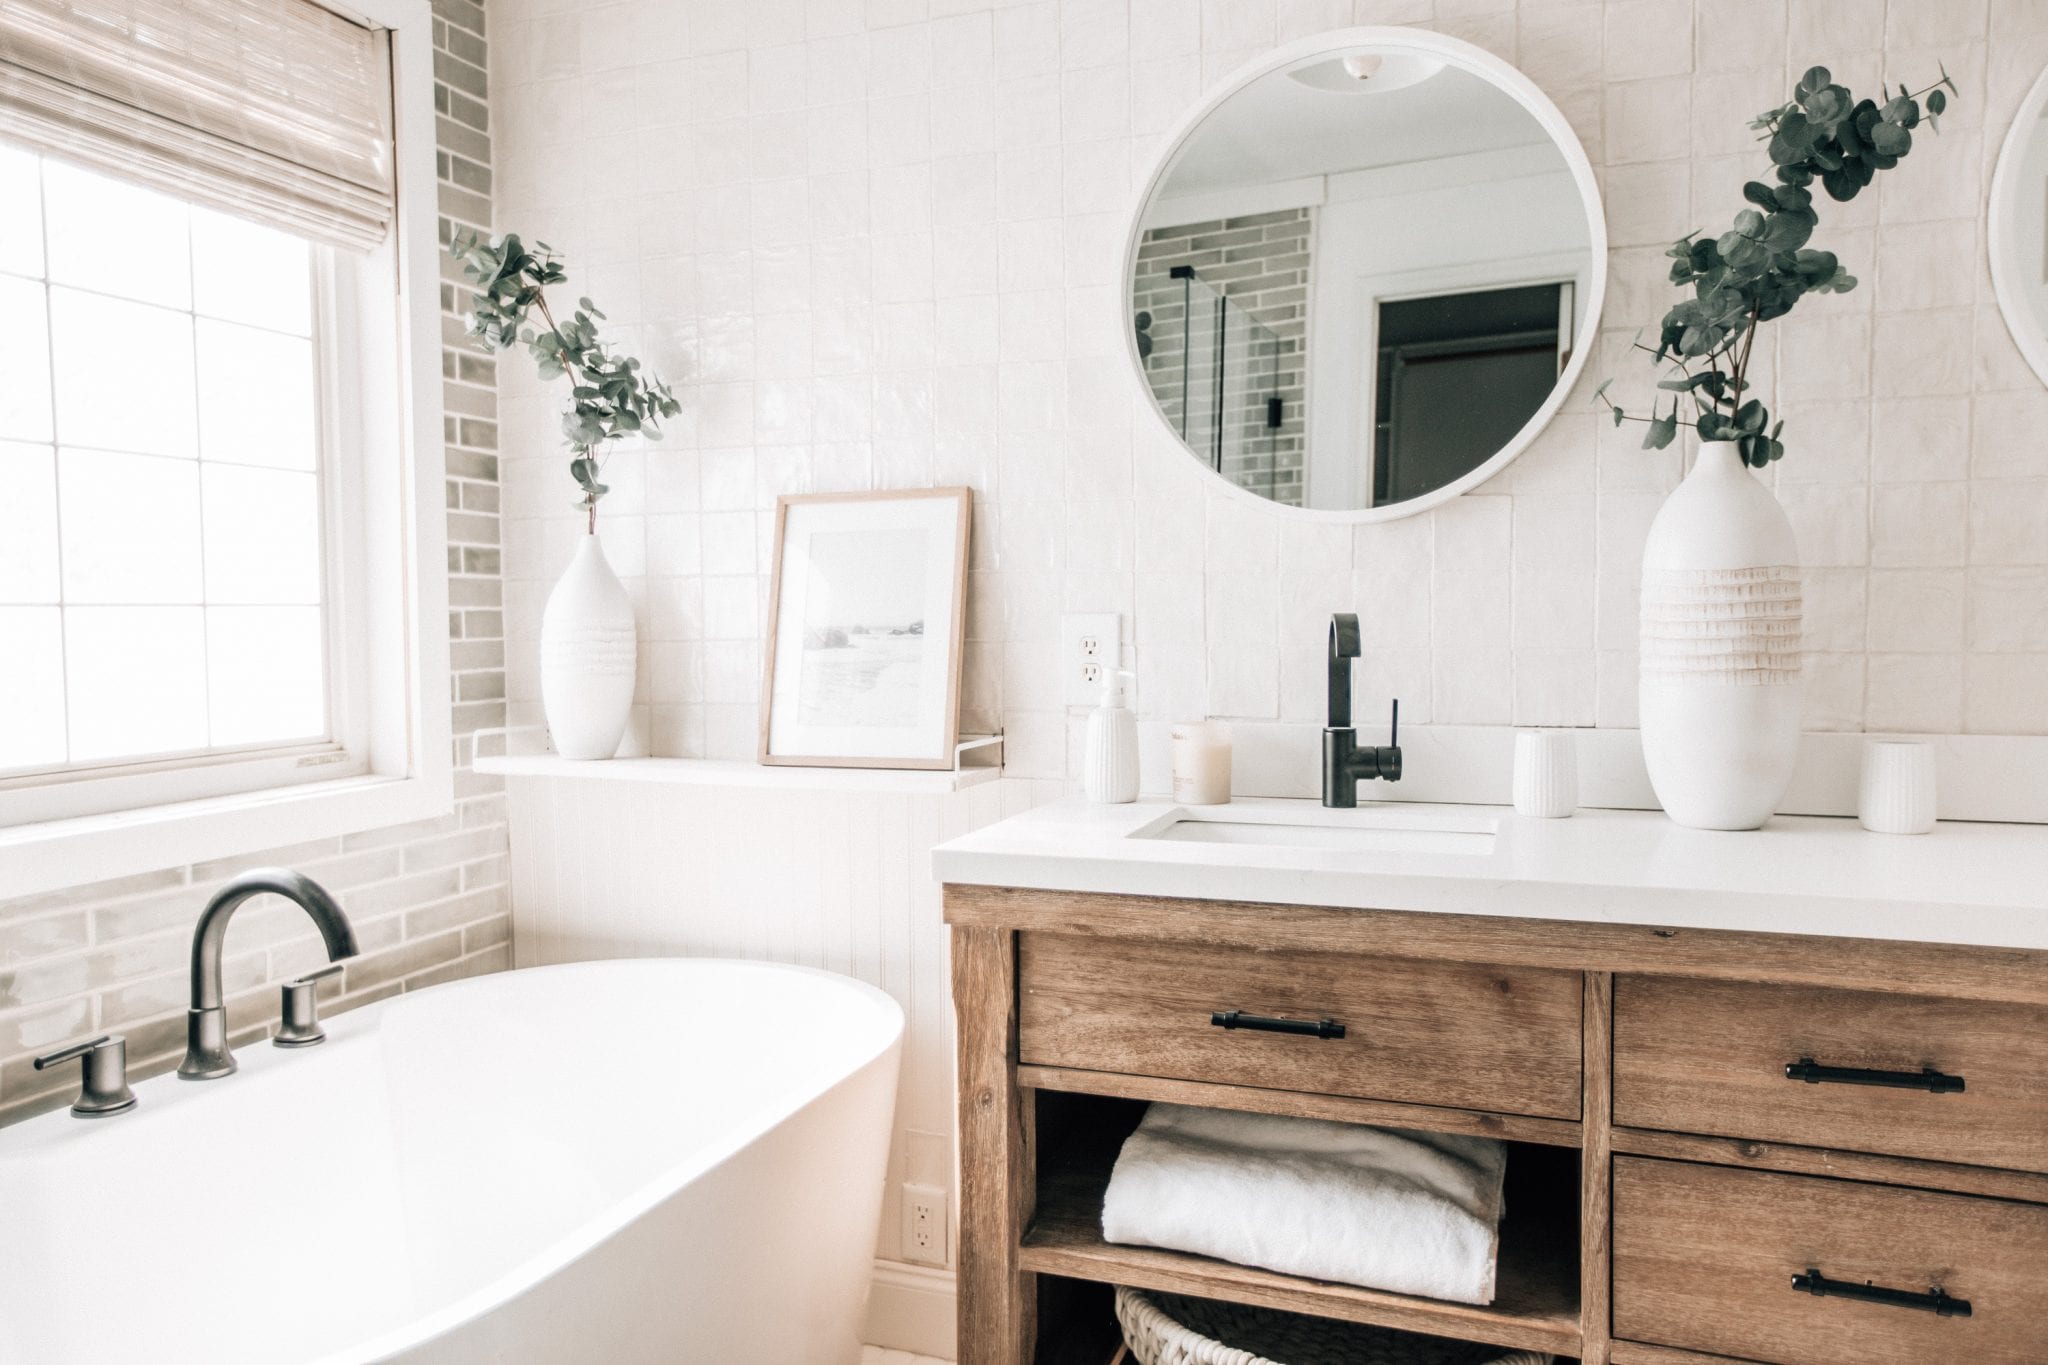
Once the tile was laid, we began putting the bathroom back together. We bought a new freestanding tub (the smallest one I could find), double sink vanity, and new hardware. We picked black accent hardware for the shower, bathtub, sink faucets, door handle, and towel hangers. In addition to all this new hardware, we took off the existing hardware on the vanity and replaced it with hardware that matched the rest of the bathroom. For more hardware details, watch this IGTV video we made.
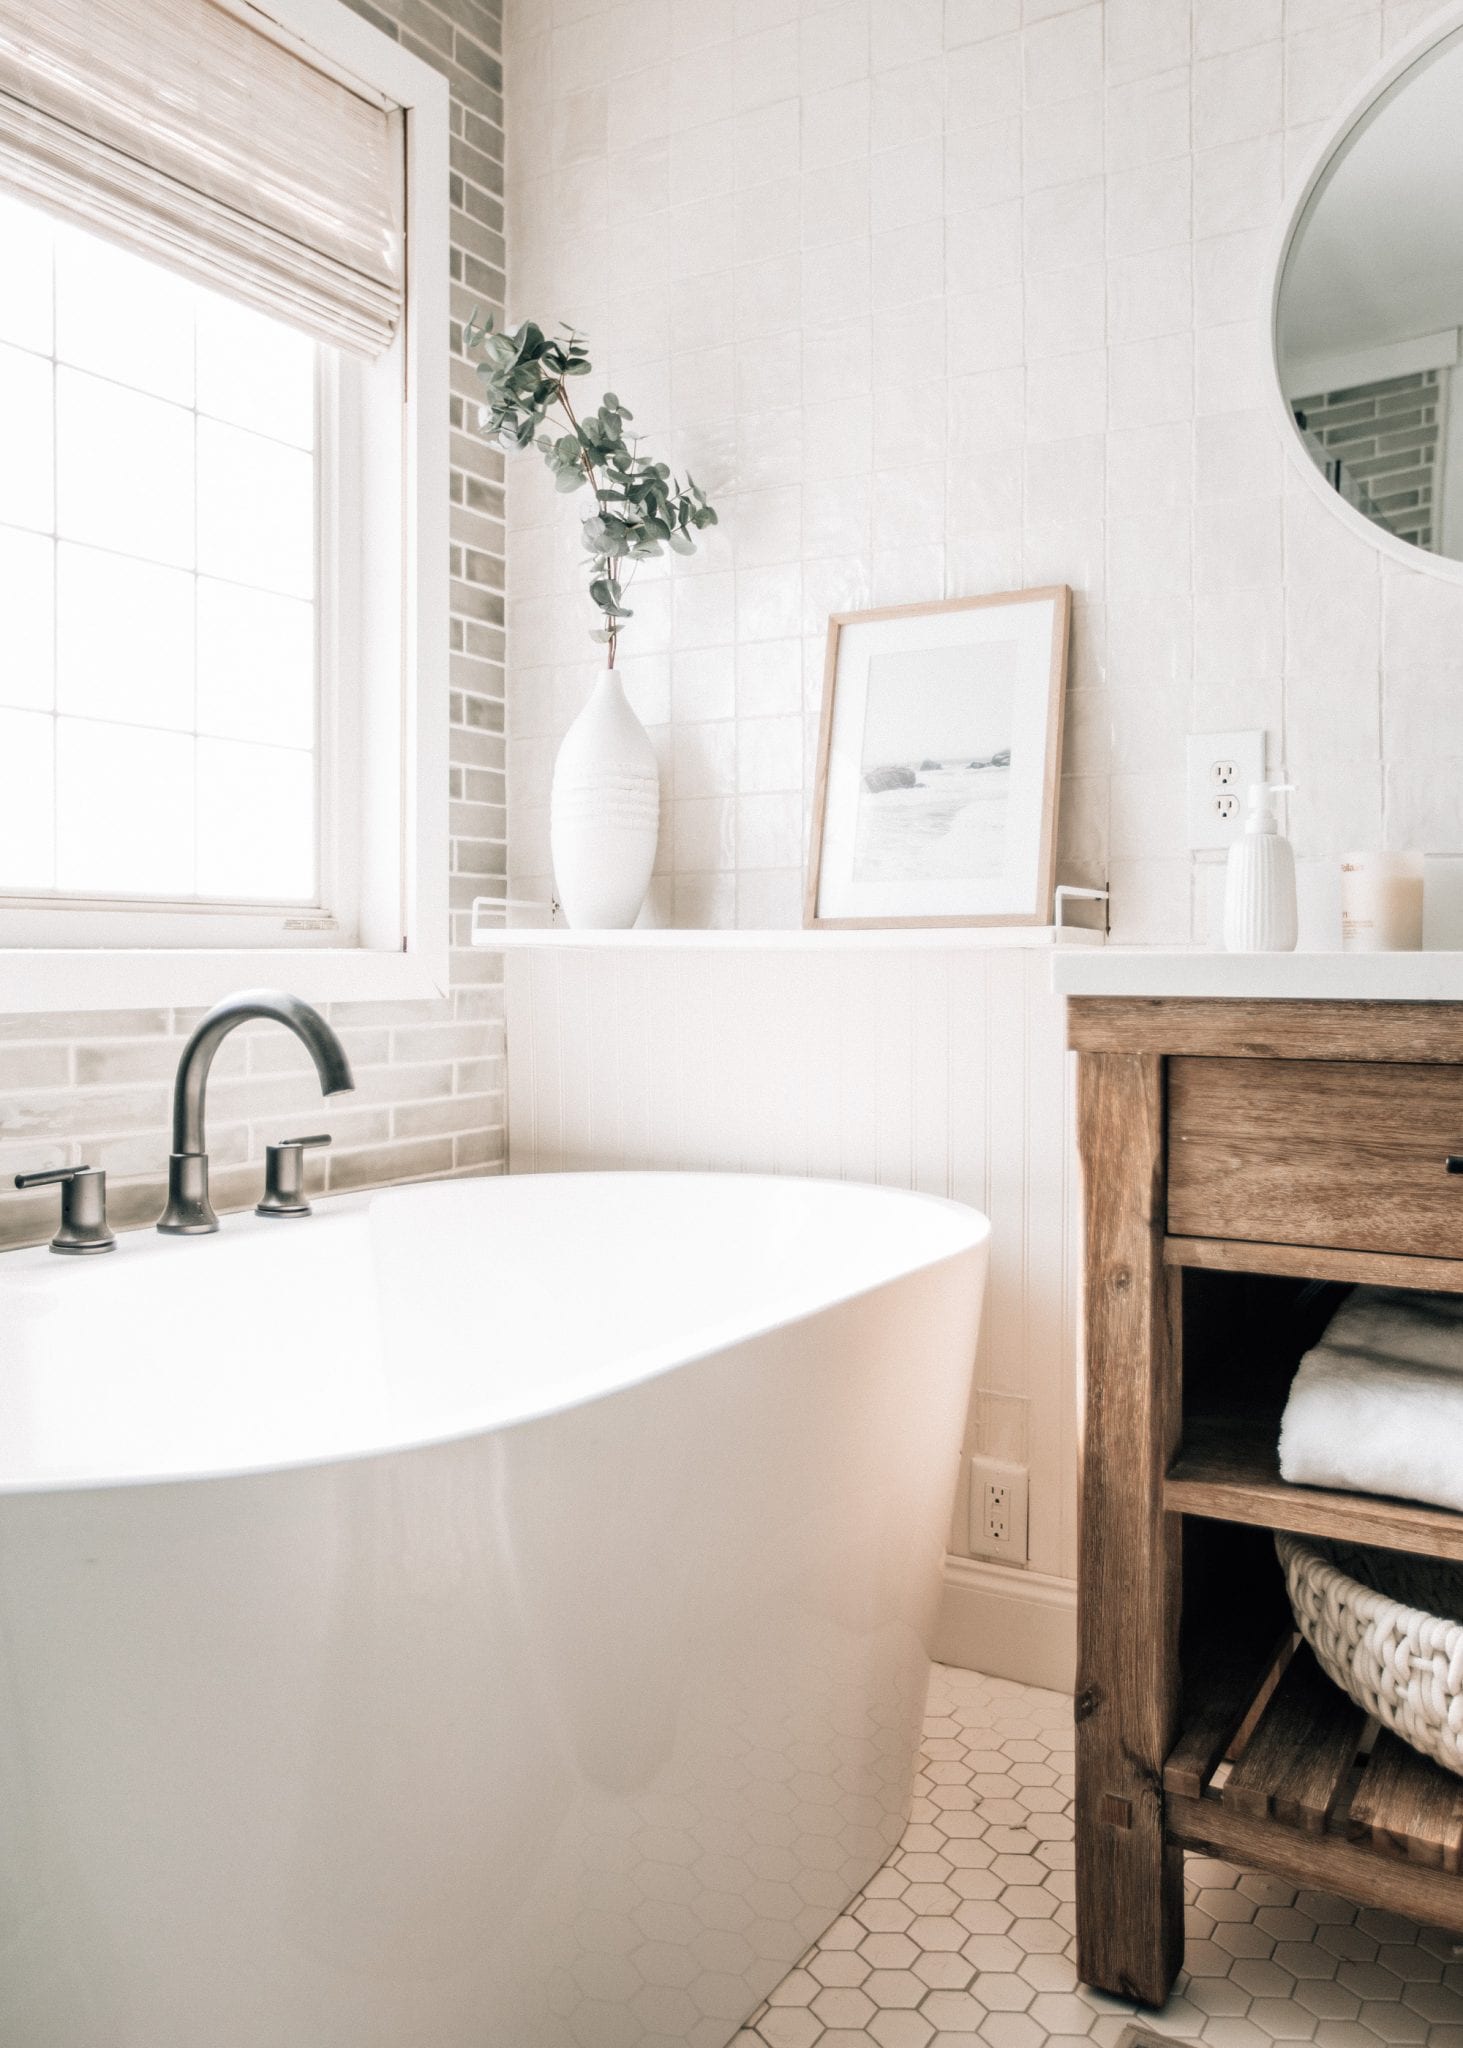
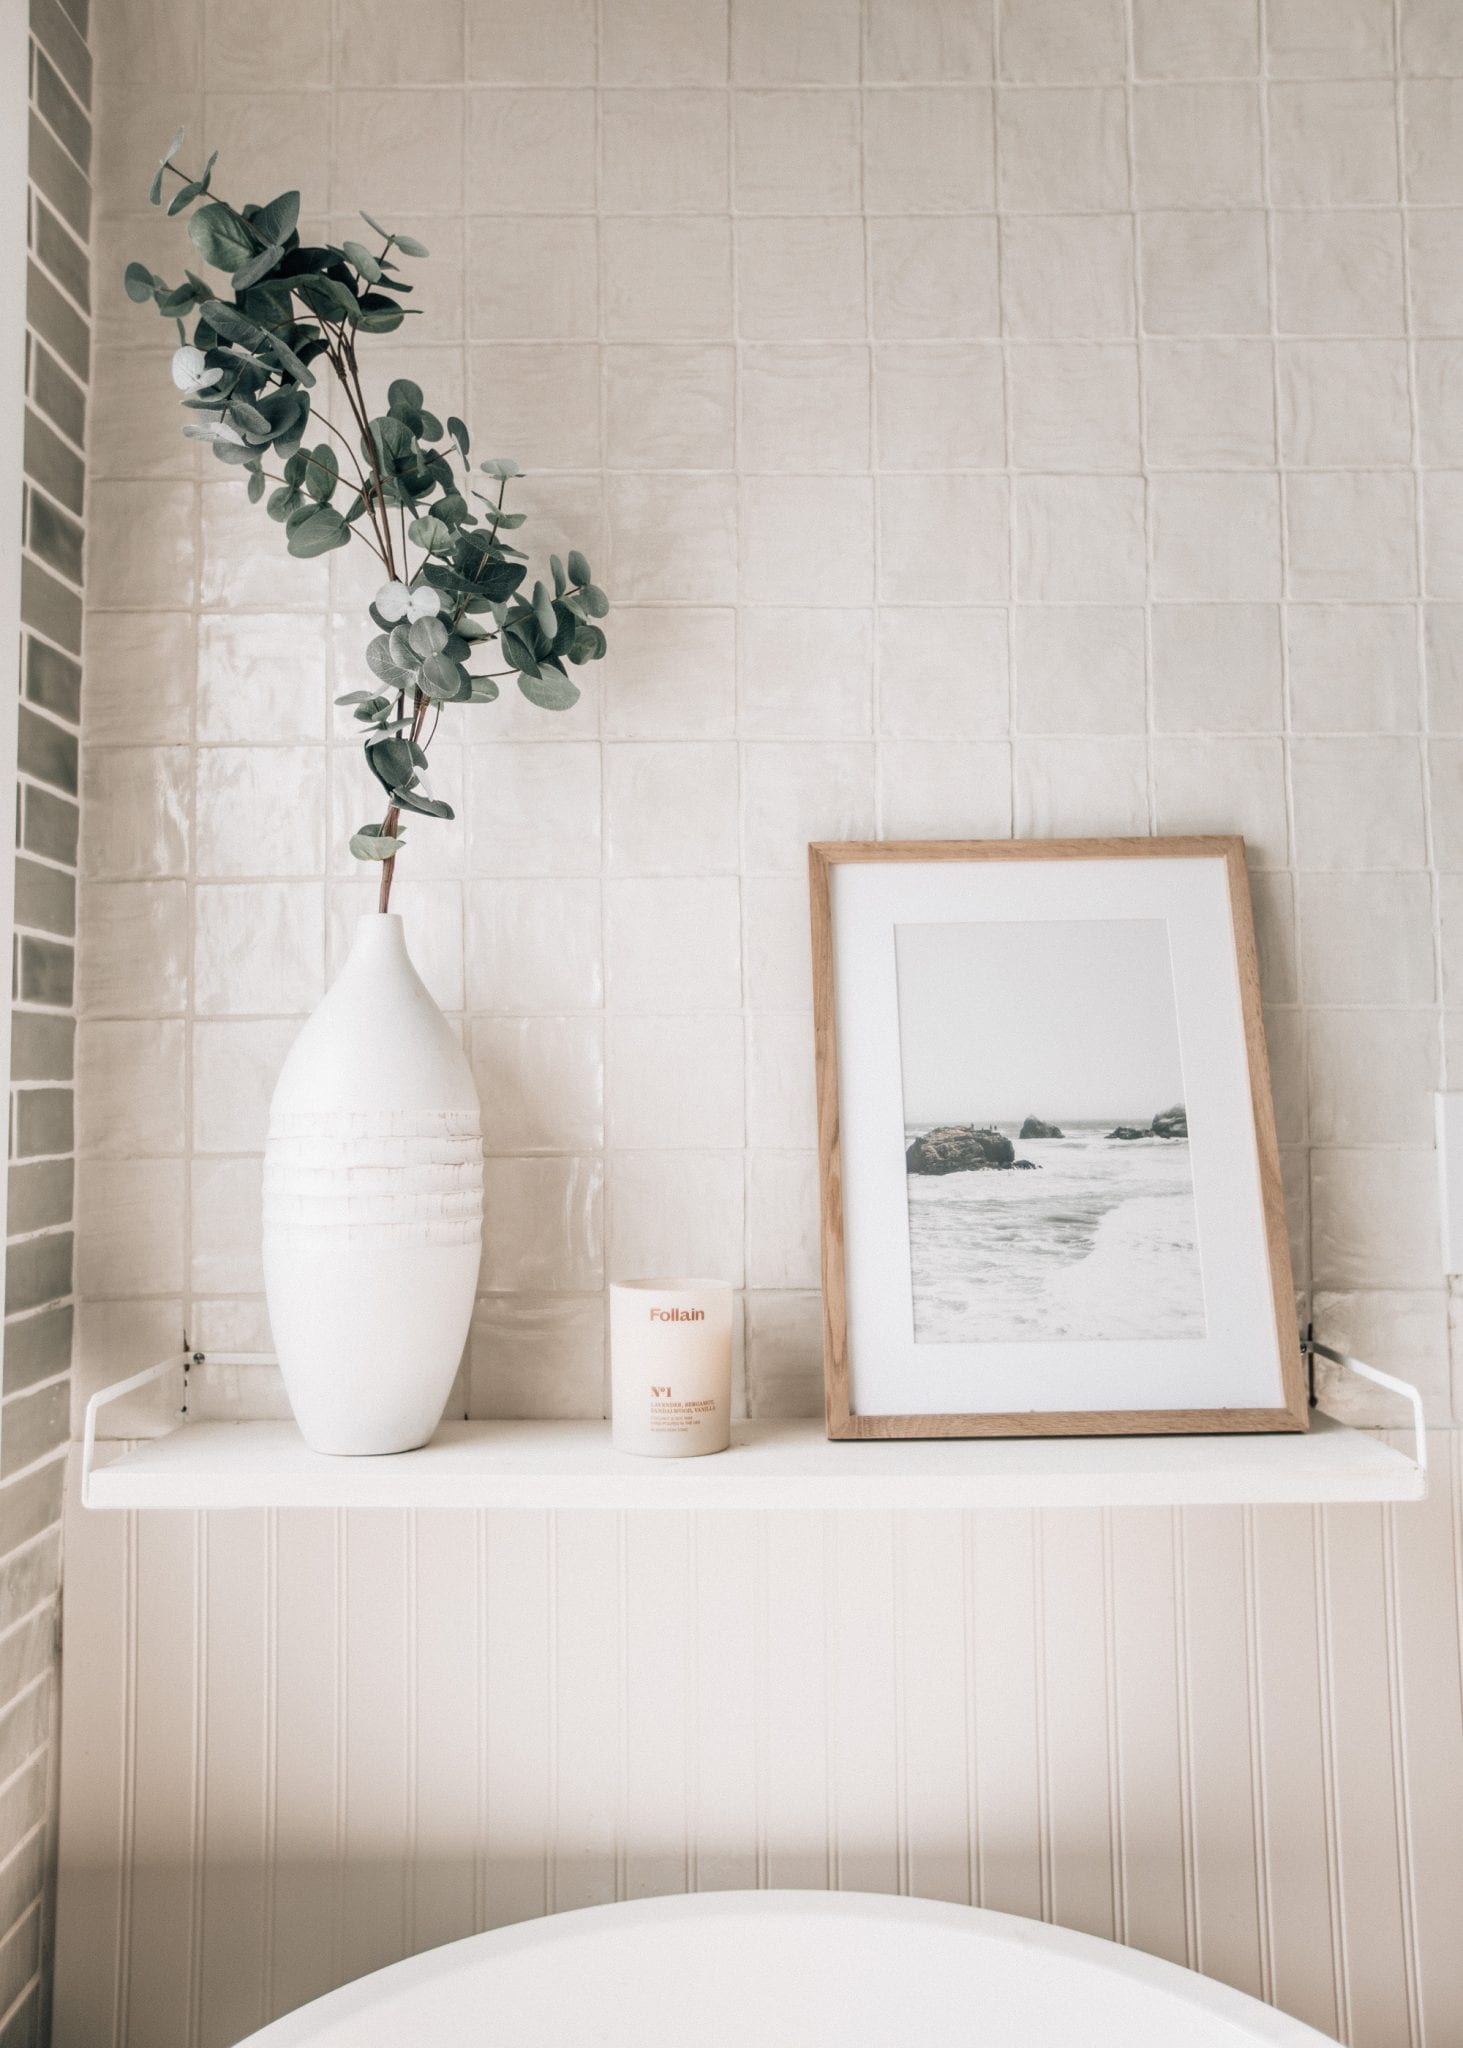
Before the renovation we had one large mirror and a strip light over the old vanity. I knew that I wanted something a little different and a little more modern so we chose to go with 2 separate circular mirrors and two gooseneck style lights to go above them. We added a small wall shelf across from the end of the bathtub too. I ordered this shelf but ended up painting it white after seeing the color wood in person.
The next step was replacing the shower doors. The old shower doors were accented in an outdated shiny gold and we knew that was not going to achieve the modern look I was going for with the black hardware. Instead of putting back the old doors, we opted instead for clear shower doors all the way around. The hinges and handles were black, matching the other pieces in the bathroom.
One of the last steps for the renovation was painting the walls. They were a cool shade of grey and we decided to go with a clean pure white to create a contrast with the new tile.
To shop all bathroom details, click below, and if you have any other questions, let me know! For our exact vanity, you can find it here in various sizes!

Wow this master bathroom makeover is incredible, great job!
~Nicki
inspirational jewelry
Did you guys change out the hardware on the vanity? I like yours better than what is on the pottery barn website.
We did change it out and it was super easy to find a replacement! The ones I went with were: https://rstyle.me/+MmOhHxwNq5M6d18sRWQHCg
Hi! Beautiful bathroom! I see that the exact vanity is the Costco Elbe Rustica, which comes with single hole knobs, but your vanity has double hole, pull bar handles. Assuming you drilled new holes for the new pulls? If so, what did you use to fill in the existing center hole? i would love to duplicate this look without spending $$$ on the PB vanity 🙂 Thanks!
Hi Laura! Yes, you’re correct! We had to drill extra holes and used wood filler to fill in the center holes. You can find stainable wood filler and we had a bunch of leftover stain in our garage at the time so I just used one that was most similar.
Beautiful! What did you use for the penny floor tile? I can’t find a link.
Thanks.
I couldn’t seem to find it online but it was from a local Floors & Decor store!
Hi! I have your same layout! Would you mind telling me the length of the wall your tub and shower is on? And the inches on the floor between your tub and shower and tub and vanity wall? I want to see if mine is comparable. It just feels like a tight squeeze. Has cleaning around the tub been an issue? Are you able to completely submerge in the tub? I’m 5’9” and worried about not fitting in a 56” tub. Okay, that’s all my questions! Your bathroom is gorgeous and I hope to use your design ideas!! Thank you for sharing!
So sorry for this delay! Unfortunately, we left that house 1.5 years ago so I don’t have the dimensions for the bathroom! Sadly, right after we renovated our bathroom, my husband was relocated for his job to NYC so we had to say bye to it! I literally only used the bath once 🙁
Hi, can you tell me where you bought your tub and the dimensions of the tub?! Looks great! Thank you
Hi Meredith! We got the tub from Home Depot! Here is a link! https://rstyle.me/+EUrBfrM14J2ejFW–gtRPQ