
This post was made in collaboration with Chase Freedom Unlimited. All opinions are my own.
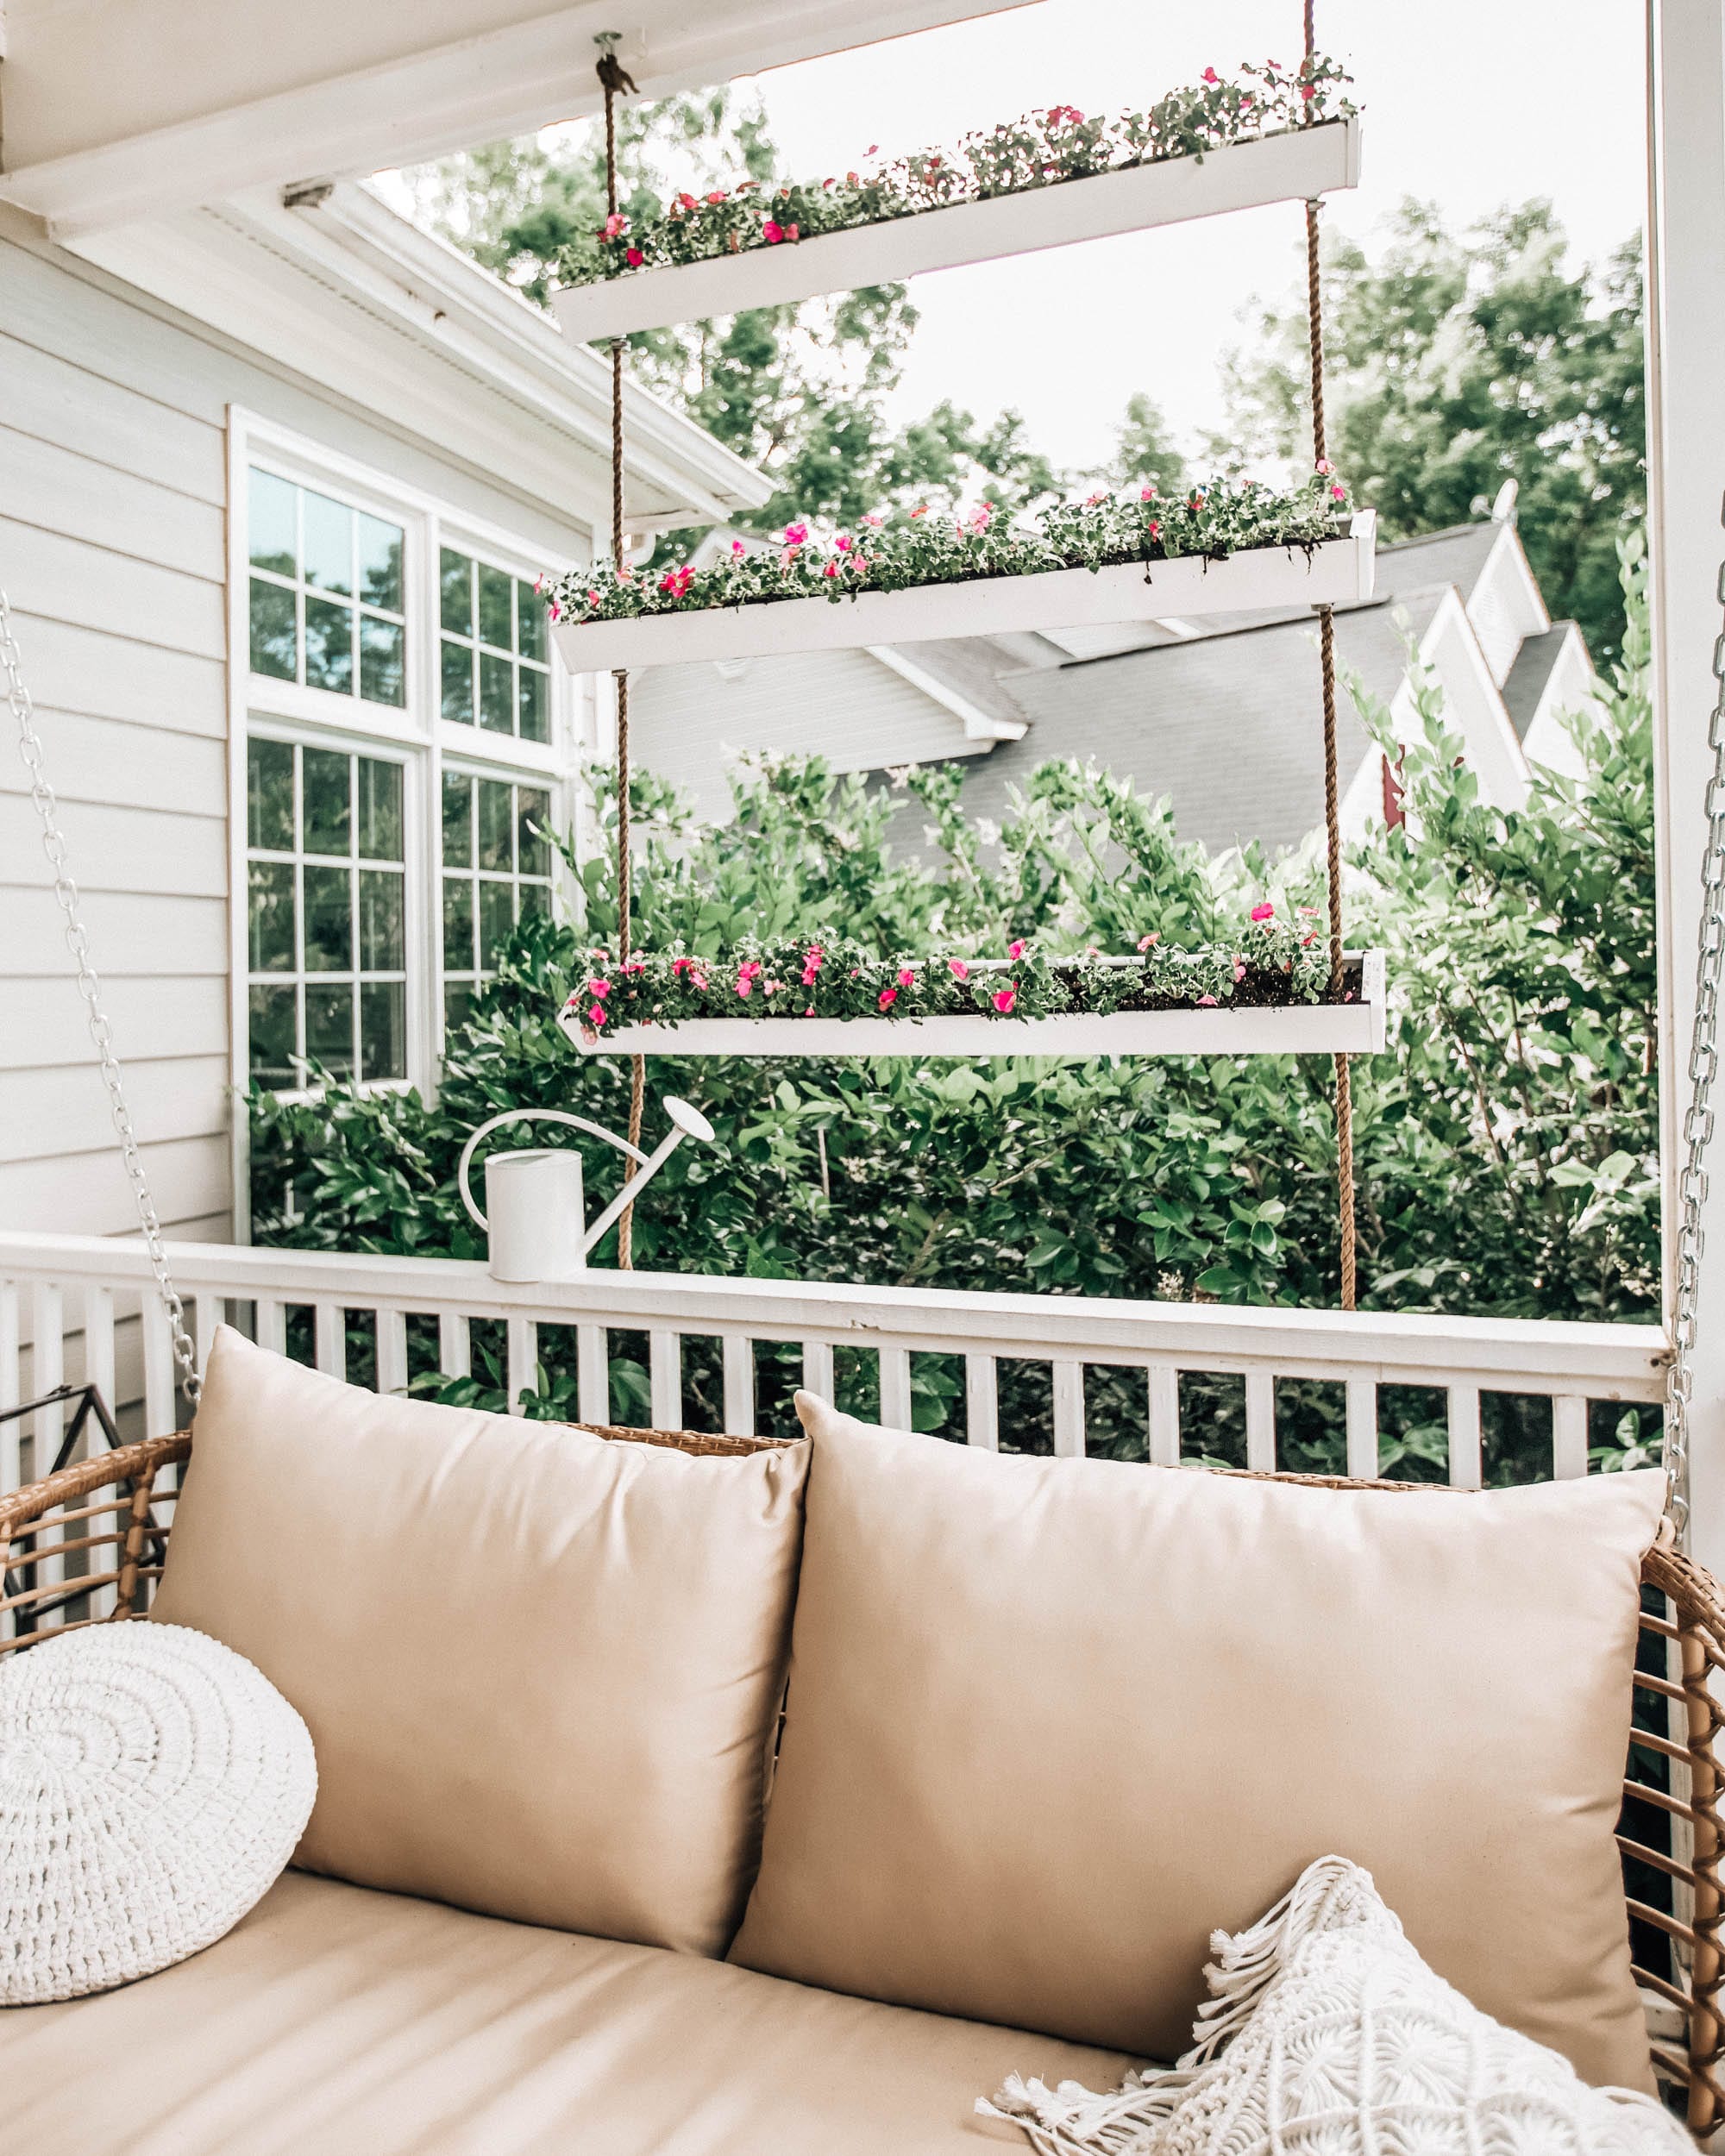
Earlier this summer, we decided to add a swing to our front porch, but I knew the porch needed something else. Our porch is really tall and there was a big space behind the swing that I knew needed to be filled with something. After visiting a friend’s house, I noticed she had hanging planters at the end of her porch and I loved them! I especially loved what they were made out of… gutters! The following weekend, TJ and I decided to pick up some supplies to try and make our own gutter planters… and they worked! Today I wanted to share a quick tutorial of how we made these. I can’t wait to fill them with different plants throughout the year! The best part was that the whole project took less than an hour and cost less than $50 (without plants included).
If you’re new here, I’ve been sharing a few landscaping goals these past few months. I had a goal this year to learn more about gardening and landscaping in general and teamed up with Chase Freedom Unlimited, my personal favorite cash back credit card to ensure I’m earning 1.5% cash back on every purchase while reaching these goals. I’ve learned SO much in such a short amount of time but still have quite a few backyard landscaping goals in progress, like growing grass, laying down a stone path, and much more. Luckily, my initial projects like these gutter planters are earning me cash back that I can use towards those projects to keep this project moving! I’ll continue to share all the yard design projects and updates on here.
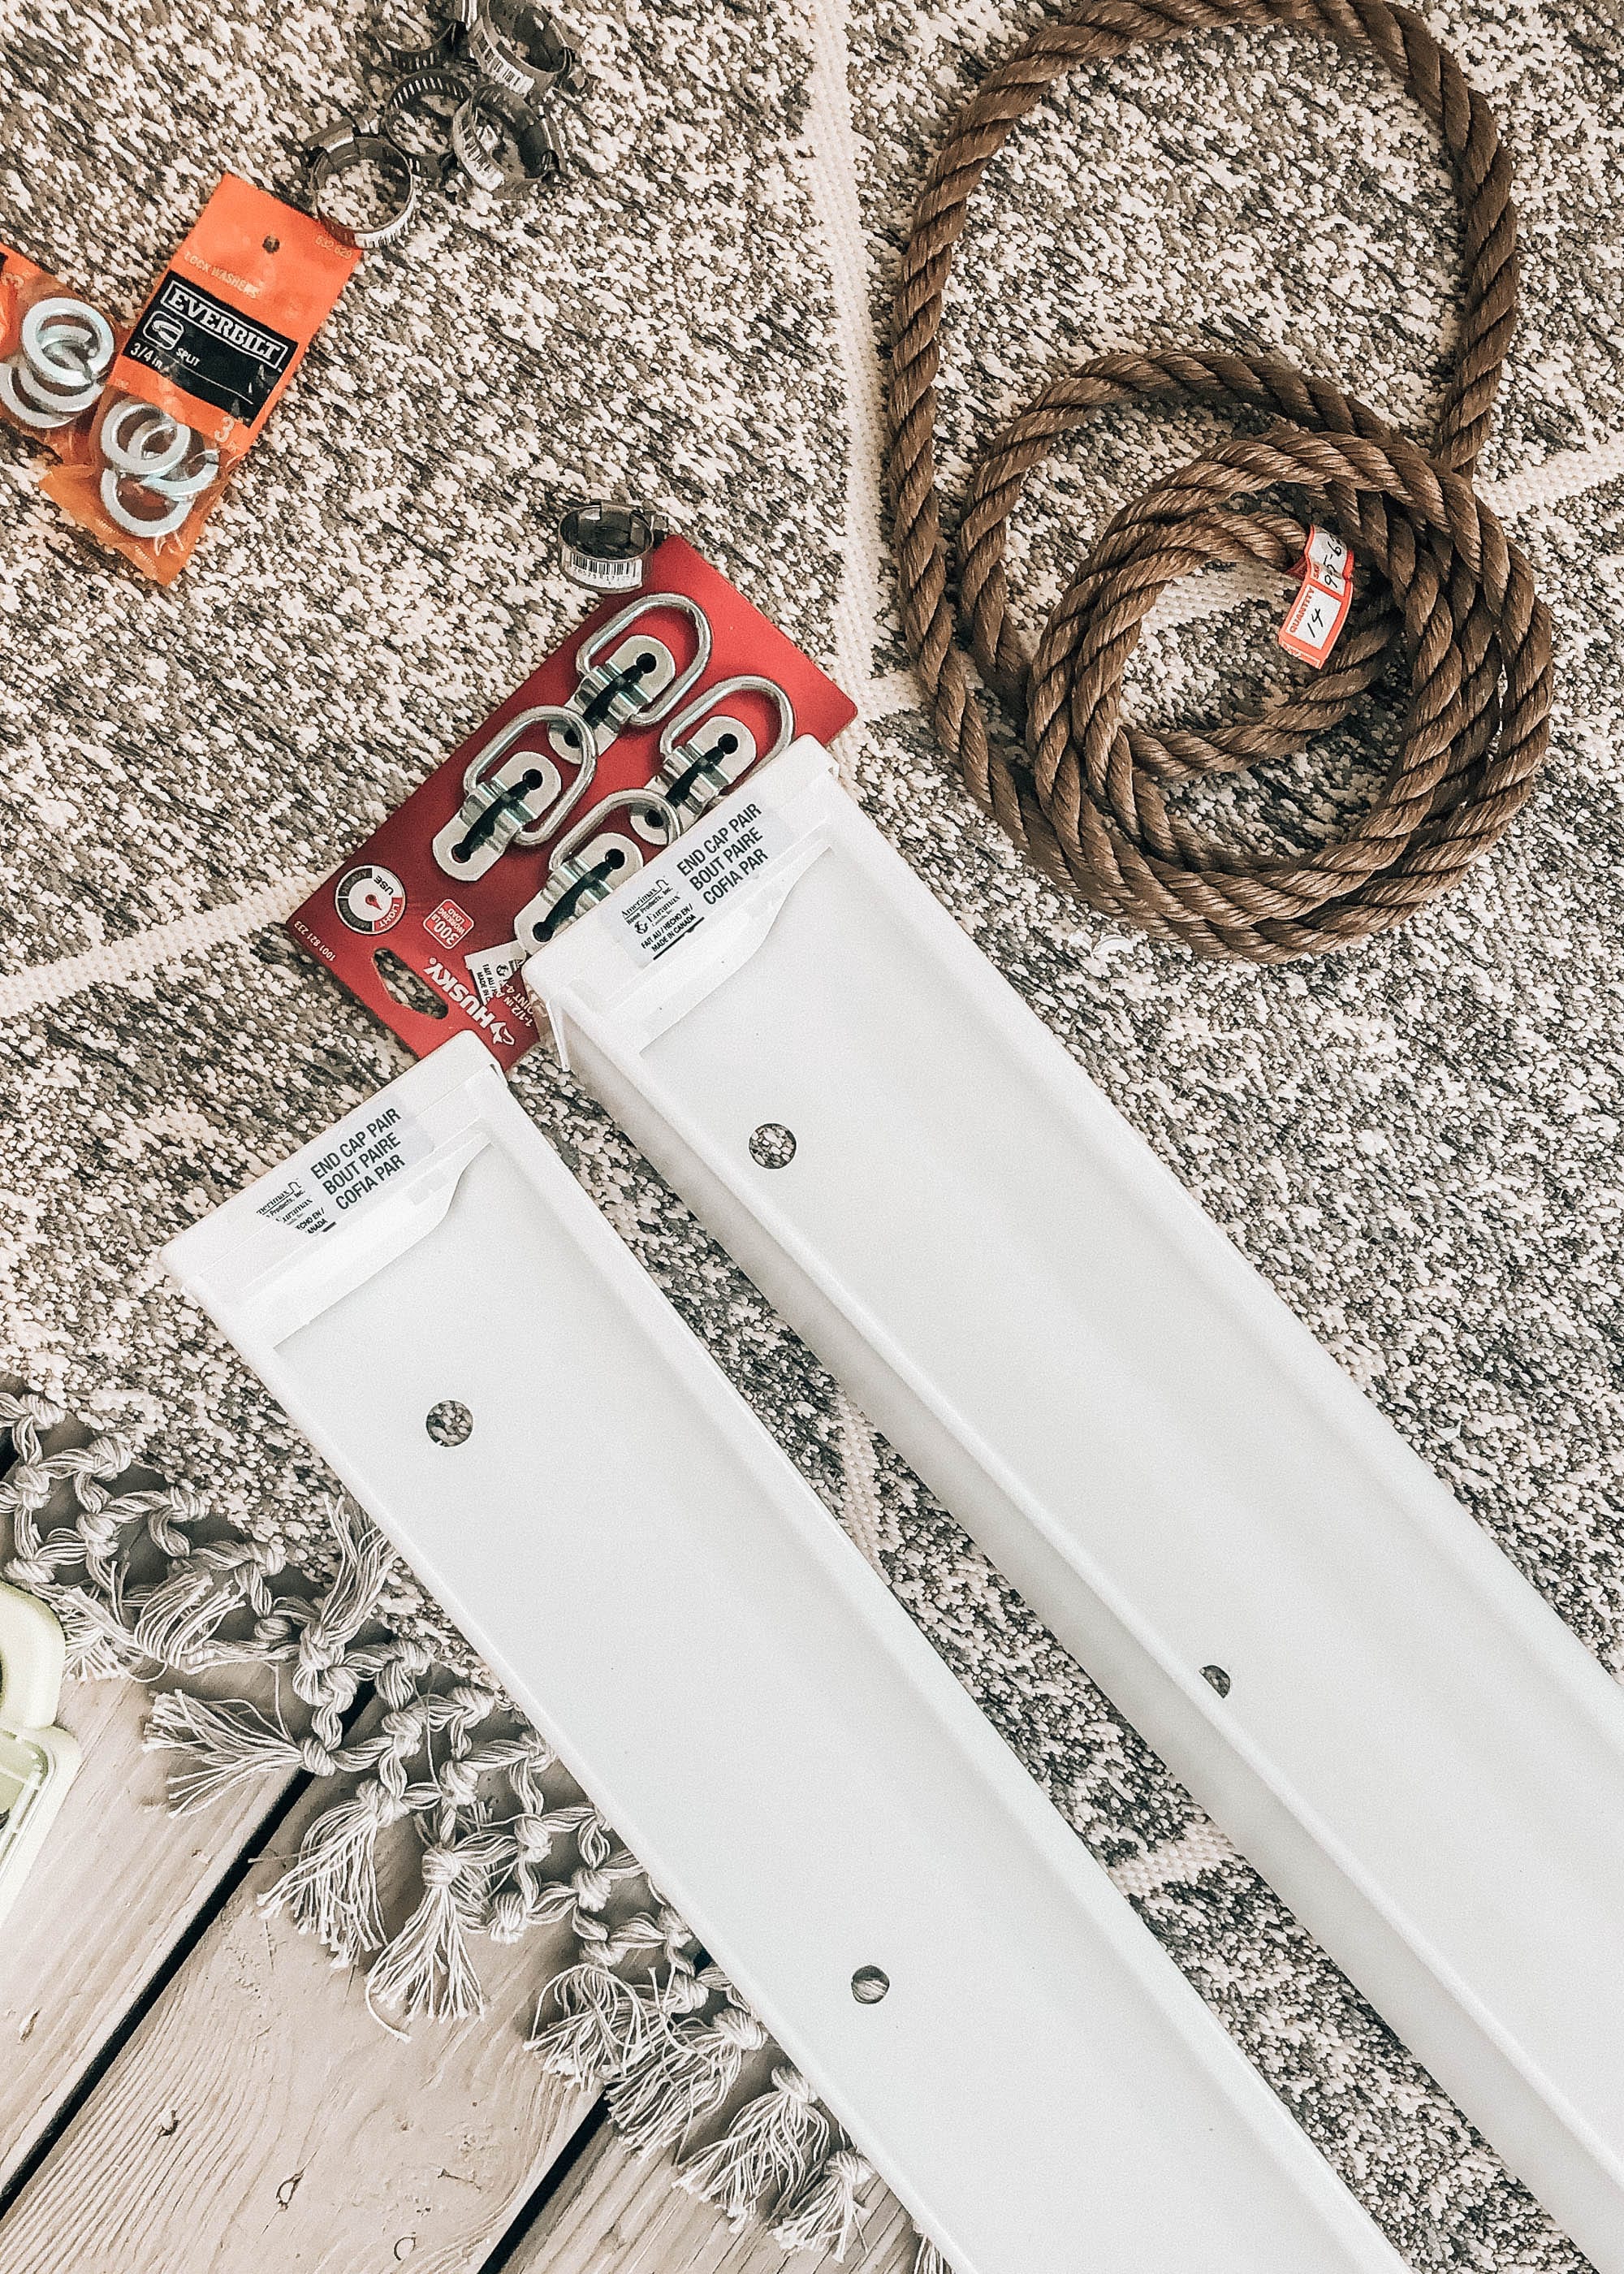
SUPPLIES:
12 feet of vinyl gutter
3 sets of gutter caps
1 pack of ¼ x 2 inch S hook
2 screw in D planter hooks
About 20 feet of nylon rope
Six 1 inch washers (with hole wide enough for desired rope)
Six ¼ – 1 ½ inch pipe clamps
TOOLS:
Power Drill
Mitre saw (or jigsaw)
Polyurethane spray
Flat head screwdriver
Tape measure
STEPS:
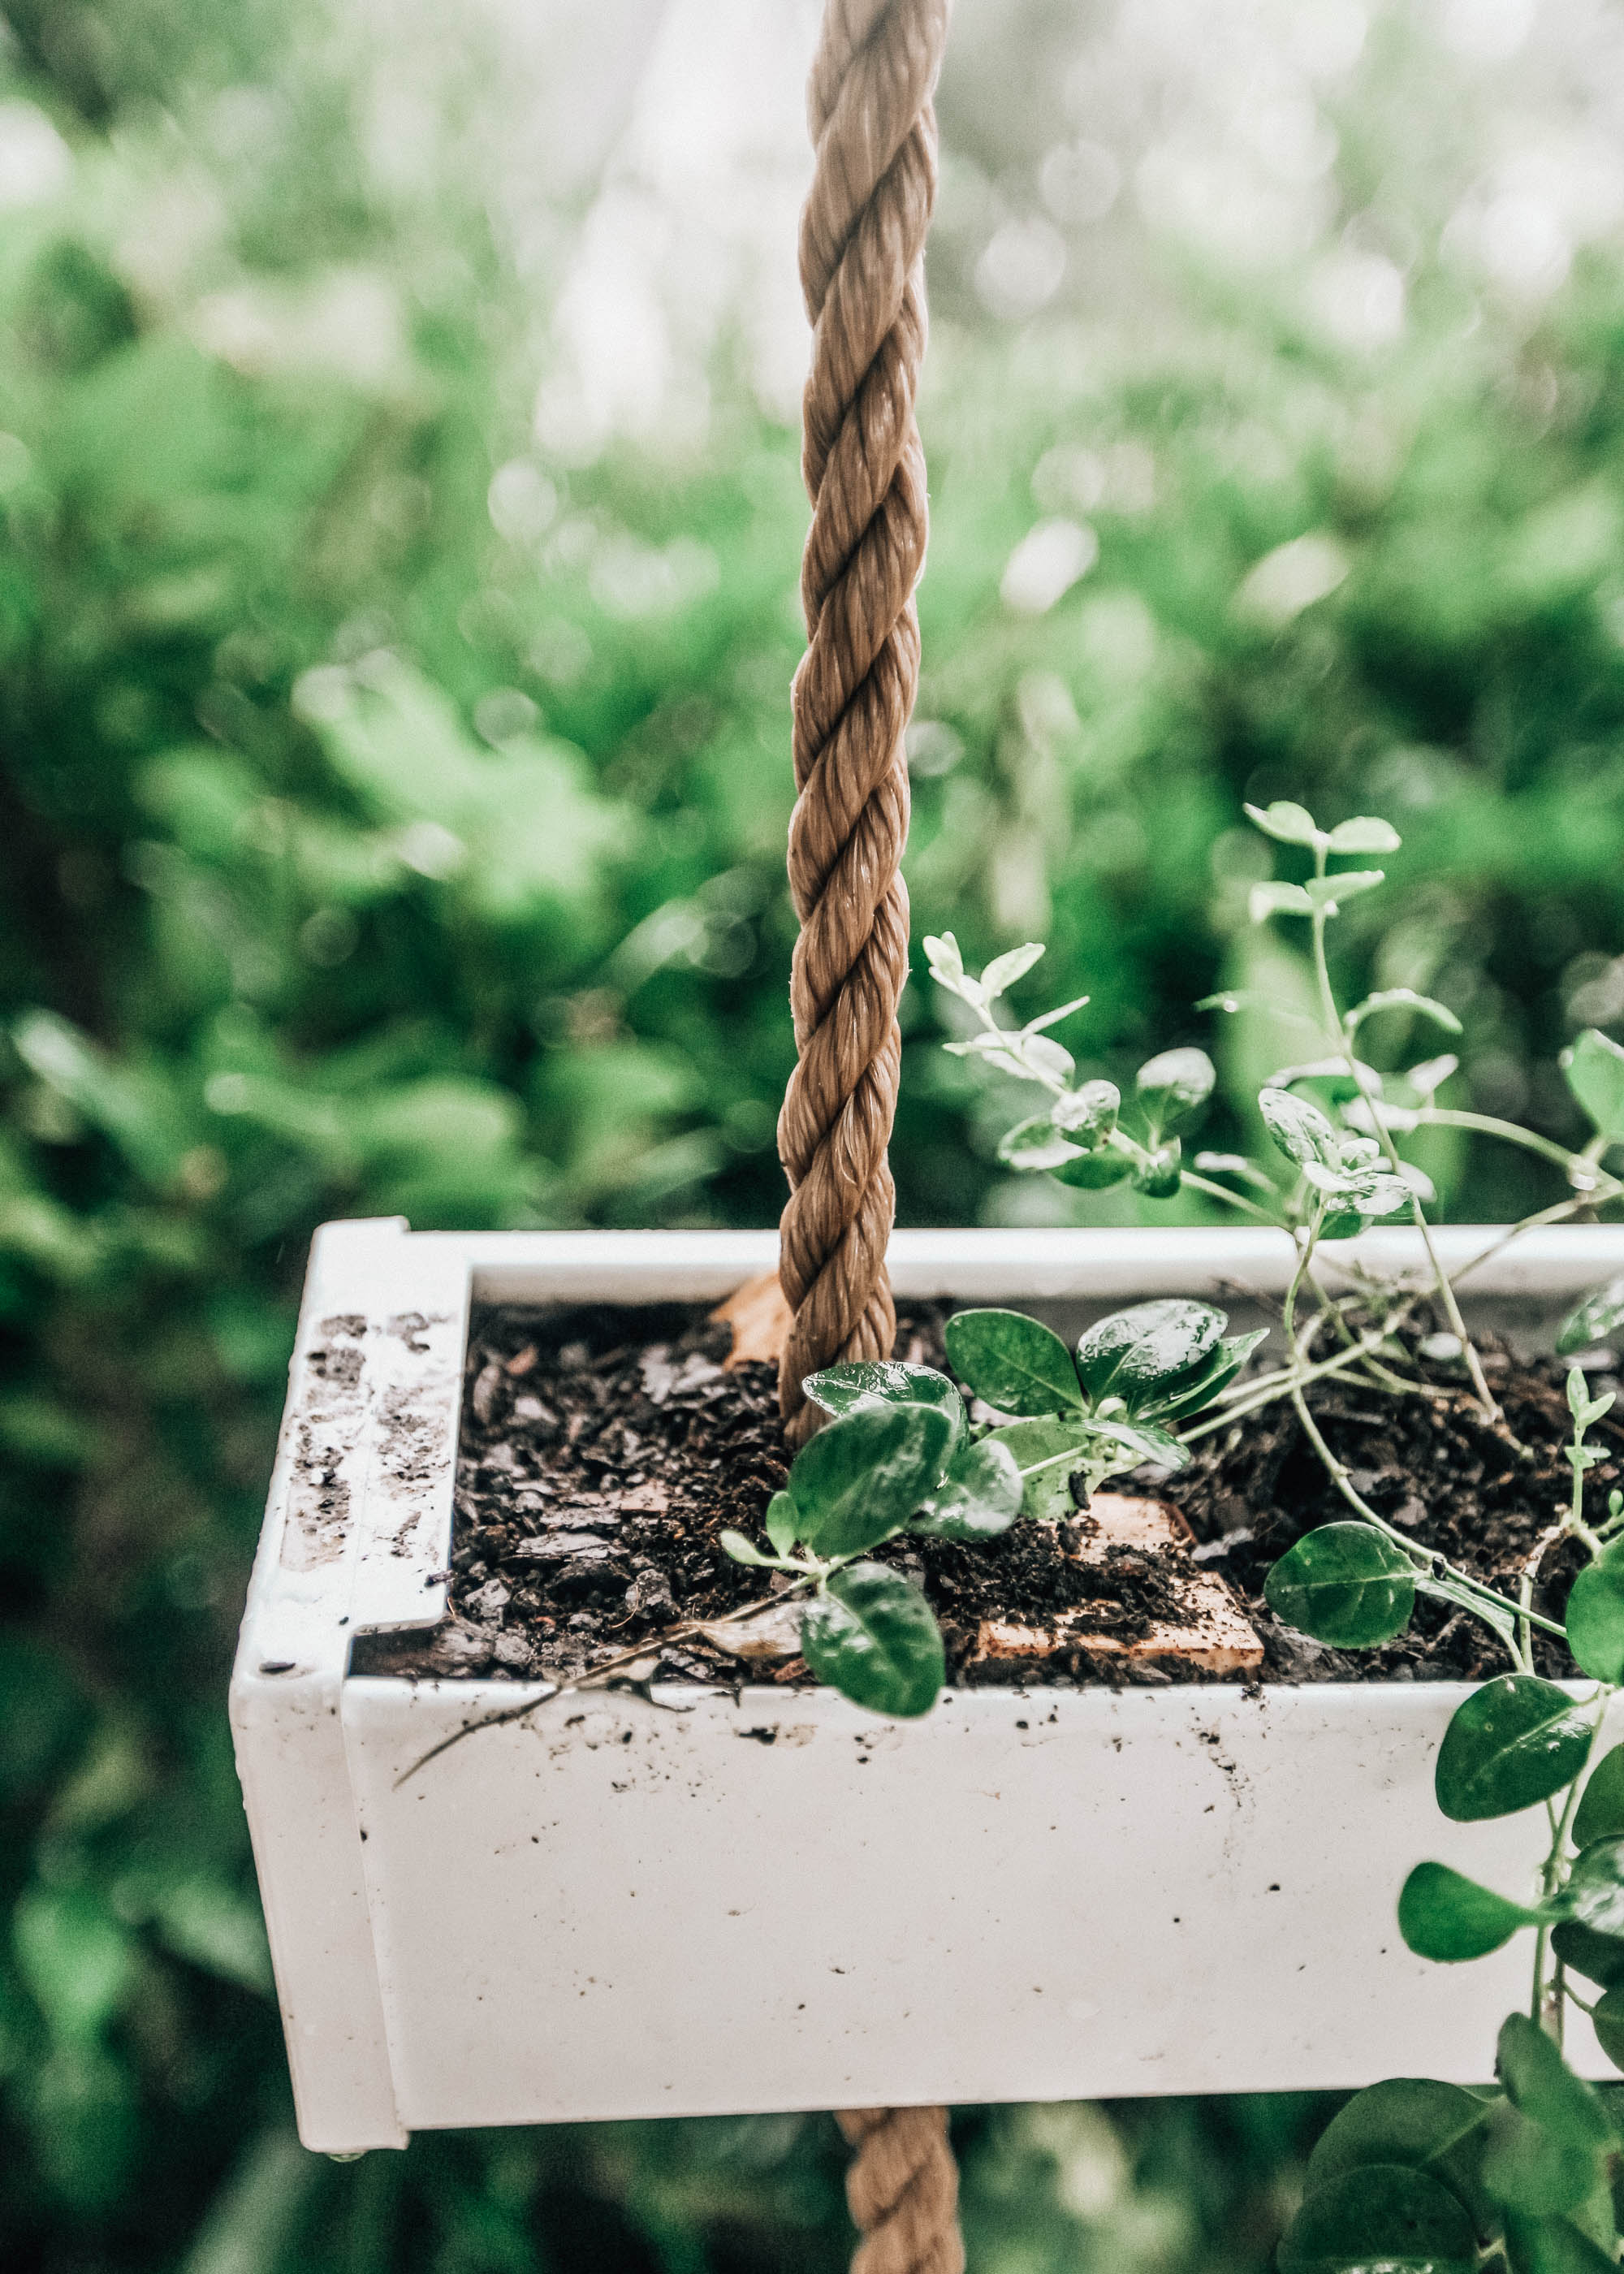
- Determine desired length of the gutter planters. We used 12 feet of gutters to make three 4 feet sections. Cut the gutters using a mitre saw or jigsaw to the desired length.
- Drill 5 holes in each gutter spaced evenly. Two holes will be used for the rope to pass through and the other three will be for drainage.
- Measure the length of the space vertically to determine how long your rope needs to be. We had about 7 feet of space on each side and cut our rope accordingly. TIP: if you can, have Home Depot or Lowes cut the rope for you using their tool that melts the ends. This will keep your rope from unraveling.
- Once the rope length is determined, measure out the distance between the planters and mark that on the rope. We had about 28 inches between each planter.
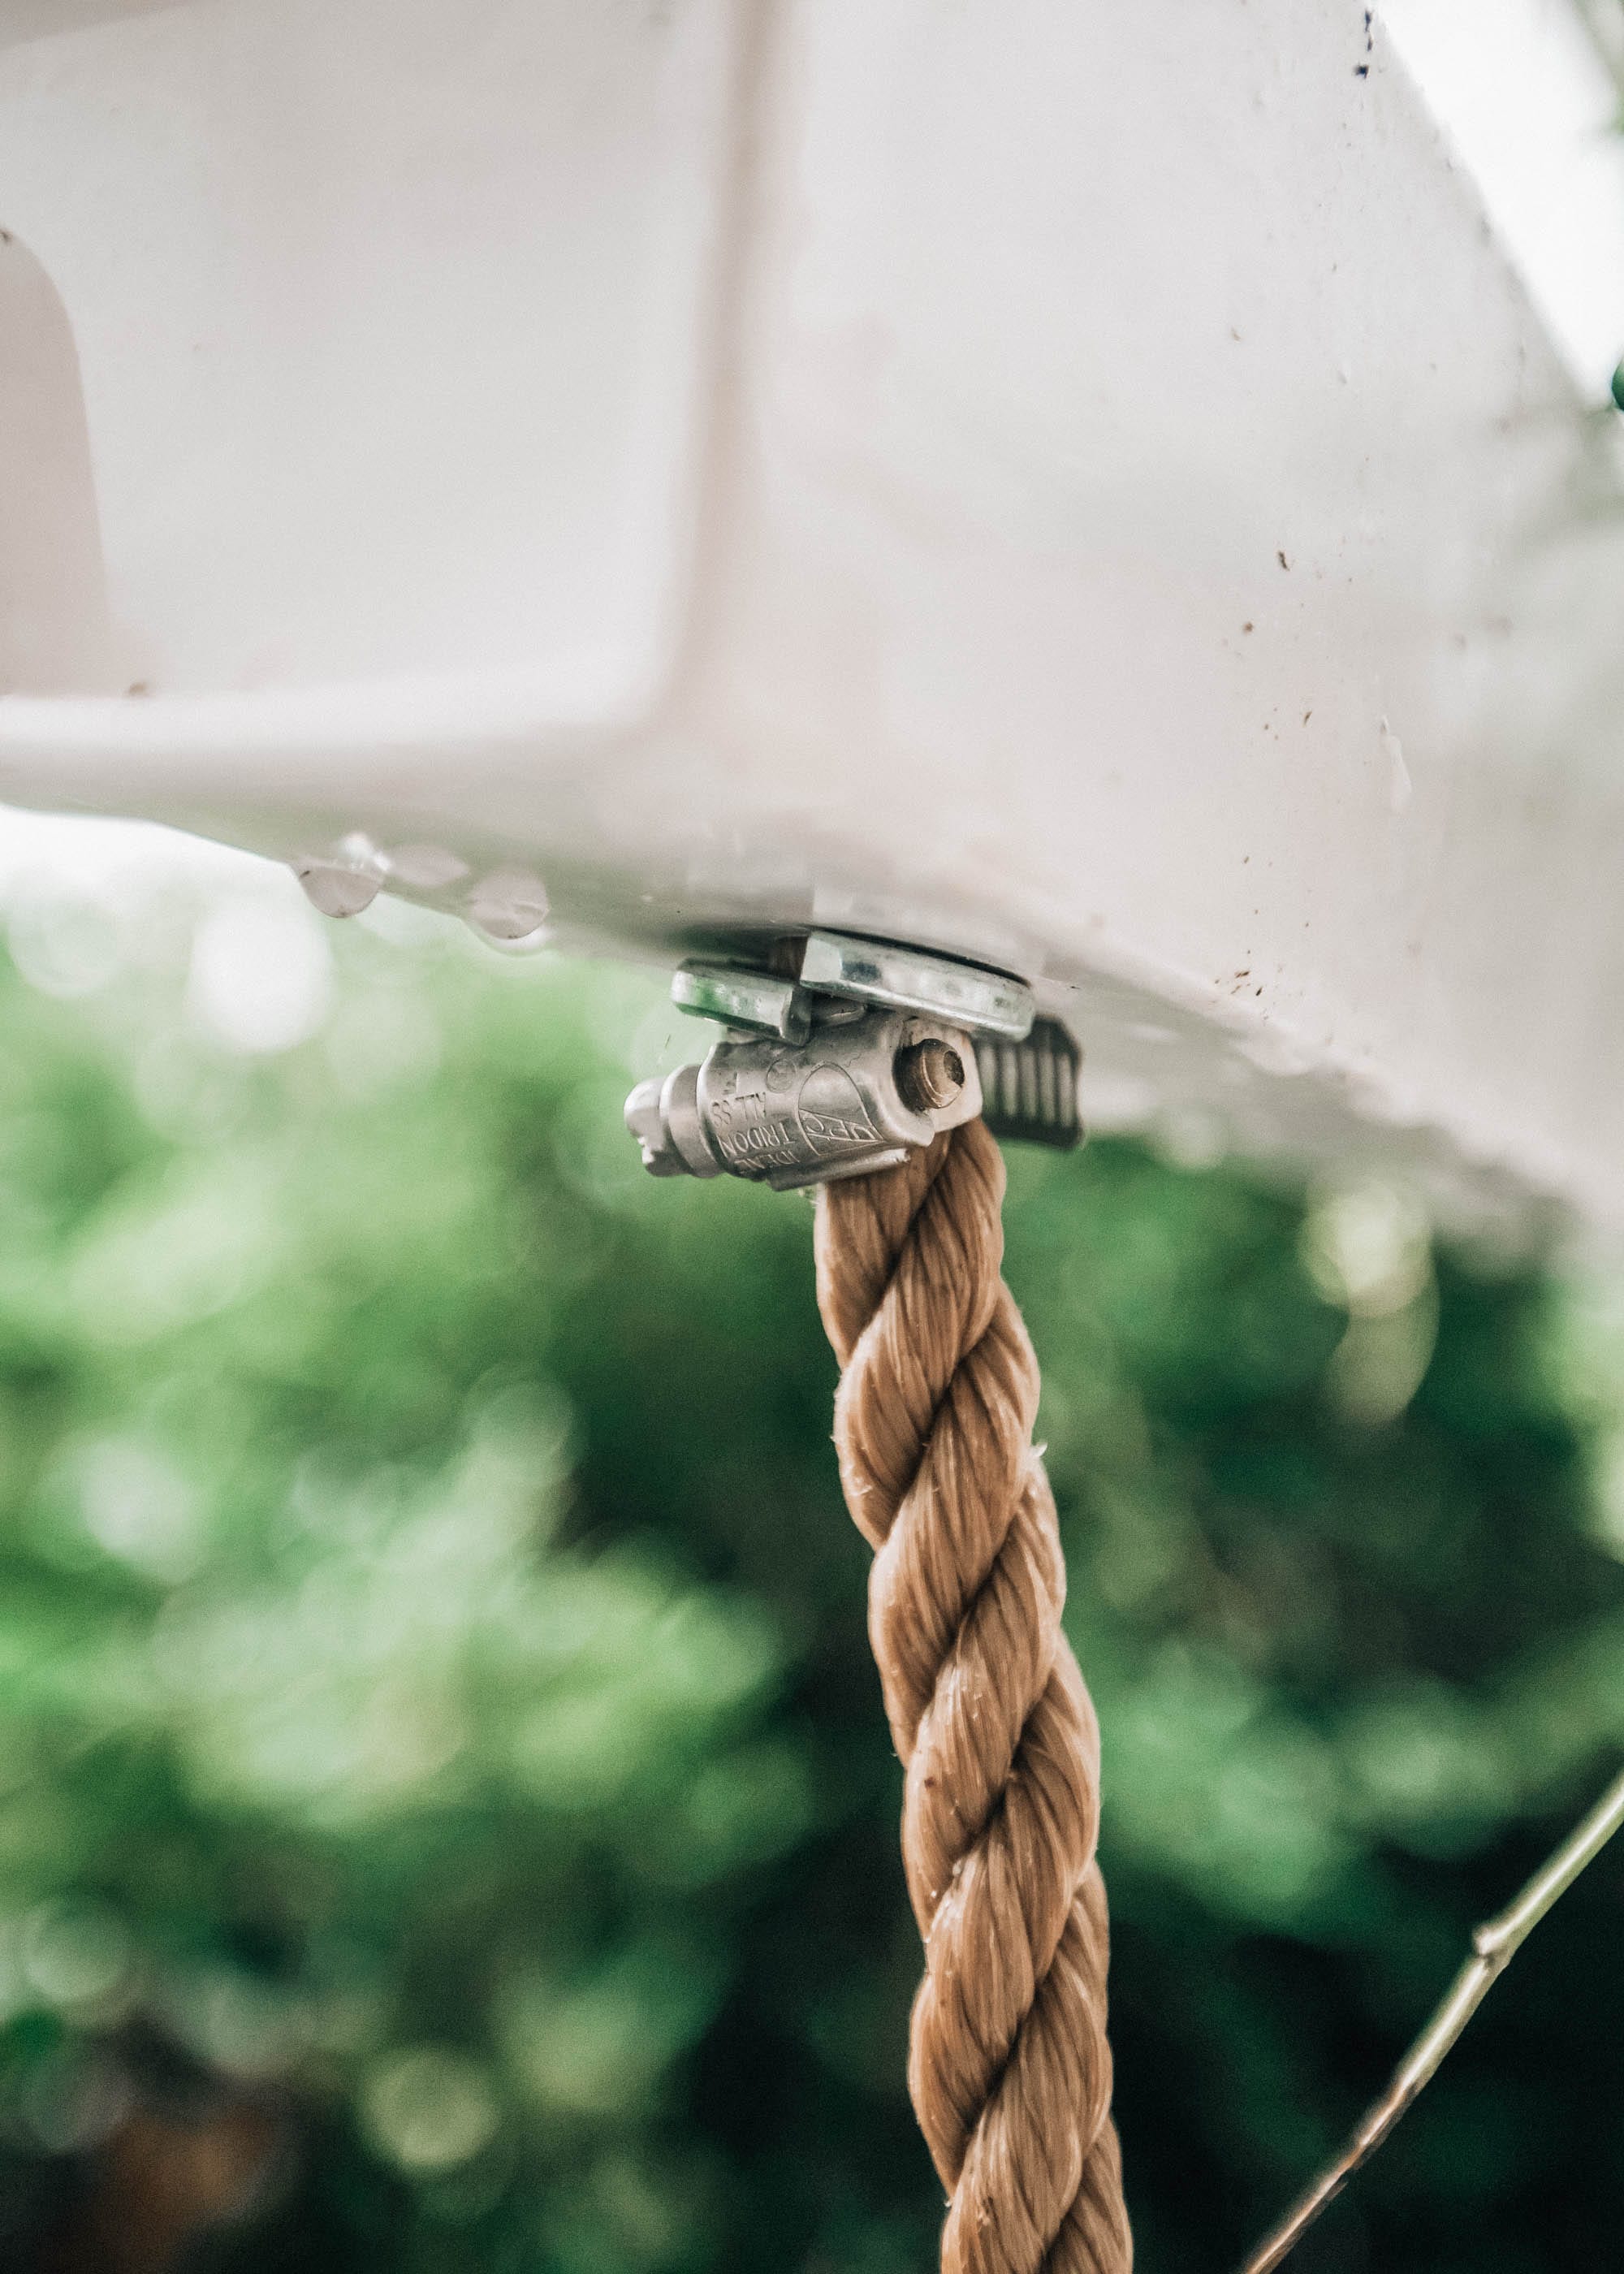
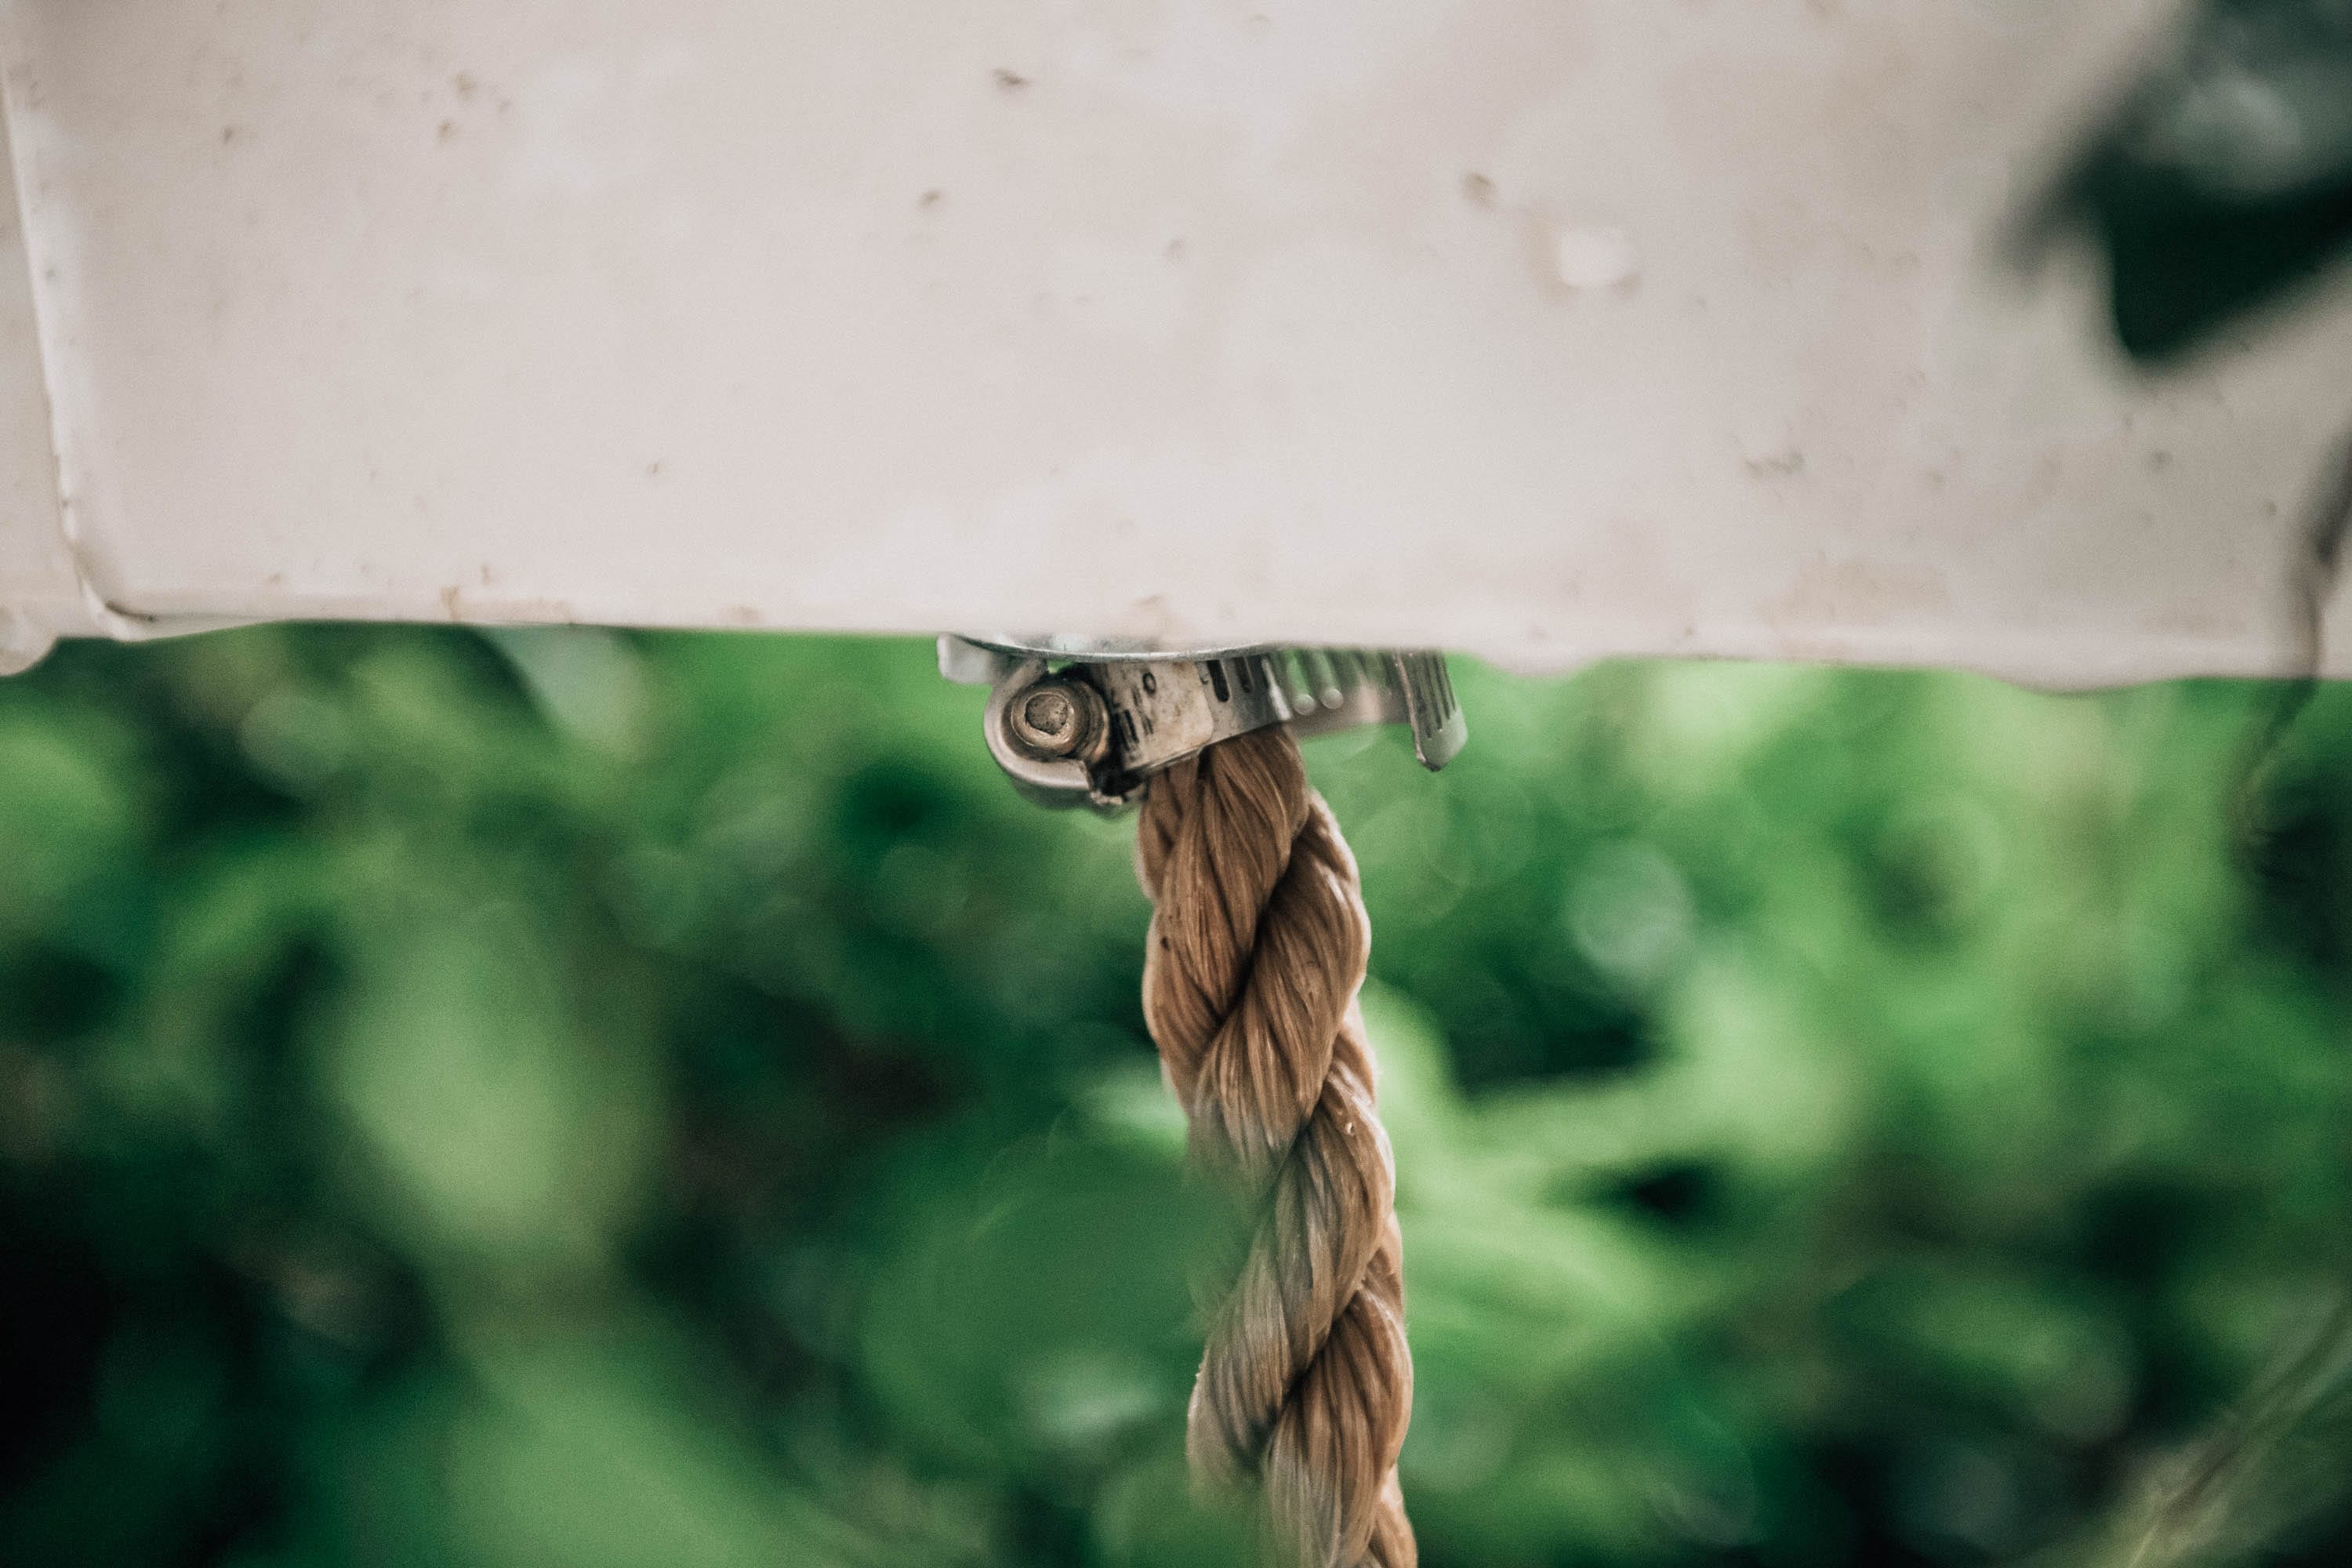
- Once marked, slide one planter onto the rope using the 2 outer holes. Loop through the washer and then the pipe clamp. Tighten pipe clamp onto rope until snug. Repeat for the other side of the planter and remaining 2 planters.
- Mark holes where D planter hooks will connect to the ceiling, dependent on how long the gutters were cut. Screw hooks into place using accompanied hardware. 2 options: Tie rope directly onto D hook or tie directly onto S hook. If using the S hook, this will allow for removal of the planters without untying the rope.
- Solidify tied rope using polyurethane spray that will harden.
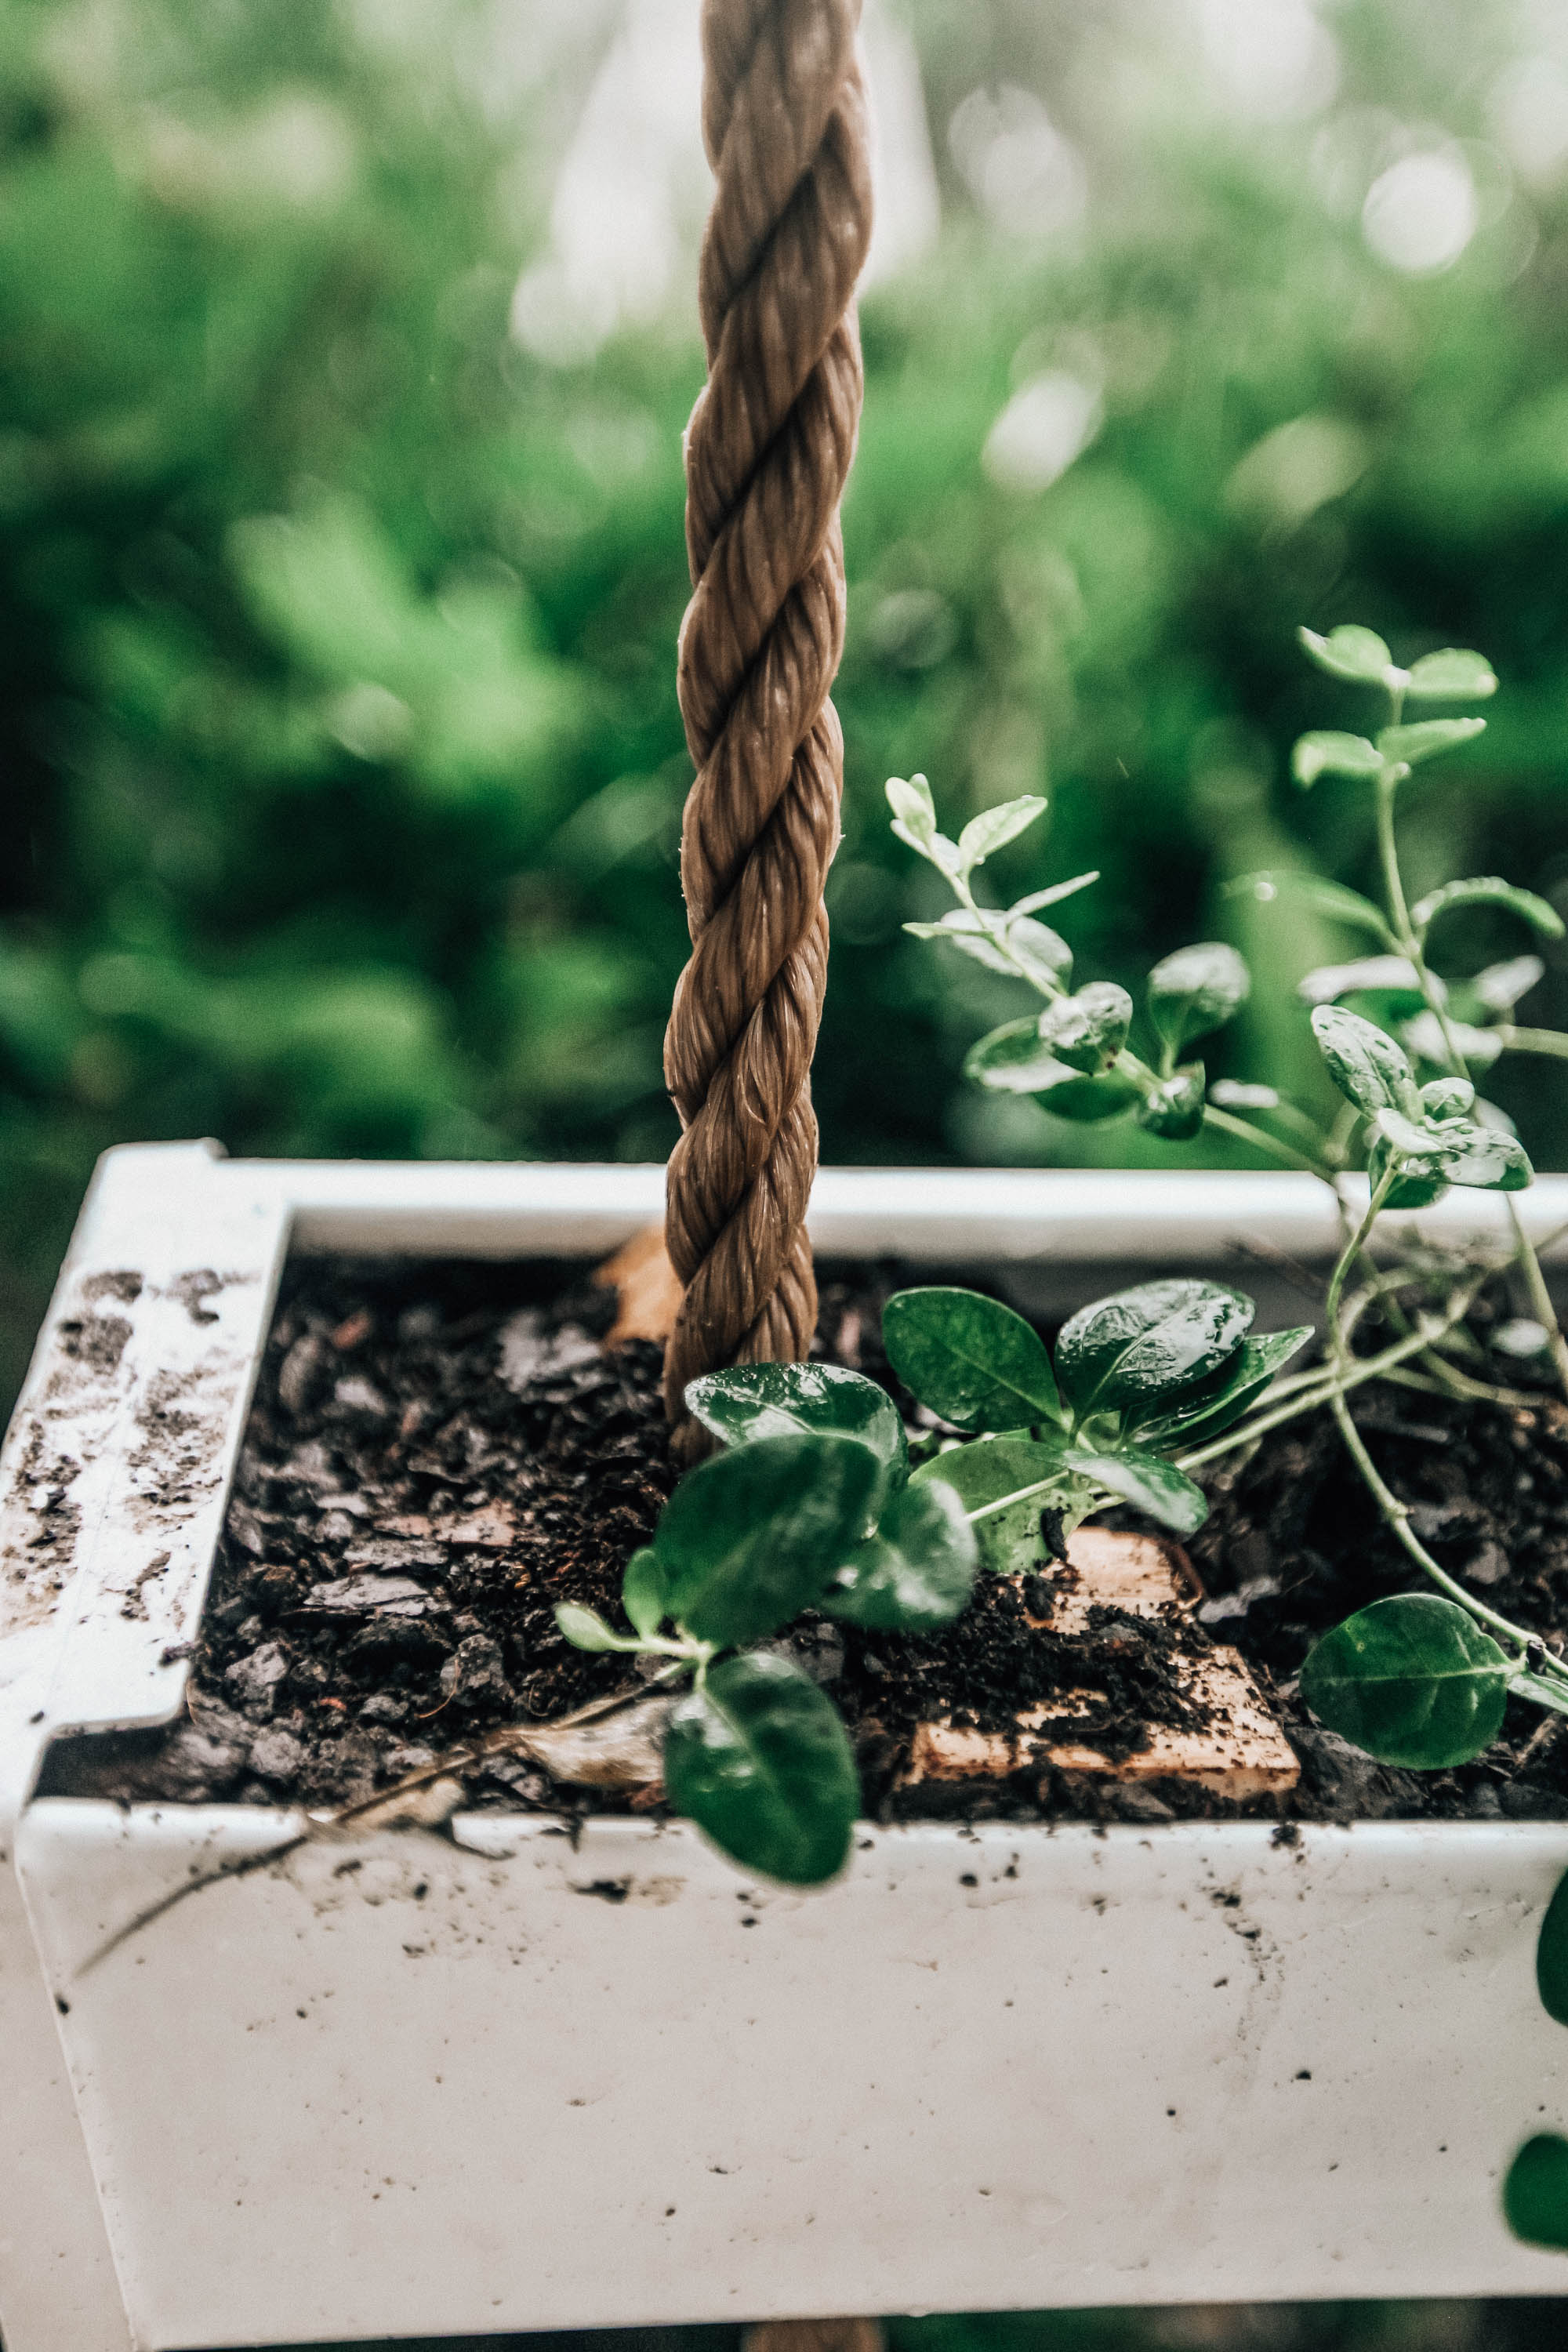
Lastly, fill planters with desired potting soil and plants.

Definitely going to make these next spring! SO cute!
That is such a cool project! Are you planning on switching out the plants for each season?