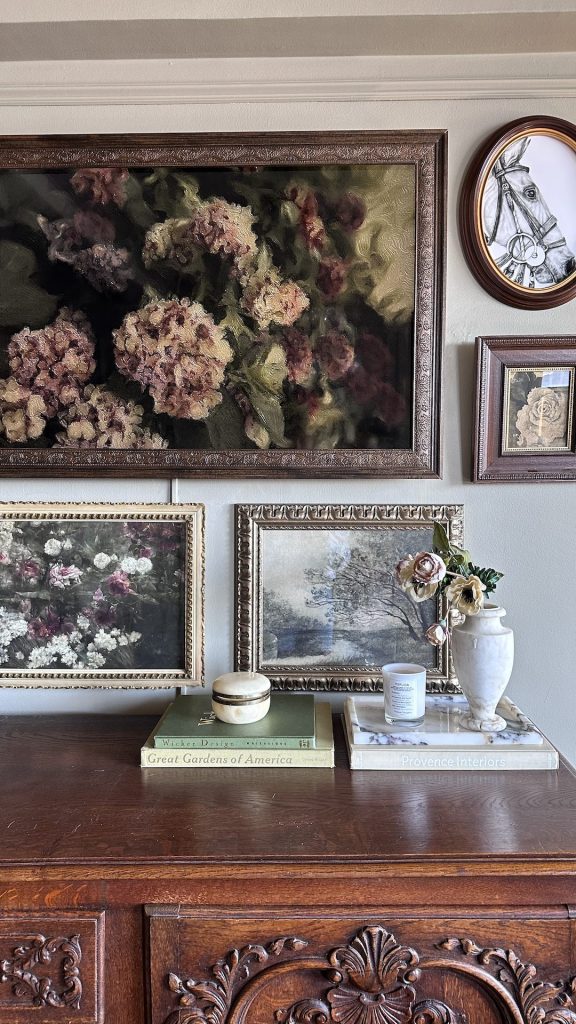
A few weeks ago we finally updated our Frame TV frame to something that matched the gallery wall a little better. When we first got our Frame TV 3 years ago we picked the standard white bevel that Samsung offered as an option. It worked well for the gallery wall we had at the time, but over the years my style has evolved a bit. The frame just didn’t match the look that we were going for anymore. So, with all of our past projects adding molding to the walls of our apartment, we decided to give it a try ourselves rather than buying an ornate frame from a company. So here is the process we went through!
I first set off to find some trim that I thought would fit well in the gallery wall with the other frames. We went to one of our favorite hardware stores, Ace Hardware, and Home Depot but I couldn’t find anything that really fit what I was looking for. Finally, while browsing Wayfair’s website, I found trim that spoke to me! So after finding the trim that I loved, I applied a dark walnut stain on the molding that would go well with the other frames in the gallery wall. I found this stain color called Dark Walnut and it ended up being the perfect color after 2 coats. I just wiped it on with an old t-shirt and then did it a second time to get the color I wanted. While that was drying I moved on to measuring how long each piece of the frame needed to be. I guess you could stain before or after cutting it but I decided to stain before cutting.
Our measurements began on the inside of the TV frame because that was where our pieces would have to match up in the corners. For our 43-inch Frame TV we came out with 37 inches on the top and the bottom, and 21.5 inches for the sides. Once the stain was dry we cut the molding to our measurements. This mitre saw box has come in super handy when cutting this type of molding, especially in a smaller space and helped to get a good 45-degree angle. This is exactly the same way we’ve done all of the molding in our apartment by the way.
After finishing all the cuts our next step was to add the command strips. We used the same velcro-style command strips that are on a bunch of our pictures in the gallery wall. We placed them on the TV first to make sure all of the adhesives were touching both surfaces. The angles lined up perfectly and that’s it! New frame for our TV. We were also planning on adding some flat molding to the sides to cover up the gap, but you actually can’t tell unless you are looking directly from a side like I mentioned before, so we decided to leave it for now.
Making this also gave us the excuse we needed to move around the gallery wall and give that an update. So the TV is a little higher and off-center than it was, but I love the way it looks when the TV is on Art mode. All the supplies are below! Let me know if you use this method and how it works out for you!
SUPPLIES:
WOODEN TRIM: https://shopstyle.it/l/bVuNL
DARK WALNUT STAIN: https://rstyle.me/+rKUpGyd7tK7WcDsFyt…
THE TV WE HAVE: https://amzn.to/3LsHvCs
TV ART DIGITAL DOWNLOAD: https://rstyle.me/+GDL8dQK1TZvpMTM8Ya…
MITRE BOX w/ SAW: https://amzn.to/41sAkQ9
COMMAND STRIPS: https://amzn.to/3ArWBli


