We have tried EVERYTHING when it comes to putting up wallpaper in our apartment. Renting a space but still wanting to make it unique and your own is possible, especially with all the beautiful wallpaper that is out there right now. But the method in how to hang it is where we got stuck. We tried the peel and stick route, traditional pasting, and a couple different removable ways that don’t involve pasting. We finally found a way that (so far) seems to really work and leave no residue behind, making it potentially one of the best options for renters!
First, let’s talk about what didn’t work. We had a very hard time finding peel and stick wallpaper that we loved for the nursery. We tried some peel and stick in the master bedroom and it worked out fine, we just weren’t in love with how the colors looked in the end. It wasn’t overly difficult to put up and we didn’t have a huge mess on our hands afterward but it did cause a lot of headaches when applying and trying to get just right. With peel and stick, I’ve noticed that you are somewhat limited in your pattern choices.
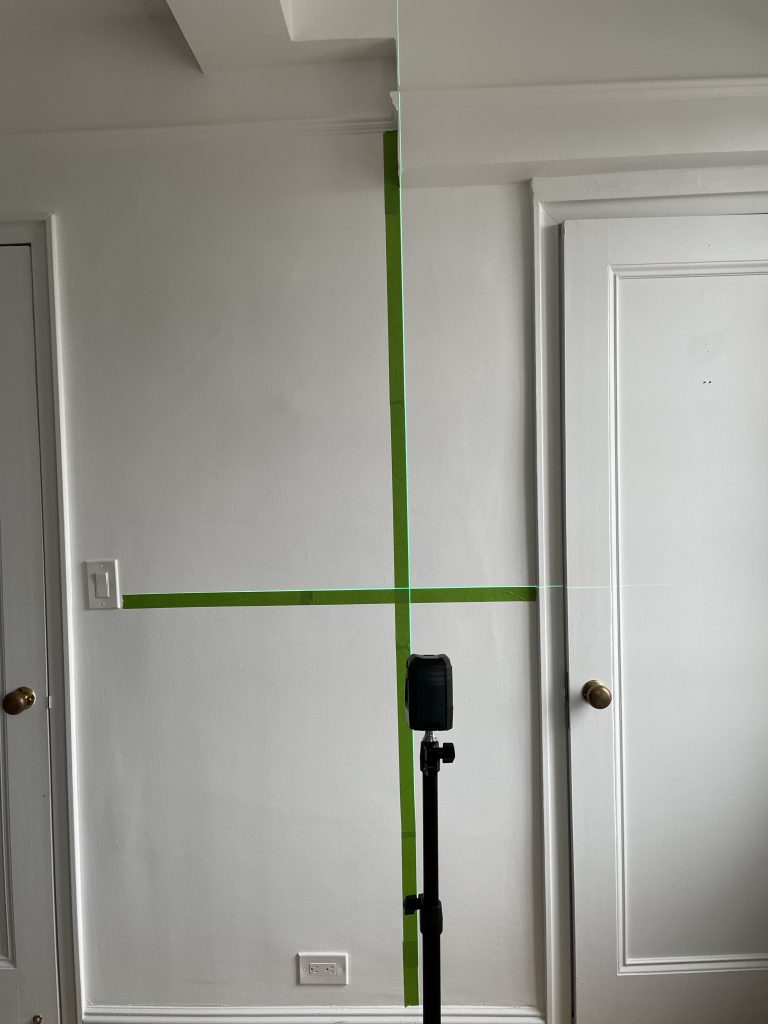
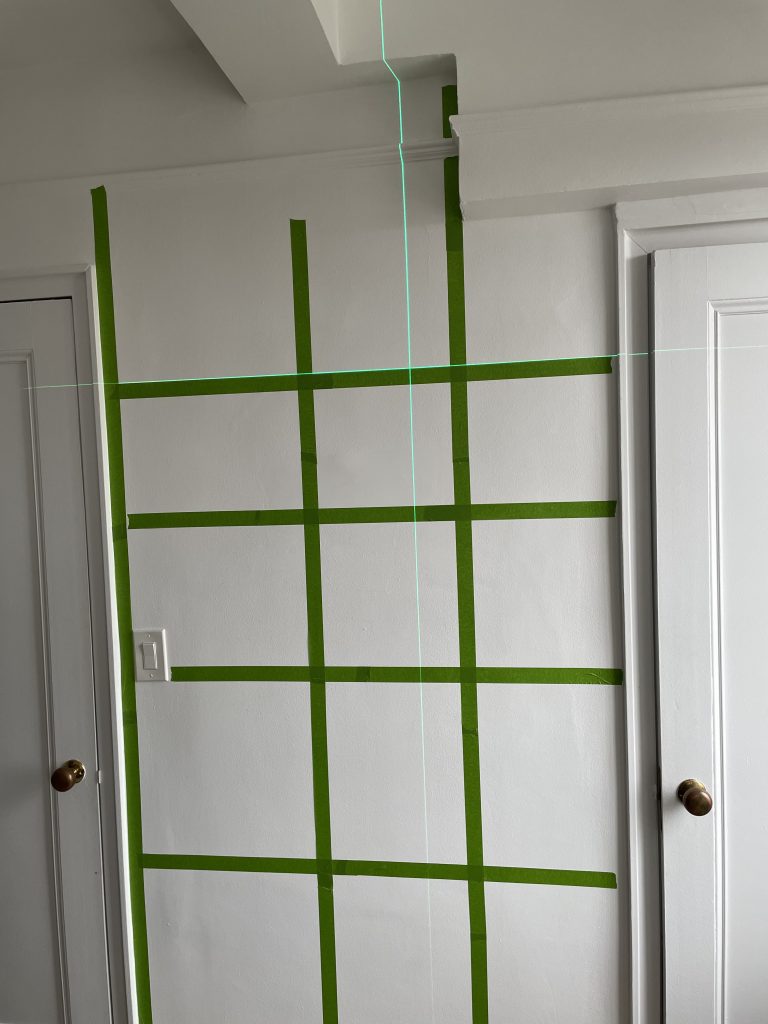
Back to the nursery… I first found what looked like a unique and somewhat easy, albeit time consuming, way to add traditional wallpaper using painters tape and double sided tape. Applying the wallpaper on the tape helped to make it quickly removable when ready to leave the apartment. This method catered to renters and looked like it had some good results based on the posts I read. So I set TJ to work on this method. We started out by making a grid with painters tape – the green frog tape worked best as it was easier for the double sided tape to stick to.
Once the frog tape was up we then added the double sided tape to the frog tape in the same grid pattern. After that we put the wallpaper up on the double sided tape, trimmed off the edges, and had a final product.
One issue we saw was the double sided tape wasn’t very strong and would move slightly on the wall as we tried to stretch and make sure no air bubbles were underneath. It created a couple seams that were very noticeable. Also, it was a little more difficult to put up the frog tape, double sided tape, and wallpaper all in a straight and consistent line, even when using a laser level. We ended up having some of the walls a little slanted and bubbles on a few of them as well. This method was definitely not the right way to go for us, but could be for others, especially if you’re looking to just fill a small area.
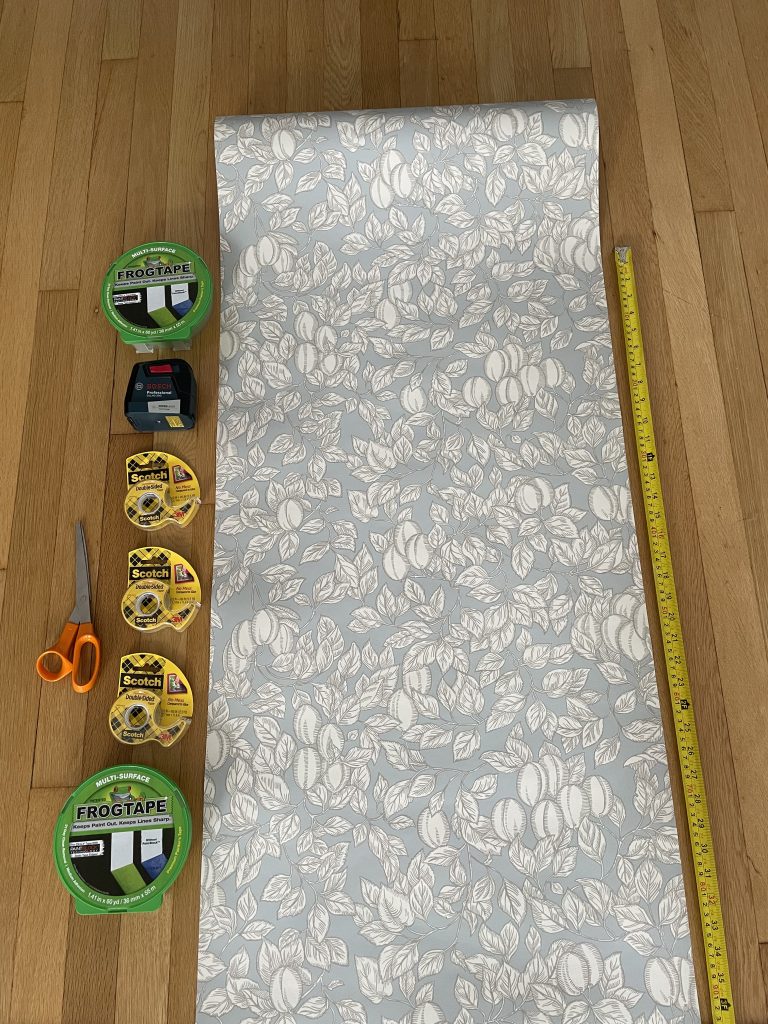
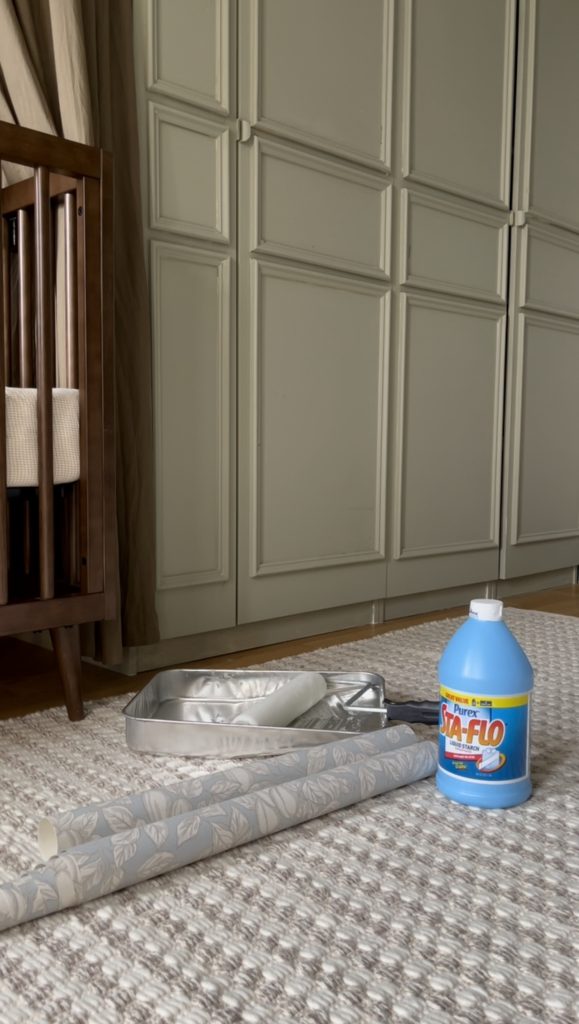
The latest and greatest method we found for putting up wallpaper was super simple! It only involved a few things – wallpaper, a paint roller and roll, liquid starch, a paint tray, towel, and something to smooth out the wallpaper once on the wall (I literally just used a children’s board book). We also used a laser level which helped keep us on track. But essentially you apply the liquid starch very generously on the wall using the paint roller (the same way you would do if using paste), and then apply the wallpaper on the wall.
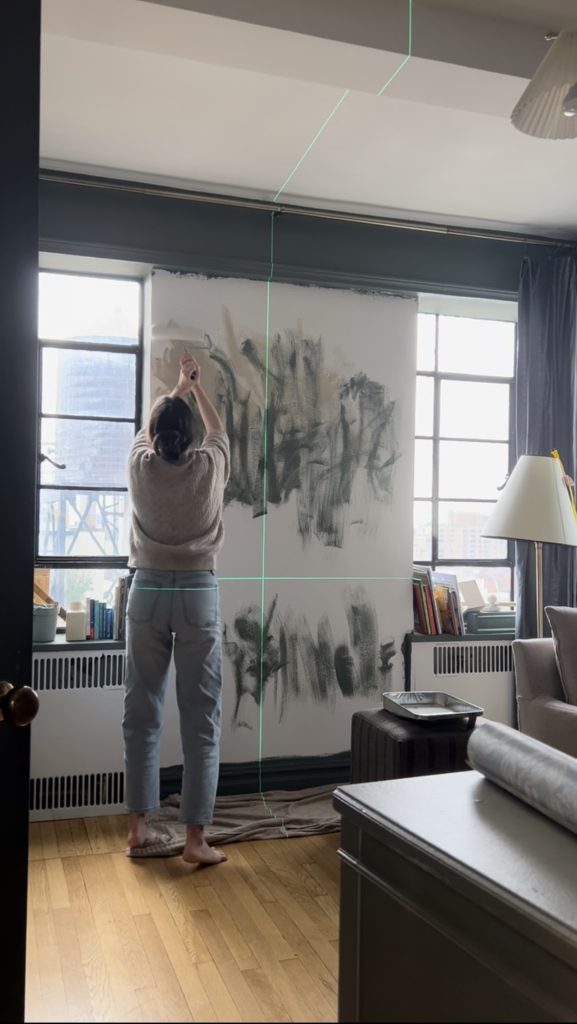
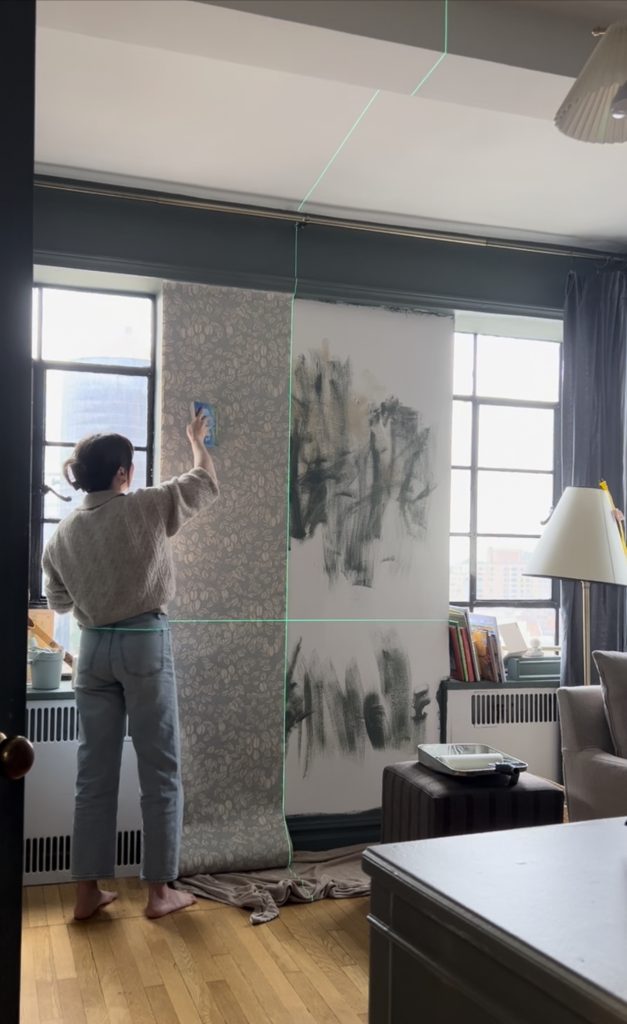
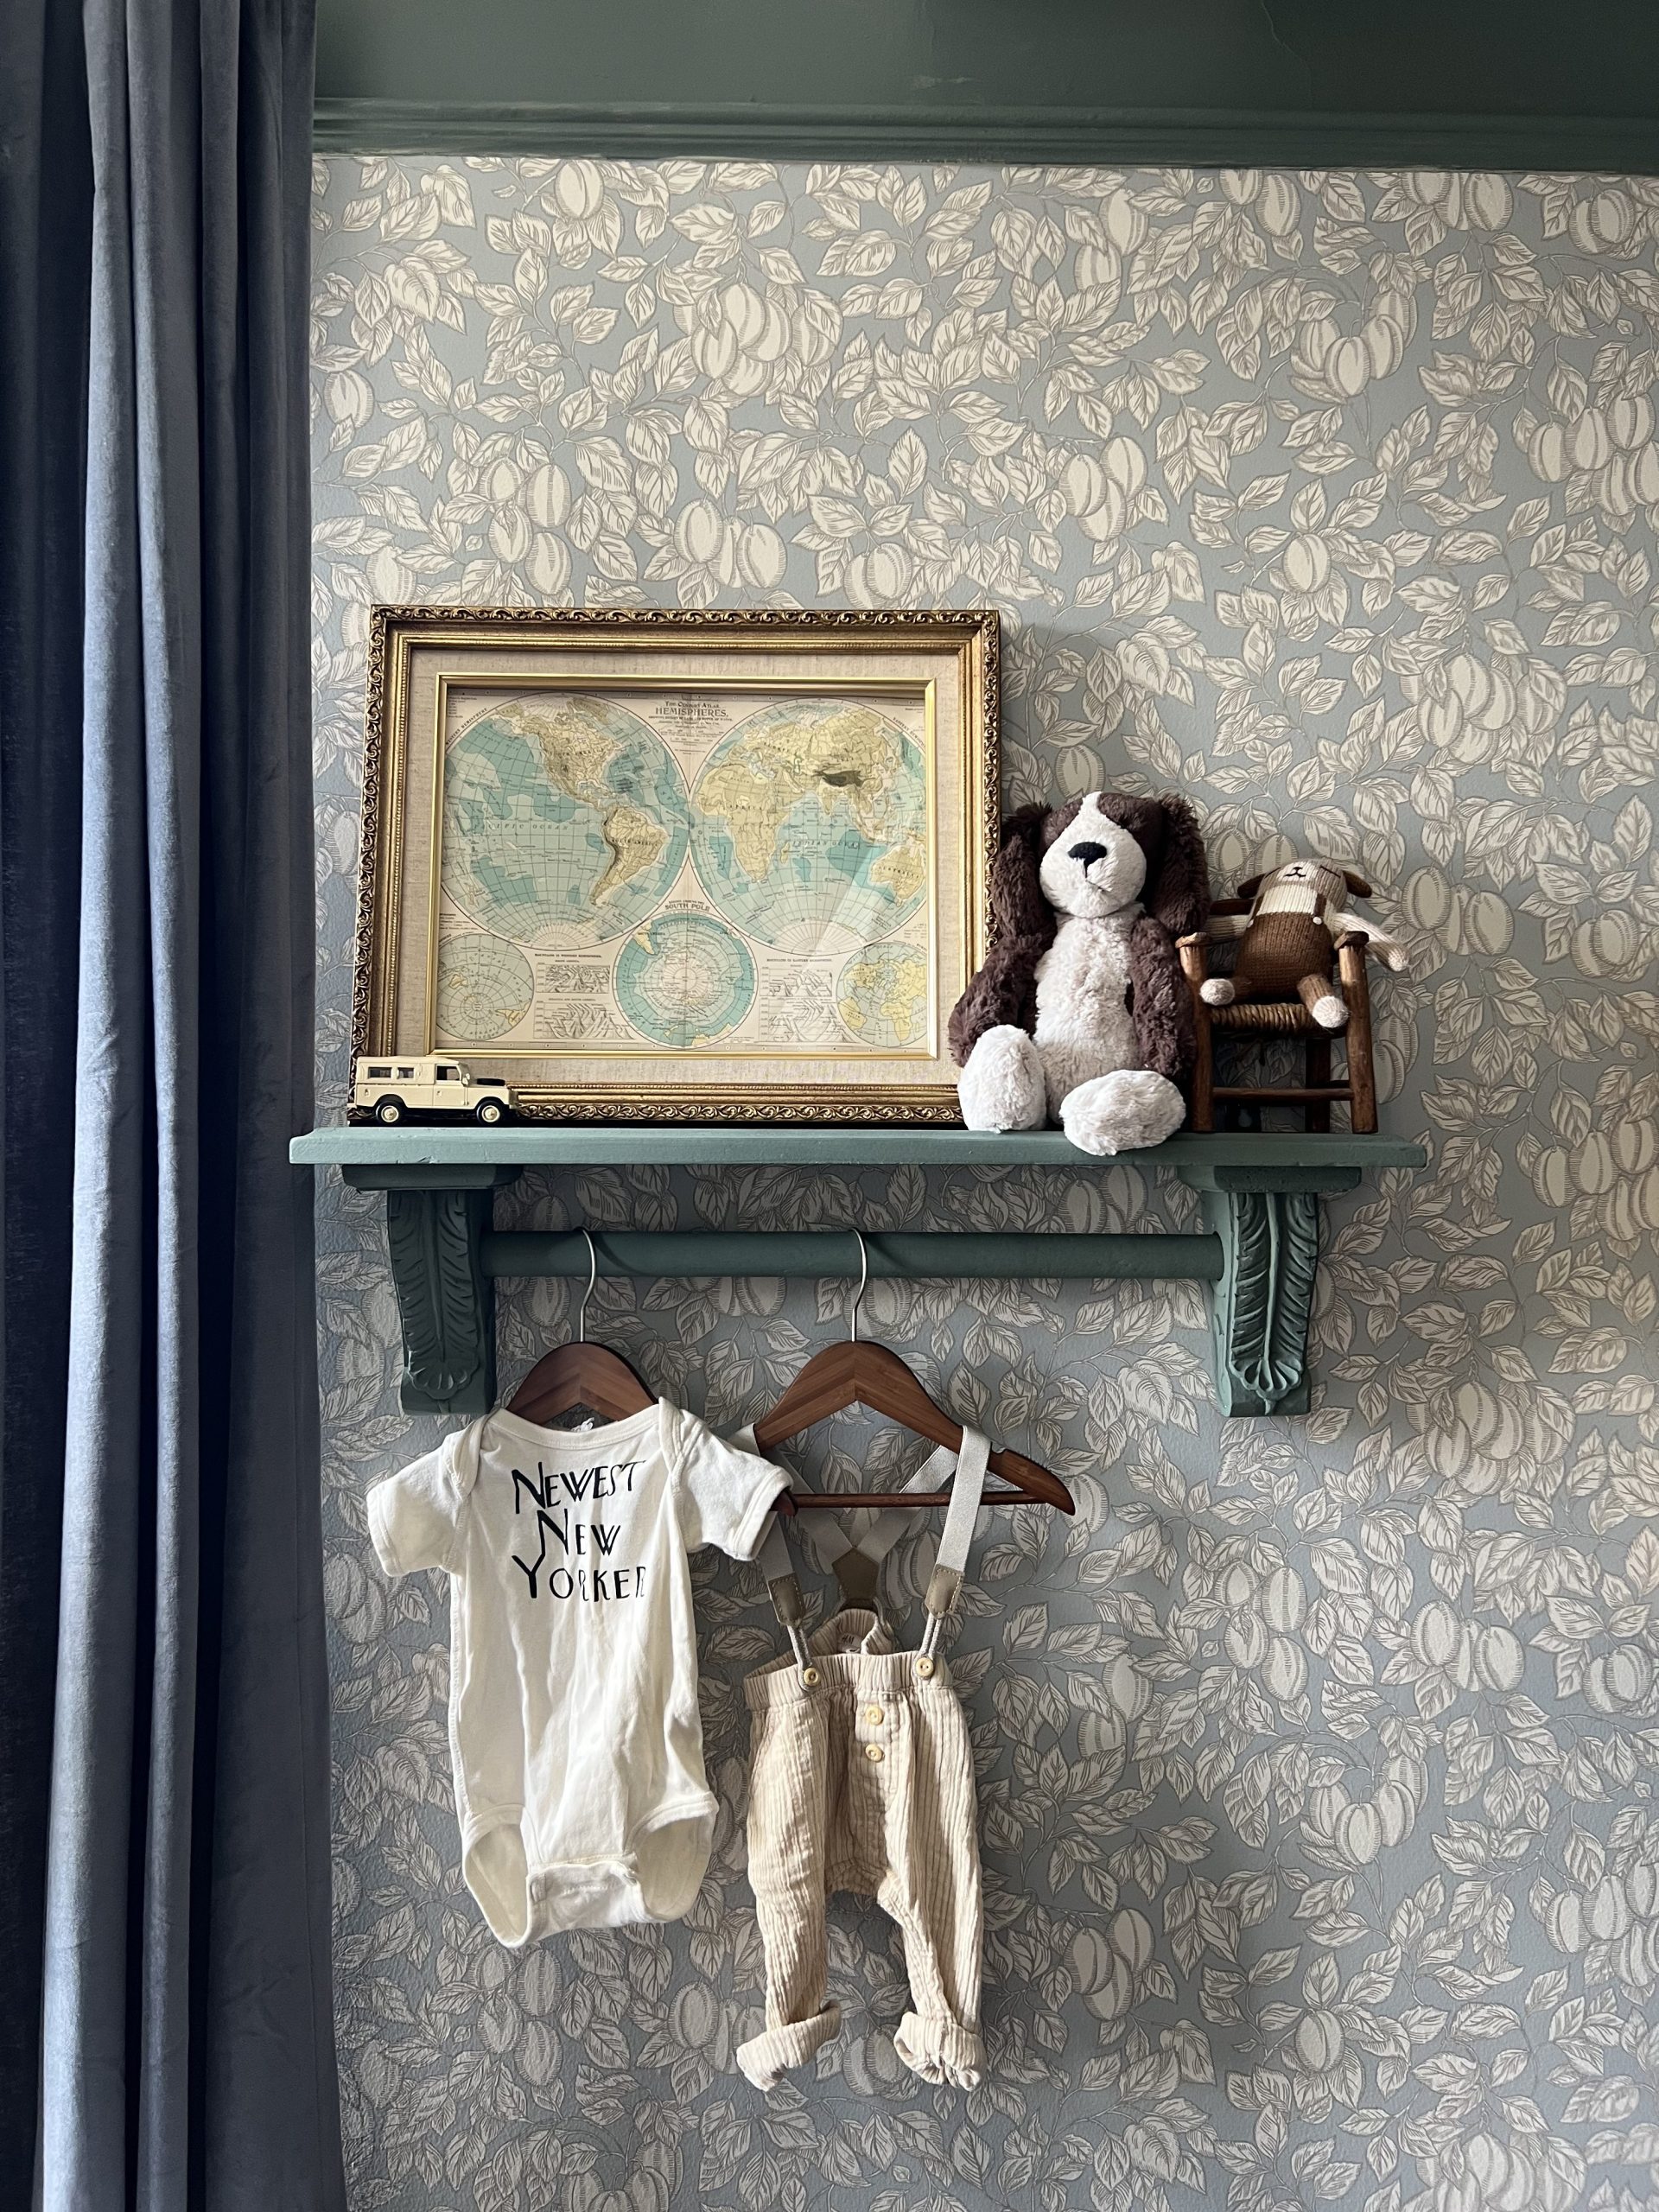
At first we didn’t think it would stick to the wall, but after smoothing it out, the paper stayed up. We let it dry and then cut off the excess at the corners. The wallpaper has been up for almost a week now and has had no issues! We even tried applying a test piece to a corner of the wall to make sure no residue was there when peeling off and after a few days it peeled off with nothing left behind! This was a game changer. It was even a little easier than using the peel and stick because the paper wasn’t sticking to everything or itself as we tried to apply on the wall. We are very happy with this hack and with the and result and hope all the other renters out there can use this to make their home beautiful!
Check out my latest Youtube tutorial here to see a video of the process.

I love this and can’t wait to try it out in our nursery! Just curious, did you use this method on textured walls? Thanks!
Our walls were not textured. So I am not sure how it would work out if you did have textured walls.
Any update on how the wallpaper did? Do you still recommend this?
It’s definitely coming up at the seams a bit! I would still recommend doing it as an easy removable option but only for smaller areas! I also should have used MORE liquid starch I think. I’ll have to post update photos!